

TL;DR:
- A dripping faucet wastes over 3,000 gallons of water annually and increases utility bills.
- Repairing most leaks takes 20-30 minutes and costs between $5 and $40 in parts.
A dripping faucet is defined as any faucet that releases water when fully closed, caused by worn washers, failed cartridges, or damaged O-rings inside the valve body. Knowing how to stop a dripping faucet is more urgent than most homeowners realize. A faucet dripping once per second wastes over 3,000 gallons annually, the equivalent of more than 180 showers, and adds roughly $6 per month to your water bill. The EPA and plumbing industry standards both identify early repair as the most cost-effective way to prevent water damage and escalating utility costs. The good news: most dripping faucet repairs take 20–30 minutes and cost between $5 and $40 in parts.
How to stop a dripping faucet: identify your faucet type first
The faucet type you have determines every repair step that follows. Getting this wrong means buying the wrong parts and potentially damaging the faucet body. There are four common types found in American homes.
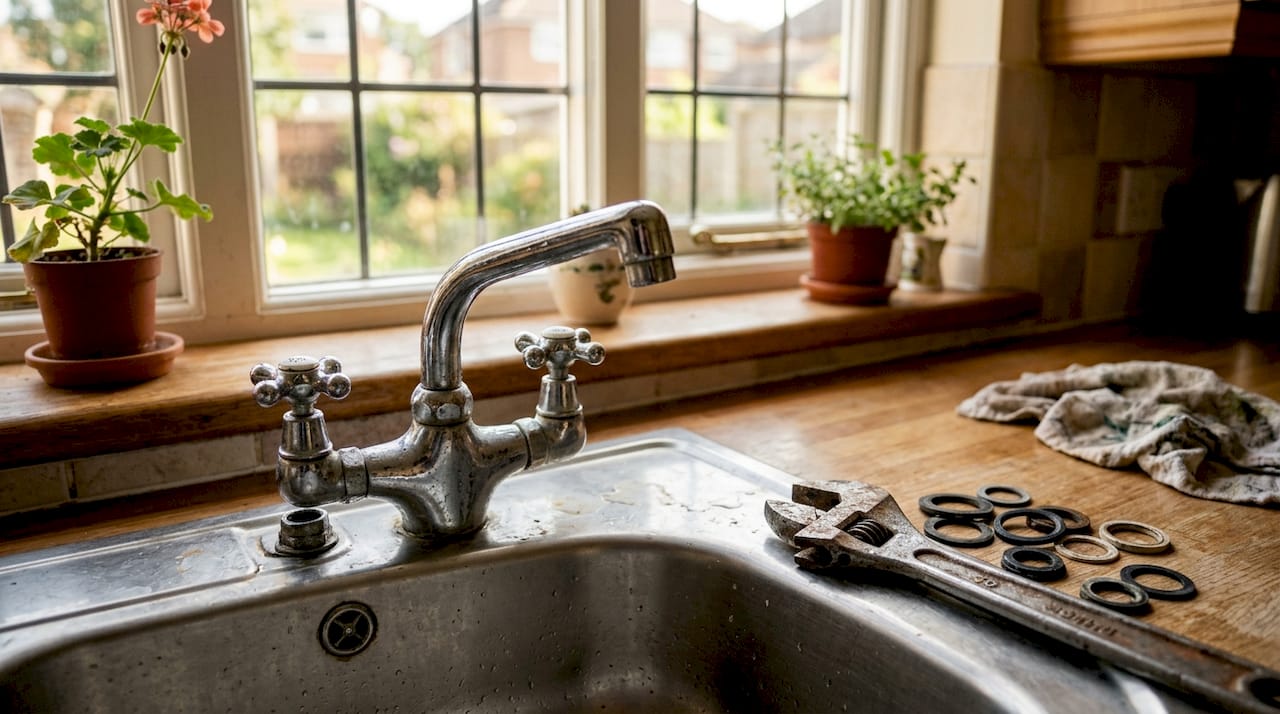
- Compression faucets use two separate handles and a rubber washer that presses against a seat to stop water flow. They are the oldest design and the most prone to dripping because the washer wears down with every use. The leak almost always comes from a worn washer or damaged seat.
- Cartridge faucets use a single or double handle that moves a cartridge up and down or side to side. The cartridge contains all the sealing components. When it fails, replacing the cartridge is more reliable than trying to repair worn internal seals.
- Ceramic disc faucets use a wide single handle and a ceramic cylinder inside the body. These are the most durable design. Leaks usually come from cracked discs or mineral buildup around the seals rather than worn rubber.
- Ball faucets use a single rotating handle and a ball-shaped cap with multiple small parts: springs, seats, and O-rings. They have the most components and the most potential failure points.
Pro Tip: Before you buy any parts, look up your faucet’s brand and model number, usually stamped on the faucet body or listed in the original paperwork. Incorrectly guessing the model or part size is the leading cause of repair failure.
What tools and parts do you need for dripping faucet repair?
Typical DIY repairs require parts costing $5 to $40, and most homeowners already own the basic tools. Specialty tools add $10–$18 if you need them. Having everything ready before you start prevents mid-repair trips to the hardware store.
| Tool or Part | Purpose | Approximate Cost |
|---|---|---|
| Adjustable wrench | Loosening packing nuts and supply lines | $8–$15 |
| Phillips and flathead screwdrivers | Removing handle screws and decorative caps | Already owned |
| Cartridge puller | Removing seized cartridges without cracking the body | $10–$18 |
| Seat wrench | Replacing damaged valve seats in compression faucets | $10–$15 |
| Replacement washers and O-rings | Sealing compression and ball faucets | $5–$10 |
| Replacement cartridge | Full seal replacement for cartridge or ceramic disc faucets | $10–$35 |
| Plumber’s grease | Lubricating O-rings and seals during reassembly | $5–$8 |
Pro Tip: Bring the original part to the hardware store. Matching a washer or cartridge by sight is far more reliable than matching by description alone, and it eliminates the most common cause of a second trip.
Step-by-step: how to fix a faucet leak by faucet type
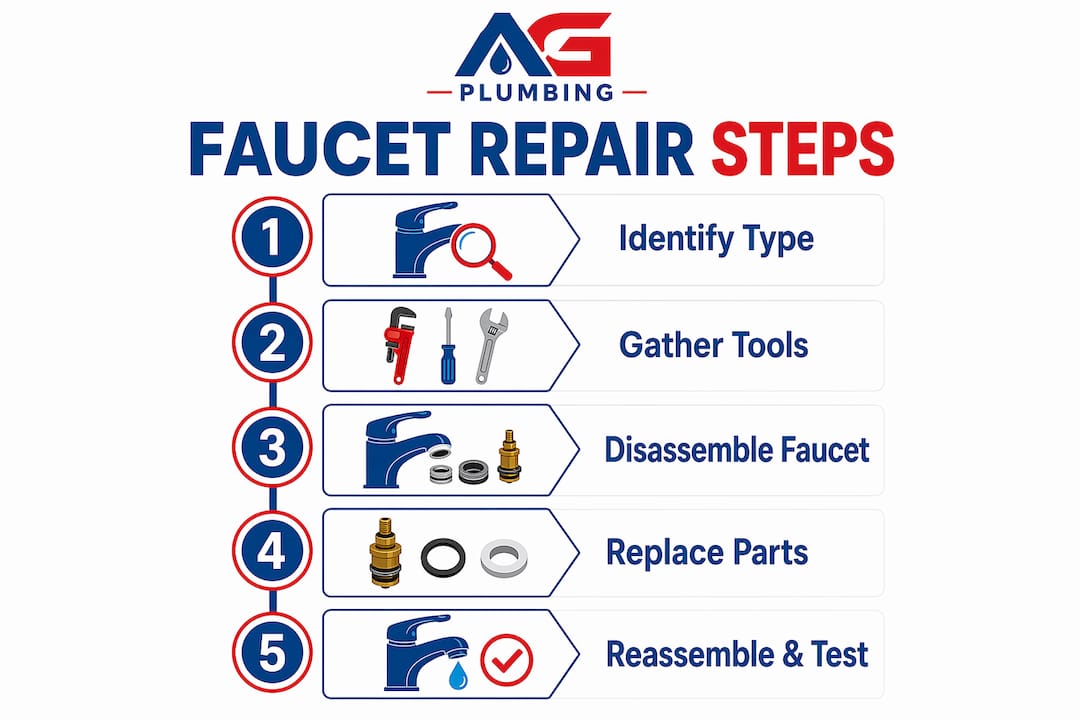
Follow these steps in order. Skipping the preparation steps causes most DIY failures.
- Shut off the water supply. Turn the shutoff valves under the sink clockwise until they stop. If there are no individual shutoff valves, turn off the main water supply to the house.
- Drain the lines. Open the faucet handles fully after closing the shutoff valves. This releases residual pressure and drains standing water from the supply lines. Skipping this step means water sprays when you open the faucet body.
- Block the drain. Place a rag or stopper in the drain before disassembly. Small parts like springs and O-rings fall into the P-trap easily and are nearly impossible to retrieve.
- Remove the handle. Pry off the decorative cap on top of the handle with a plastic putty knife or a screwdriver wrapped in tape. Remove the screw underneath, then pull the handle straight up. Never use a metal tool directly on the finish — it scratches chrome and brass permanently.
- Disassemble by faucet type.
Compression faucets
Remove the packing nut with an adjustable wrench. Pull out the stem and inspect the rubber washer at the bottom. A flat, cracked, or grooved washer is the source of the drip. Replace it with an exact-size match. Inspect the brass seat inside the faucet body. If it feels rough or pitted, use a seat wrench to remove and replace it. Reassemble in reverse order. When tightening the packing nut, use a snug fit plus a quarter turn. Over-tightening deforms the new washer and creates a new leak immediately.
Cartridge faucets
Locate the retaining clip or nut holding the cartridge in place and remove it. If the cartridge is seized, use a cartridge puller tool. Pulling a stuck cartridge by hand risks cracking the faucet body, which turns a $15 repair into a full faucet replacement. Pull the cartridge straight out, note its orientation, and insert the new one in the same direction. Incorrect orientation causes the hot and cold to reverse. Snap the retaining clip back in and reassemble.
Ceramic disc faucets
Remove the cylinder from the faucet body. Inspect the ceramic discs for cracks. Clean mineral deposits from the disc surface and the surrounding seals with white vinegar and a soft cloth. If a disc is cracked, replace the entire cylinder. Ceramic disc faucets rarely need full replacement, but the cylinder itself is not repairable once cracked.
Ball faucets
Lay out all removed parts in order on a clean towel. Ball faucets have the most components, so sequence matters. Replace all springs, seats, and O-rings as a set. Kits sold at hardware stores include every part for about $15–$20. Lubricate all O-rings with plumber’s grease before reassembly. Reassemble in reverse order, then test.
- Test for leaks. Turn the shutoff valves back on slowly. Let the faucet run for 30 seconds, then close it fully. Watch the spout for 2 minutes. A successful repair produces zero drips.
When should you call a professional plumber?
Some faucet problems go beyond worn washers and cartridges. Recognizing these signs early prevents water damage and higher repair costs.
- Seized shutoff valves. If the shutoff valve under the sink will not turn, do not force it. A corroded shutoff valve that breaks during a repair floods the area immediately and requires emergency service.
- Faucet body cracks. Visible cracks in the faucet body mean the entire faucet needs replacement, not repair.
- Leaks below the sink. A drip at the supply line connection or from the P-trap is a separate issue from the faucet itself and requires different repairs.
- Recurring leaks after repair. If a faucet starts dripping again within weeks of a repair, the cause is often water pressure above 80 psi. High pressure accelerates seal wear and causes repeated failures. The recommended household pressure is 50–60 psi.
A corroded or leaking shutoff valve should be evaluated by a licensed plumber before any faucet repair begins. Forcing a damaged shutoff valve can cause internal seat damage and severe water damage to the surrounding area.
Ag-plumbing recommends checking your plumbing repair needs before starting any DIY work if you are unsure about your shutoff valves or water pressure. With 30 years of experience serving Pittsburgh, PA, the Ag-plumbing team has seen how a small oversight during DIY repair can escalate quickly.
Key Takeaways
Stopping a dripping faucet requires identifying the correct faucet type, replacing the specific worn component, and verifying household water pressure stays at 50–60 psi to prevent recurring leaks.
| Point | Details |
|---|---|
| Identify faucet type first | Compression, cartridge, ceramic disc, and ball faucets each require different parts and repair steps. |
| Match parts exactly | Bring the original washer, O-ring, or cartridge to the hardware store to guarantee a correct fit. |
| Prepare before disassembly | Shut off water, drain lines, and block the drain before removing any faucet components. |
| Check water pressure | Pressure above 80 psi causes recurring leaks; the safe household range is 50–60 psi. |
| Know when to stop | Seized shutoff valves, cracked faucet bodies, and persistent leaks after repair require a licensed plumber. |
What I’ve learned after years of watching DIY faucet repairs go wrong
The most common mistake I see is homeowners skipping the faucet type identification step entirely. They watch a generic repair video, buy a bag of assorted washers, and start disassembling. Then they discover they have a cartridge faucet, not a compression faucet, and the washers are useless. Now they have a disassembled faucet, no correct parts, and water shut off to the whole house.
The second mistake is underestimating water pressure. High household water pressure is an overlooked cause of faucet leaks. Homeowners fix the washer, the faucet drips again in three weeks, and they assume they did the repair wrong. Often, the repair was fine. The pressure is simply destroying seals faster than normal. A $30 pressure gauge from any hardware store tells you immediately whether your home runs above 80 psi. If it does, a pressure-reducing valve installed on the main line solves the problem permanently. That single fix extends the life of every faucet, valve, and appliance in the house.
The third thing I want you to take seriously is the cartridge puller. Plumbers use it because it works. Homeowners skip it because it looks unnecessary. Pulling a seized cartridge by hand or with pliers at the wrong angle cracks the faucet body. That crack is invisible until water starts seeping into the cabinet below. Maintaining household water safety starts with using the right tool for each step, not improvising with whatever is in the drawer.
Timely faucet maintenance is genuinely worth the effort. A $10 washer replaced today prevents a $200 service call next month and protects your cabinets, floors, and walls from slow water damage that builds invisibly over time.
— Maayan
Ag-plumbing’s faucet repair services in Pittsburgh
Ag-plumbing has provided professional faucet repair to Pittsburgh homeowners and renters for 30 years. When a dripping faucet involves a seized shutoff valve, a cracked faucet body, or a pressure problem that keeps causing repeat leaks, a licensed plumber is the faster and safer solution.
The Ag-plumbing team handles all faucet types, from basic compression faucets to multi-function ball faucets, and diagnoses underlying pressure or supply line issues that DIY repairs miss. If you are in Pittsburgh or the surrounding areas and want the leak fixed correctly the first time, contact Ag-plumbing for an assessment. You can also review the full range of plumbing services available for your home.
FAQ
How much water does a dripping faucet waste per year?
A faucet dripping once per second wastes over 3,000 gallons annually. That is the equivalent of more than 180 showers.
Why is my faucet dripping after I already replaced the washer?
A faucet that drips again shortly after repair usually signals water pressure above 80 psi, which destroys seals faster than normal. Check your household pressure with a gauge and install a pressure-reducing valve if it exceeds the recommended 50–60 psi range.
Can I fix any dripping faucet myself?
Most dripping faucets are DIY-repairable in 20–30 minutes with $5–$40 in parts. Call a licensed plumber if the shutoff valve is seized, the faucet body is cracked, or the leak is at the supply line connection below the sink.
What is the most common cause of a dripping faucet?
Worn washers and O-rings are the most common cause in compression and ball faucets. Failed cartridges are the primary cause in cartridge and ceramic disc faucets.
How do I know which faucet type I have?
Count the handles and observe how they move. Two handles that press down indicate a compression faucet. A single handle that moves up and down or side to side points to a cartridge or ceramic disc faucet. A single handle that rotates in an arc is a ball faucet.
Recommended
- Step-by-Step Faucet Repair for Pittsburgh Homeowners – AG-Plumbing
- How to Fix a Running Toilet: a DIY Guide – AG-Plumbing
- Emergency Plumbing Guide: Quick Solutions for Homeowners – AG-Plumbing
- How to Fix Noisy Pipes: A Practical Home Guide – AG-Plumbing
