
TL;DR:
- Most leaking toilets are caused by worn or damaged flapper valves that cost under $10 to replace.
- Performing a dye test helps confirm if the flapper is the leak source before replacing parts.
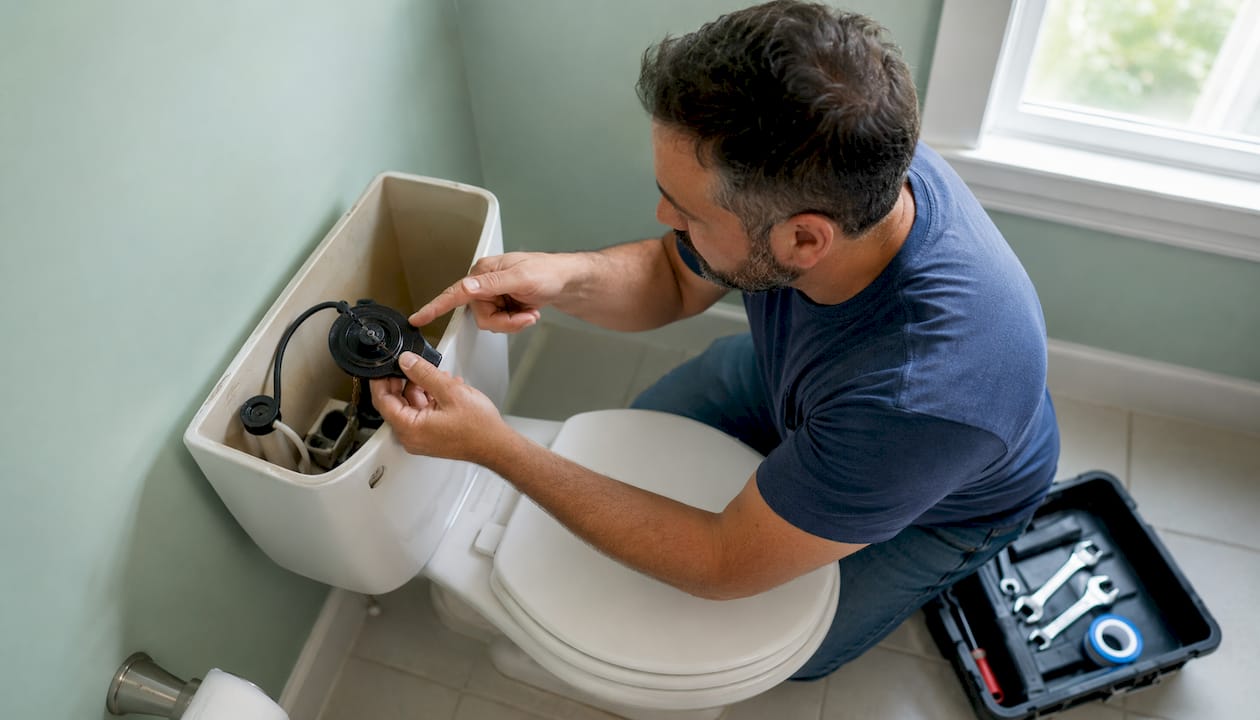
A toilet flapper valve is the rubber or silicone seal at the bottom of your tank that plugs the flush-valve opening and lifts every time you flush. According to Korky, it acts as the moving part of the flush valve, holding water in the tank between flushes and releasing it on demand. Three things worth knowing right away:
- Where it sits: Submerged at the tank floor, attached to the base of the overflow tube by a pair of hinges or ears.
- What it does: Seals the tank when idle; lifts via a chain when you press the handle to let water rush into the bowl.
- Why it matters: A worn flapper is the single most common cause of a running toilet. Brands like Fluidmaster and Korky make replacement flappers that typically cost under $10, and This Old House recommends diagnosing the flapper first before touching any other tank component.
Table of Contents
- What are the parts connected to a toilet flapper?
- How does a flapper valve control a flush?
- What symptoms point to a flapper problem?
- How do you test whether the flapper is leaking?
- What flapper sizes and types do you actually need?
- Can you replace just the flapper yourself?
- When a new flapper still doesn’t fix the problem
- How often should you replace a flapper?
- Quick troubleshooting checklist before you buy anything
- What the experts say about diagnosing a running toilet
- Key Takeaways
- The flapper is usually the answer — but not always
- Ag-plumbing handles what DIY can’t
- Useful sources
- FAQ
What are the parts connected to a toilet flapper?
Inside the tank, the flapper doesn’t work alone. Understanding what surrounds it helps you shop for the right part and spot problems faster.
- Flapper (the seal itself): The disc-shaped rubber or silicone piece that sits over the flush-valve opening.
- Ears/hinges: Two side tabs that clip onto pegs on the overflow tube, holding the flapper in position.
- Lift chain: Connects the flapper to the flush lever arm; chain length controls how far and how long the flapper rises.
- Flush lever/arm: The handle mechanism inside the tank that pulls the chain when you press the exterior handle.
- Flush-valve seat: The rim the flapper presses against to form a watertight seal; damage here defeats any new flapper.
- Overflow tube: The vertical tube in the tank center; water drains through it if the tank level gets too high.
- Fill valve: Separate from the flapper entirely — refills the tank after each flush.
Variants matter. Most toilets use a traditional hinged rubber or silicone flapper. Older models may use a tank ball with a lift rod instead of a chain — a design that’s generally worth upgrading to a modern flapper. Some newer toilets use a canister or tower-style flush valve: a tall central cylinder with a flat seal at its base rather than a hinged disc. That distinction is critical when buying parts, because canister seals are model-specific and won’t swap with universal flappers.
Quick visual cue: If you see a flat rubber disc on hinges, you have a standard flapper. If you see a tall plastic tower in the center of the tank, you have a canister valve — and you’ll need the manufacturer’s exact replacement seal.
How does a flapper valve control a flush?
The sequence is fast but precise, and each step depends on the one before it.
- You press the handle. The flush lever arm inside the tank pivots.
- The chain pulls taut. It lifts the flapper off the flush-valve seat.
- Water rushes out. Gravity pulls tank water through the flush-valve opening and into the bowl, creating the siphon that clears waste.
- The flapper reseats. As the tank empties, the flapper loses buoyancy and drops back onto the seat, sealing the opening.
- The fill valve kicks in. The falling water level triggers the fill valve to refill the tank.
- The cycle ends. Once the water reaches the set level, the fill valve shuts off and the tank is ready again.
How long the flapper stays lifted controls flush volume. A flapper that drops too quickly produces a weak flush; one that stays up too long wastes water.
Pro Tip: Chain slack is the most overlooked adjustment in toilet repair. Set the chain so there’s about half an inch of slack — enough for the flapper to seat fully flat, but not so much that the chain loops under the flapper and prevents it from sealing.
What symptoms point to a flapper problem?
Most flapper failures announce themselves clearly, though they can look like other issues at first glance.
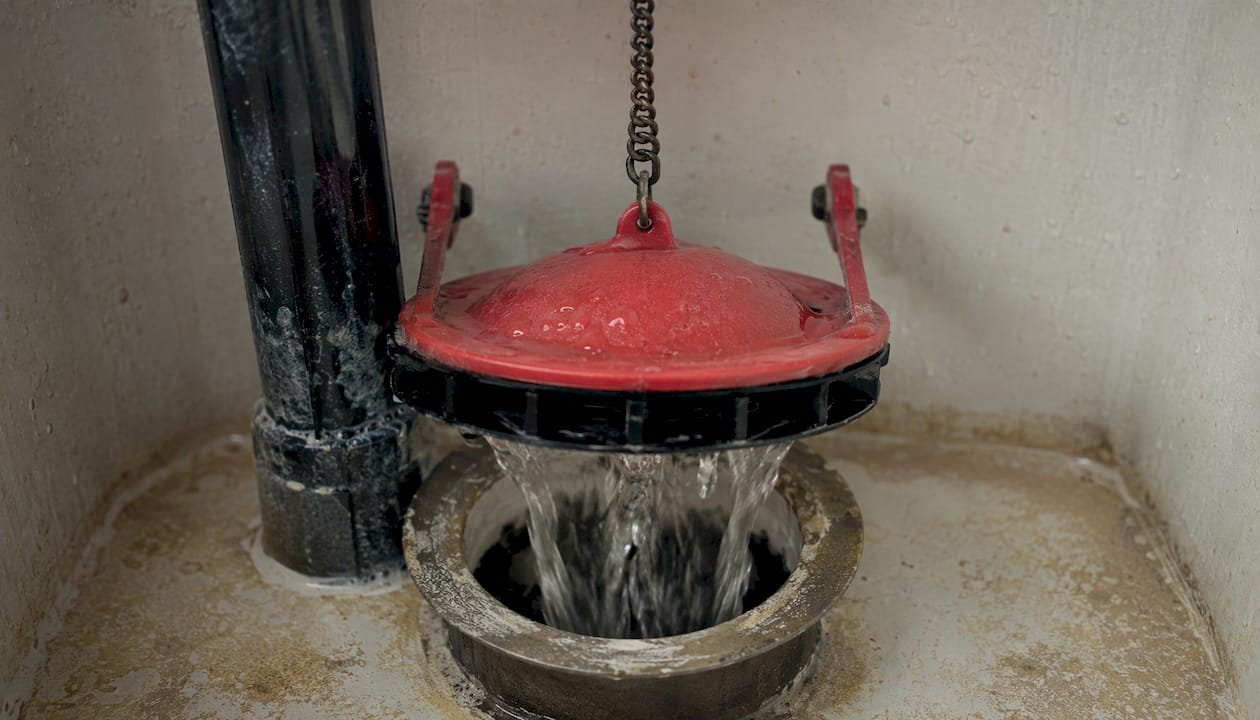
- Continuous running water: The most common sign. A worn or warped flapper lets water trickle past the seal constantly, so the fill valve never fully shuts off.
- Phantom flushes: The tank refills on its own without anyone flushing. A slow flapper leak drops the tank level gradually until the fill valve triggers — sometimes minutes apart, sometimes hours.
- Weak or incomplete flush: Often a chain problem. If the chain is too loose, the flapper barely lifts and the tank doesn’t drain fully.
- High water bills with no obvious leak: A silently leaking flapper can waste a surprising amount of water over weeks without making noise you’d notice.
One thing that trips up even experienced DIYers: a dirty or pitted flush-valve seat. If the seat rim has mineral deposits or small nicks, no flapper will seal reliably — even a brand-new one. That’s a different repair than swapping the flapper.
Distinguishing fill-valve problems: If water is flowing into the overflow tube (the tall center tube), the issue is the fill valve or water level, not the flapper. A flapper leak shows as water moving from tank to bowl when the toilet is idle. The dye test separates these two causes cleanly. For a broader look at common plumbing issues, Ag-plumbing has a practical breakdown worth bookmarking.
How do you test whether the flapper is leaking?
Before buying any parts, spend 20 minutes confirming the flapper is actually the problem.
Dye test (the most reliable method):
- Remove the tank lid and set it safely aside.
- Add several drops of food coloring to the tank water — not the bowl.
- Wait 15–20 minutes. Do not flush during this time.
- Check the bowl. If color appears in the bowl, water is leaking past the flapper seal.
Visual checks:
- Lift the flapper and feel the rubber. Stiff, cracked, or warped rubber won’t seal.
- Run a gloved finger around the flush-valve seat. Rough spots, mineral crust, or visible pitting mean the seat itself may be the problem.
- Check the chain for kinks, tangles, or a loop that’s caught under the flapper.
- Watch the overflow tube. Water flowing into it points to the fill valve, not the flapper.
Sizing check: Before heading to the hardware store, identify your flush-valve opening size. An opening roughly the size of a baseball or orange takes a 2-inch flapper; one closer to a grapefruit or softball takes a 3-inch flapper.
Safety note: Shut off the water supply at the shutoff valve (usually behind or below the toilet) before removing the flapper or doing any hands-on inspection.
What flapper sizes and types do you actually need?
Getting the wrong size is the most common parts-buying mistake. Manufacturers and trade guides are clear: never guess by toilet age or brand — measure the opening or compare it to the everyday-object rule.
- 2-inch flappers: Standard size, fits most older and mid-range toilets. Opening looks roughly like a baseball or orange.
- 3-inch flappers: Common in higher-efficiency and newer toilets. Opening looks roughly like a grapefruit or softball.
- Universal/adjustable flappers: Brands like Fluidmaster and Korky make adjustable models that fit a range of hinged-flapper toilets — a good default for most homeowners.
- Canister/tower seals: Not interchangeable with hinged flappers. These require model-specific parts; check the toilet’s model number (usually stamped inside the tank lid) before ordering.
| Feature | 2" Flapper | 3" Flapper |
|---|---|---|
| Size reference | Baseball / orange | Grapefruit / softball |
| Material options | Rubber, silicone | Rubber, silicone |
| Compatibility | Most standard toilets | High-efficiency / newer models |
| Universal options | Yes (Fluidmaster, Korky) | Yes, but verify fit |
| Ease of installation | Clip-on ears, straightforward | Same clip-on method; confirm seat diameter first |
Rubber vs. silicone: Rubber flappers are cheaper and widely available but degrade faster, especially in homes with hard water or chloramine-treated municipal supplies. Silicone flappers cost a bit more and hold up longer under those conditions. If you’re replacing a flapper for the second time in two years, silicone is worth the upgrade.
Can you replace just the flapper yourself?
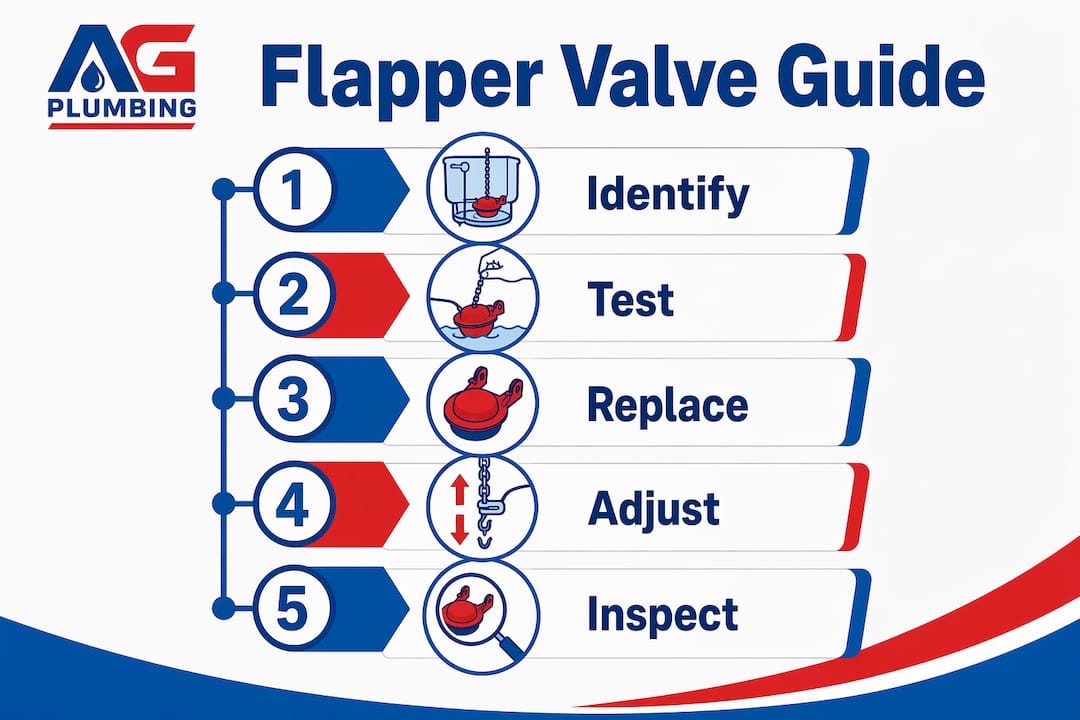
Yes, on most standard hinged-flapper toilets. The whole job takes about 15 minutes and costs under $10 in parts.
- Shut off the water supply at the shutoff valve behind or below the toilet.
- Flush to drain the tank. Hold the handle down to empty as much water as possible.
- Unhook the old flapper. Slide the ears off the overflow tube pegs and disconnect the chain from the flush lever.
- Inspect the flush-valve seat. Run a finger around the rim. If it feels rough or pitted, a new flapper alone may not fix the problem.
- Install the new flapper. Clip the ears onto the pegs and attach the chain to the lever arm, leaving about half an inch of slack.
- Turn the water back on and let the tank fill completely.
- Test. Flush once to confirm full flush strength, then run the dye test again to verify the seal.
Pro Tip: When attaching the chain, hook it to a hole in the lever arm that gives you that half-inch slack with the flapper fully seated. Too many links of slack and the chain can loop under the flapper; too few and the flapper never fully closes. A running-toilet fix often comes down to this single adjustment.
Canister/tower toilets are a different story. The seal is part of a larger assembly, and the replacement part must match the toilet’s model number exactly. Forcing a generic part onto a canister valve usually results in continued leaking.
When a new flapper still doesn’t fix the problem
A fresh flapper that keeps leaking usually means the problem was never the flapper to begin with.
- Pitted or cracked flush-valve seat: Even small nicks on the seat rim prevent a reliable seal. Fluidmaster notes that irregularities or corrosion on the seat can defeat a brand-new flapper, requiring seat repair or a full flush-valve assembly replacement.
- Fill valve set too high: If the water level sits above the overflow tube, water drains into the tube continuously. Adjusting the fill valve float solves this; a new flapper does nothing.
- Canister seal mismatch: Installing a universal flapper on a canister-style toilet won’t work. The seal geometry is completely different.
- Mineral buildup: Hard water deposits on the seat or flapper body can prevent full contact. Cleaning with white vinegar sometimes helps, but heavy buildup often means replacement.
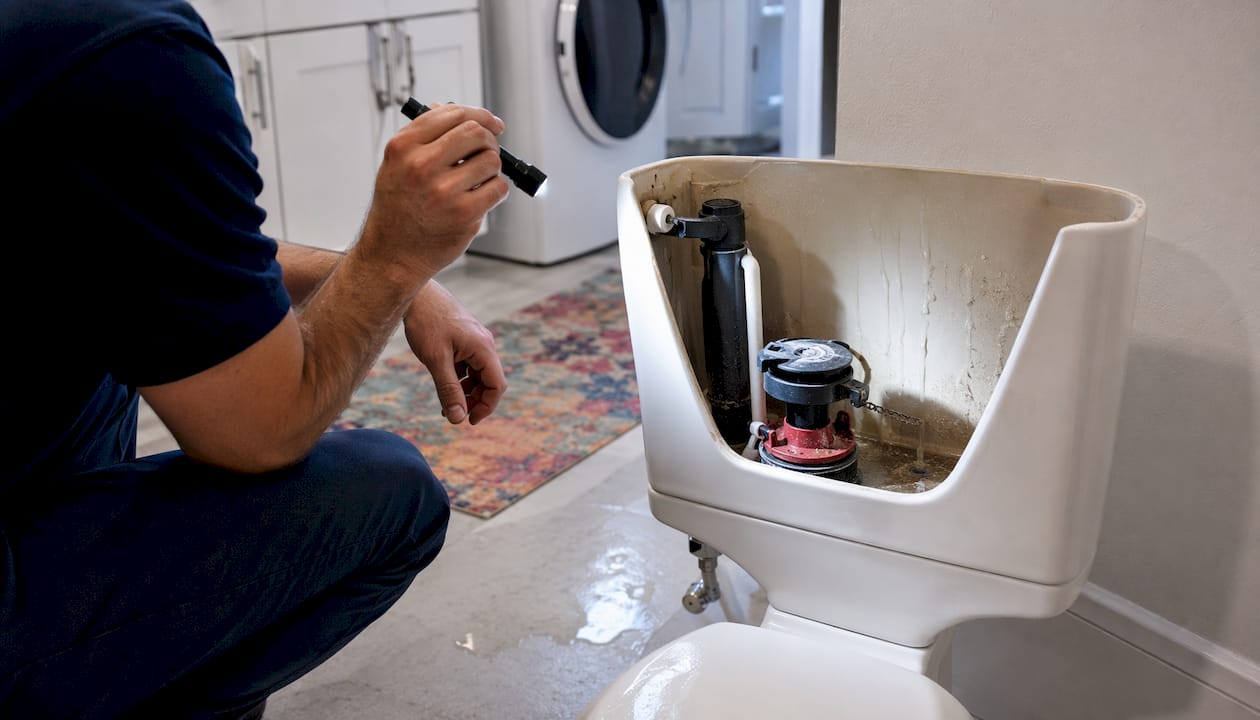
How to check the seat quickly: Use a flashlight and a gloved finger to feel the entire seat rim. Any roughness you can feel will likely cause a leak. If you find damage, the seat or full flush-valve assembly needs replacing — that’s the point where most homeowners reasonably call a plumber.
Call a pro when: the seat is visibly cracked or corroded, the leak persists after a correctly installed new flapper, you’re dealing with canister/tower parts and can’t identify the model, or you’d simply rather have the repair done right the first time with a warranty behind it.
How often should you replace a flapper?
A typical rubber flapper lasts 3–5 years under normal conditions. Silicone versions tend to outlast rubber, particularly in homes with hard water or aggressive municipal water treatment. Hard water accelerates degradation by depositing minerals on the rubber surface, stiffening it and eventually preventing a clean seal.
A simple annual check takes two minutes and can catch a failing flapper before it starts wasting water:
- Inspect the rubber for stiffness, cracks, or visible warping.
- Clean the seat and flapper with a damp cloth to remove mineral deposits.
- Verify chain slack — a quick visual confirms it hasn’t shifted.
- Replace proactively if the rubber feels hard or shows surface cracking, even without an active leak.
Flapper lifespan callout: Most flappers last 3–5 years, but hard water can cut that to 2–3 years. Fluidmaster recommends periodic inspection rather than waiting for a running toilet to signal failure.
Ag-plumbing’s plumbing maintenance checklist includes toilet tank inspection as a standard annual item — worth adding to your home maintenance calendar.
Quick troubleshooting checklist before you buy anything
Run through this in order. Most running toilets resolve at step 2 or 3.
- Dye test (10–20 min): Add food coloring to the tank, wait without flushing. Color in the bowl = flapper leak. No color = check the overflow tube next.
- Check the overflow tube (1 min): Is water flowing into it? If yes, stop here — the fill valve or water level is the issue, not the flapper.
- Inspect chain slack (2–5 min): Too tight, too loose, or kinked? Adjust to half an inch of slack and test flush.
- Visual flapper inspection (2–5 min): Feel the rubber. Stiff, cracked, or warped? Replace the flapper.
- Check the flush-valve seat (2–5 min): Run a gloved finger around the rim. Rough or pitted? A new flapper won’t fix this — seat or valve replacement needed.
- Replace the flapper (15 min): If the dye test was positive and the seat feels smooth, a $10 replacement flapper is your fix.
- Call a pro: Seat damage, canister/tower parts, or a leak that persists after a correct flapper install.
What the experts say about diagnosing a running toilet
The diagnostic order matters more than most homeowners realize. Richard Trethewey at This Old House recommends running the dye test first, before assuming the flapper is the culprit. Skipping straight to replacement wastes money and time when the real issue is the fill valve or the seat.
“The most effective way to troubleshoot a running toilet is to first perform a dye test to isolate the issue to the flapper, rather than assuming it is the source of all running toilet noises.” — Richard Trethewey, This Old House
If the dye test confirms a flapper leak but a new flapper still doesn’t seal, the next step is a close inspection of the flush-valve seat. Fluidmaster advises using a flashlight and a gloved finger to feel for tiny nicks or mineral pits along the entire seat rim. Even a small imperfection creates a path for water to bypass the seal.
When to contact Ag-plumbing: Have the toilet model number, a description of the symptoms, and your dye test result ready. That information lets a technician arrive with the right parts, whether that’s a seat replacement, a full flush-valve assembly, or a canister/tower seal that’s hard to source at a big-box store.
Key Takeaways
A toilet flapper valve is a rubber or silicone seal that plugs the flush-valve opening and lifts during a flush to release water — replacing it costs under $10 and fixes most running toilets.
| Point | Details |
|---|---|
| What a flapper valve is | A rubber or silicone seal at the tank bottom that controls water release during every flush. |
| Run the dye test first | Add food coloring to the tank; color in the bowl after 15–20 minutes confirms a flapper leak. |
| Check chain and seat | Half an inch of chain slack prevents both leaks and weak flushes; a rough seat defeats any new flapper. |
| When to call a pro | Seat damage, canister/tower parts, or a leak that persists after a correctly installed new flapper. |
| Ag-plumbing’s role | Ag-plumbing handles seat replacement, flush-valve assembly work, and canister/tower seal sourcing in Pittsburgh, PA. |
The flapper is usually the answer — but not always
Most homeowners hear a running toilet and immediately order a new flapper. That instinct is often correct, and a $10 fix is hard to argue with. But the cases where a new flapper changes nothing are the ones worth thinking about more carefully.
The flush-valve seat is the part nobody talks about. It’s a fixed ceramic or plastic rim, and once it develops a nick or a mineral pit, no amount of flapper-swapping will produce a reliable seal. The tell is simple: if your third flapper in two years still leaks, stop replacing the flapper and start looking at the seat. A flashlight and a gloved finger will tell you in 30 seconds whether the surface is smooth or compromised.
The other underrated fix is chain adjustment. A chain that’s one link too short keeps the flapper slightly lifted at all times — a slow, silent leak that a dye test catches but a visual inspection misses. Before buying anything, try moving the chain hook one or two links and running the dye test again. It costs nothing and takes two minutes.
Ag-plumbing handles what DIY can’t
When the flapper swap doesn’t stop the leak, the problem is usually the flush-valve seat, a failing fill valve, or a canister-style seal that requires the exact manufacturer part. Those repairs go beyond a $10 fix at the hardware store.

Ag-plumbing has served Pittsburgh, PA and the surrounding areas for 30 years, handling everything from toilet tank repairs to full flush-valve assembly replacements and hard-to-source canister/tower seals, as well as marketing strategies detailed at the local ranking guide for plumbers. The team arrives with the right parts for your specific toilet model, so you’re not guessing at compatibility. If the dye test came back positive and a new flapper didn’t solve it, that’s the moment to call in a professional. Request a diagnostic visit or estimate at ag-plumbing.com and get the repair done right the first time.
Useful sources
- Korky — Anatomy of a Toilet: Clear part-by-part breakdown of tank components; useful for identifying your flapper type and related parts.
- Fluidmaster — Toilet Flapper Leaks: Manufacturer guidance on diagnosing flapper vs. flush-valve seat issues; includes canister/tower valve information.
- This Old House — Repair Toilet Tank Components: Expert-backed repair walkthrough with chain-adjustment guidance and fill-valve vs. flapper differentiation.
- PlumbingByTheBook — Flapper Sizing Guide: Practical sizing method using everyday objects; covers universal vs. model-specific compatibility.
- The Spruce — Tank Ball and Flapper Adjustment: Covers legacy tank-ball designs and the upgrade path to modern flappers.
Save your toilet’s model number (stamped inside the tank lid) before calling a plumber or ordering canister/tower parts. It’s the single piece of information that prevents a wasted trip.
FAQ
How do I know if my toilet flapper needs replacing?
Run the dye test: add food coloring to the tank, wait 15–20 minutes without flushing, and check the bowl. Color in the bowl confirms the flapper is leaking and needs replacement.
Can you replace just the flapper in a toilet tank?
Yes, on most standard hinged-flapper toilets — the job takes about 15 minutes and costs under $10. Canister or tower-style toilets require a model-specific seal rather than a universal flapper.
How do you fix a flapper valve?
Shut off the water supply, drain the tank, unhook the old flapper from the overflow tube pegs, and clip the new one in place. Attach the chain with about half an inch of slack, turn the water back on, and run a dye test to confirm the seal.
How often should a flapper be replaced?
Most flappers last 3–5 years under normal conditions; hard water can shorten that to 2–3 years. Inspect the rubber annually and replace it when it feels stiff, shows cracking, or the dye test comes back positive.
Recommended
- Why Install Shutoff Valves: A Homeowner’s Safety Guide – AG-Plumbing
- What Is a T&P Relief Valve? A Homeowner’s Guide – AG-Plumbing
- What Is a Dual Flush Toilet? A Homeowner’s Guide – AG-Plumbing
- Pressure Balancing Valves: Why Every Shower Needs One – AG-Plumbing
