
TL;DR:
- Running a water meter test and inspecting visible fixtures can quickly confirm a home water leak. Most leaks are detectable within 30 minutes using common household tools, and calling a professional is essential if the source remains unknown. Regular checks and early diagnostics prevent costly damage and ensure efficient leak repairs.
The fastest way to confirm a home water leak is a three-step combination: run a water meter test, drop food coloring in your toilet tank, and do a quick walk-through of visible fixtures. Most leaks reveal themselves within 30 minutes using nothing more than what you already own.
Run these five checks in order before doing anything else:
- Meter check: Stop all water use, read the meter, wait 30–60 minutes, read again. Any movement means a leak exists.
- Toilet dye test: Drop food coloring in the tank. Color in the bowl within 10 minutes means the flapper is leaking.
- Listen and look: Walk bathrooms, kitchen, and laundry. Listen for running water. Look for stains, damp drywall, or musty smells.
- Inspect supply lines and valves: Check under every sink, behind the washing machine, and around the water heater for drips or rust.
- Check outdoors: Look for soggy lawn patches, dripping hose bibs, and wet spots near the meter pit.
If your meter confirms a leak and none of these checks reveal the source, stop guessing and call a licensed plumber. Unnecessary digging or opening walls costs far more than a professional diagnostic visit.
The EPA’s detect-and-chase leaks checklist and most municipal water utilities recommend exactly this sequence. It works because it moves from confirmation to isolation, narrowing the search area with each step.
Table of Contents
- How do you use the water meter test to find a leak?
- Are toilets really the most common source of silent leaks?
- What visual and sound signs point to a hidden leak?
- How to inspect fixtures and appliances for hidden leaks
- How do you check outdoor systems and the main service line?
- What DIY tools actually work for detecting leaks at home?
- When should you stop DIY and call a licensed plumber?
- A 10-minute checklist you can run right now
- Routine maintenance that actually prevents leaks
- How to read your water bill for signs of a leak
- Key Takeaways
- Why non-invasive diagnosis is the smarter first call
- Ag-plumbing’s leak detection services in Pittsburgh
- Useful sources and further reading
- FAQ
How do you use the water meter test to find a leak?
The water meter test is the single most reliable way to confirm a hidden leak on your side of the service line. It costs nothing and takes under two hours.
Step-by-step:
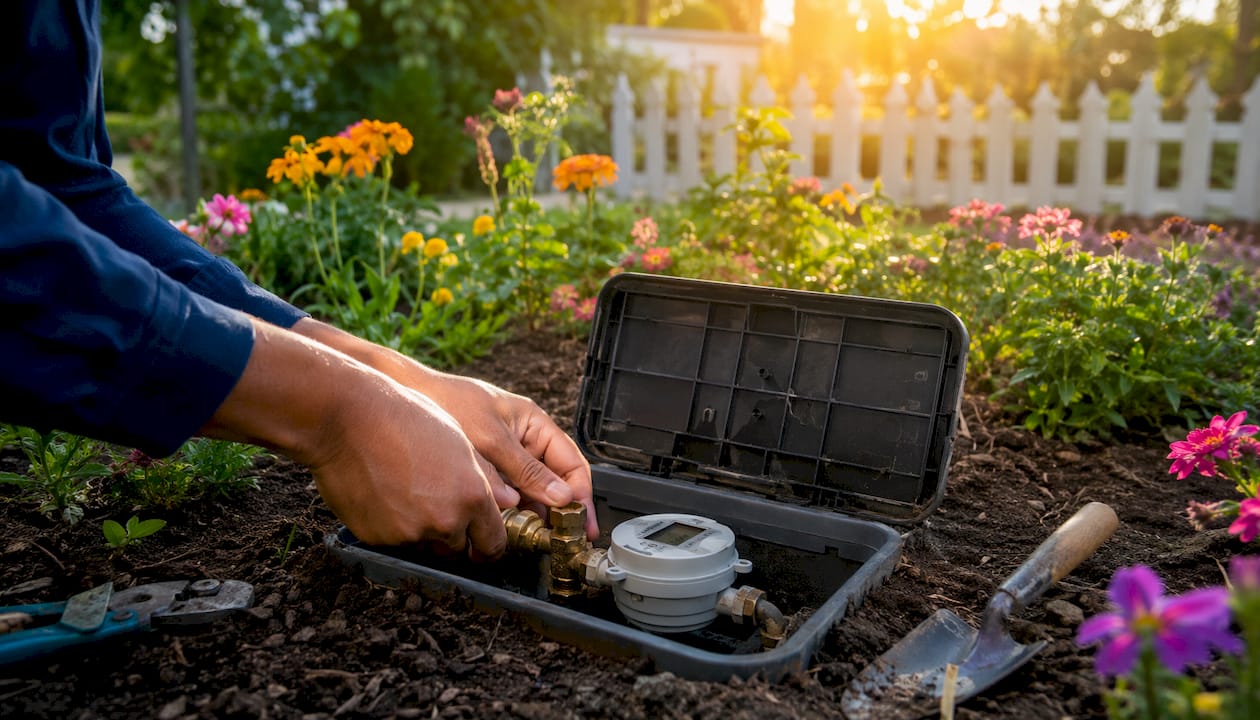
- Locate your meter. It’s usually in a pit near the street, in a basement, or inside a utility closet in colder climates.
- Stop every water-using device in the house: faucets, ice makers, irrigation timers, water softeners, and dishwashers.
- Read the meter and photograph the display. Note the exact reading and whether the small leak indicator dial (a triangle or star on most analog meters) is spinning.
- Wait 1–2 hours without using any water.
- Read the meter again. Any change in the reading, or a spinning leak indicator, confirms an active customer-side leak.
To isolate whether the leak is inside or outside the house, shut off the main house shutoff valve (not the meter shutoff) and repeat the test. If the meter stops moving, the leak is inside. If it keeps moving, the leak is in the underground service line between the meter and your foundation.
From there, you can narrow further by closing individual supply valves one at a time while watching the meter. When the meter stops after you close a specific valve, that fixture or appliance is your source.
Pro Tip: The most common test-killers are appliances that cycle automatically. Ice makers refill every few hours. Water softeners run regeneration cycles overnight. Irrigation controllers can fire even when you think they’re off. Disable or unplug these before starting the test, or you’ll get a false positive.
Are toilets really the most common source of silent leaks?
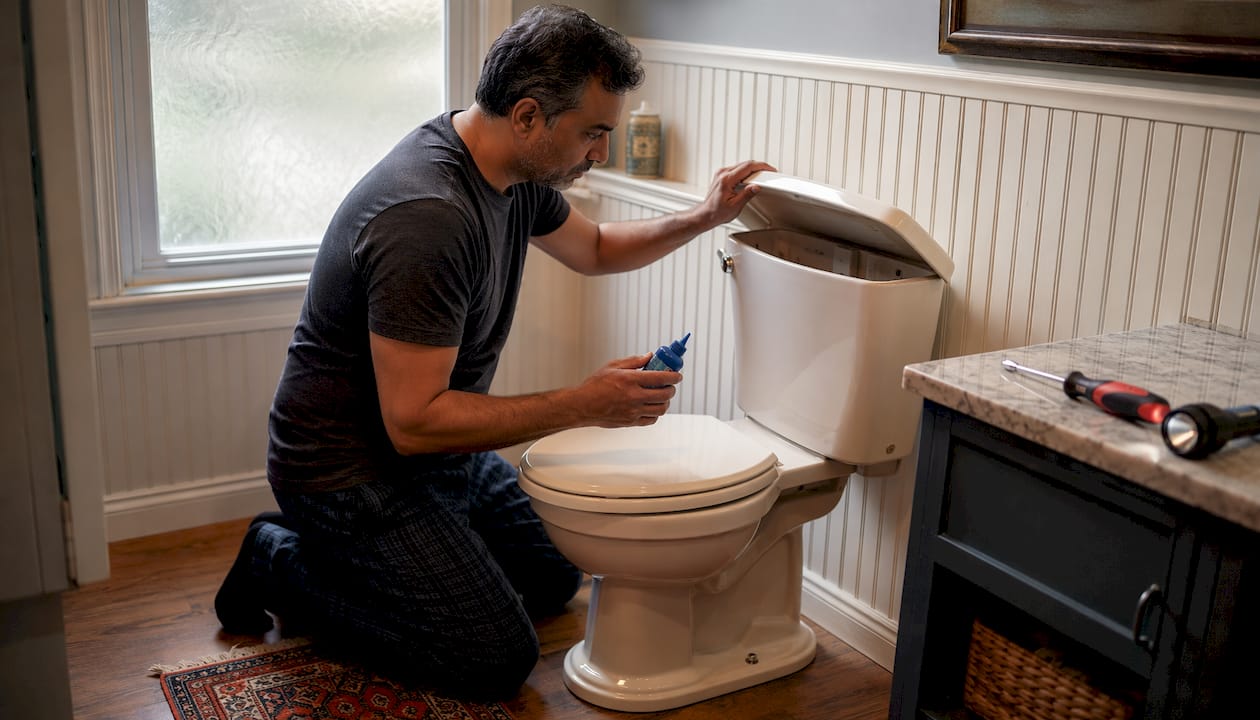
Yes. Toilets are the most common source of silent household water loss, and the dye test catches them in minutes.
How to run the dye test:
- Remove the toilet tank lid and set it aside carefully.
- Drop 5–10 drops of food coloring (or a dye tablet) into the tank water.
- Do not flush. Wait 10 minutes.
- Look at the bowl water. Color in the bowl means the flapper is leaking water past the seat.
- Flush once to clear the dye so it doesn’t stain the porcelain.
If the test is positive, inspect these parts before calling anyone:
- Flapper: Lift it and check the rubber for warping, mineral buildup, or cracks. A $5–$10 replacement from any hardware store fixes most silent leaks.
- Fill valve: Listen for a hiss after the tank fills. A running fill valve often means the float is set too high or the valve seat is worn.
- Overflow tube: Water draining into the overflow tube means the float is set too high. Bend the float arm down slightly or adjust the float clip.
- Flush valve seat: Run a finger around the seat where the flapper rests. Mineral deposits or chips prevent a full seal.
Flapper replacement is a legitimate DIY fix. If you replace the flapper and the dye test still shows color, or if the fill valve keeps running after adjustment, call a plumber. A leaky toilet can waste roughly 200 gallons of water every day, so don’t let it sit.
Pro Tip: Dual-flush and pressure-assisted toilets use different flapper designs. A standard rubber flapper from a big-box store often won’t seal correctly on these models. Check the manufacturer’s model number before buying a replacement, or bring the old flapper with you to the store.
What visual and sound signs point to a hidden leak?
Stains, musty smells, warm floor spots, and the sound of running water when everything is off are reliable indicators of a leak somewhere in the system. The key is a methodical room-by-room walk-through rather than a random check.
High-priority areas to inspect:
- Ceilings and walls directly below a bathroom or laundry room
- Under every sink cabinet (look for water rings, warped wood, or mold)
- Around the base of toilets and tubs
- Behind and beneath the washing machine
- Along the water heater’s base and the pressure relief valve discharge pipe
- Exterior walls where supply lines run
Specific signs and what they suggest:
- Ceiling stain below a bathroom: Usually a supply line, tub drain, or toilet wax ring. The stain’s shape matters. A ring with a dry center often means an intermittent drip; a consistently wet patch suggests an active supply leak.
- Warm or soft spot on a concrete floor: A strong indicator of a hot-water slab leak. Don’t ignore it.
- Bubbled paint or spongy drywall: Water has been sitting behind the surface for a while.
- Green patches or unusually lush grass outdoors: Likely a slow underground pipe leak feeding the soil.
Pro Tip: You can amplify quiet pipe sounds without any equipment. Press a long metal screwdriver handle against a pipe and put your ear to the handle’s end. The metal conducts sound well enough to hear a faint hiss or drip that you’d miss otherwise. This works especially well along basement pipes and behind walls near shutoff valves.
How to inspect fixtures and appliances for hidden leaks
Check all visible supply lines, shutoff valves, dishwasher and refrigerator ice-maker lines, washing machine hookups, and water heater connections. These are the spots where leaks hide in plain sight.
What to look for at each location:
- Under-sink supply lines: Braided stainless lines rarely fail, but older plastic or chrome lines crack with age. Look for white mineral deposits (dried water) at fittings, rust staining, or soft spots in the line.
- Shutoff valves: Valves that haven’t been turned in years often weep at the packing nut. A small drip here can saturate a cabinet floor over months.
- Refrigerator ice-maker line: Pull the fridge out and check the thin plastic or copper line running to the wall. Kinks and loose compression fittings are common.
- Washing machine hoses: Rubber hoses older than five years are a known failure risk. Look for bulging near the fittings or any cracking in the hose body.
- Water heater: Drips running down the tank side often mean the pressure relief valve is discharging, which signals excessive pressure or a failing valve. Rust at the base means the tank is corroding internally.
Red flags that mean call a pro now: active streaming water, water pooling under insulation, a bulging pipe joint, or any rust at a water heater connection. Don’t attempt to tighten a fitting that’s actively spraying.
Safe DIY steps: tighten a loose slip nut by hand plus a quarter-turn with pliers, swap a rubber hose washer, or replace a washing machine hose. For anything beyond that, isolate the appliance by closing its supply valve and call for service.
Pro Tip: To confirm an appliance is the source, close its supply valve and watch the meter for 10 minutes. If the meter stops moving, you’ve found your leak. This saves a plumber diagnostic time and can lower your service bill.
How do you check outdoor systems and the main service line?
Outdoor leaks often announce themselves as soggy spots in the yard, unusually green patches of grass, or continuous meter movement even after all indoor water is shut off.
- Walk the service line path. The underground pipe runs from the meter to your foundation. Look for depressions, soft soil, or wet spots along that path, especially after dry weather when the contrast is obvious.
- Inspect hose bibs. Turn each one on briefly and off. A drip after shutoff usually means a worn seat washer. Check the wall behind an exterior hose bib for interior moisture too.
- Check irrigation heads and valves. Walk each zone while the system runs. Look for heads that spray sideways, valve boxes with standing water, and any section of pipe that’s visibly wet when the system is off.
- Open the meter pit. Look for standing water inside the pit itself. Some water after rain is normal; water present during dry weather is not.
- Operate the main shutoff. Know where it is before you need it. Turn it fully off and back on once a year to prevent it from seizing. If it won’t turn or leaks at the stem, have a plumber service it.
If the meter moves with the house shutoff closed but stops when the meter shutoff is closed, the leak is in the service line. That’s a customer-side repair. If the meter moves even with the meter shutoff closed, the problem is on the utility side. Call your water utility, not a plumber.
Before any digging near the meter or service line, call 811 (the national utility-locate service) to have underground lines marked. Cutting a gas or electric line while chasing a water leak creates a far worse problem.
What DIY tools actually work for detecting leaks at home?
A small toolkit covering food coloring, soapy water, a pressure gauge, a moisture meter, and a basic infrared thermometer gives you high diagnostic value for low cost. Each tool targets a specific type of leak.
| Tool | What it detects | Skill level | Approx. DIY cost |
|---|---|---|---|
| Food coloring / dye tablets | Toilet flapper leaks | Beginner | Under $2 |
| Soapy water (dish soap + water) | Leaks at threaded joints, pipe fittings | Beginner | Under $1 |
| Moisture meter | Wet drywall, subfloor, or insulation | Beginner | $20 |
| Infrared thermometer | Hot/cold spots on floors and walls | Intermediate | $20–$60 |
| Water pressure gauge | High pressure causing stress on fittings | Beginner | $10–$20 |
| Smart leak sensor | Ongoing monitoring at appliances | Beginner | $15 per sensor |
A few important notes on what works and what doesn’t:
- Soapy water is the correct standard for bubble testing at joints. Apply it with a brush or spray bottle and watch for bubbles under pressure. Windex is not a reliable substitute — it’s too thin to hold bubbles well at varying pressures, and it’s not formulated for this purpose.
- Moisture meters are worth buying if you suspect a slow leak behind a wall. A reading above 20% in drywall signals active moisture.
- Smart leak sensors placed under sinks, behind the washing machine, and near the water heater catch leaks the moment water hits the floor. They’re a low-cost addition to any water leak prevention plan.
Pro Tip: Never use flammable aerosols or open flames to test for any type of leak. And keep all testing away from electrical outlets and panels. If a leak is near an electrical source, shut the circuit off at the breaker before inspecting.
When should you stop DIY and call a licensed plumber?
Call a licensed plumber when the meter confirms a leak but you cannot locate the source, when a leak risks structural damage (ceiling stains spreading, fast pooling, or spongy floors), or when unsafe conditions exist near electrical panels or gas lines.
Hiring a professional with non-invasive tools is typically more cost-effective than opening walls or floors based on guesswork. Escalating to a licensed plumber early prevents the kind of structural damage that turns a $300 repair into a $3,000 remediation.
Professional plumbers use a layered diagnostic approach that starts with meter confirmation and escalates through increasingly precise tools:
- Acoustic leak detection: Sensitive listening devices amplify the sound of water escaping a pressurized pipe. Plumbers can pinpoint a leak under a slab or behind a wall without opening anything.
- Infrared thermography: A thermal camera reveals temperature differences caused by wet materials or flowing hot water. It’s particularly effective for slab leaks and hidden supply line failures.
- Video pipe inspection cameras: A flexible camera fed through a cleanout or access point shows the interior of drain and sewer lines, identifying cracks, root intrusion, or joint failures.
- Tracer gas: For very small or deep leaks, a non-toxic gas mixture is introduced into the pipe. A surface detector picks up gas escaping at the leak point. This method requires specific preparation — lines must be evacuated before the test to avoid false negatives.
A professional diagnostic visit typically takes 1–3 hours for most residential leaks. Cost factors include accessibility (finished basement vs. open crawlspace), leak depth (surface vs. under slab), and whether excavation is needed. Combining methods gives better accuracy and reduces the chance of a second visit.
Pro Tip: Before the plumber arrives, have three things ready: access to the water meter, photos of any stains or damage you’ve found, and a written note of what tests you ran and what the meter showed. This cuts diagnostic time and gives the plumber a head start.
A 10-minute checklist you can run right now
A prioritized 10-minute sequence gets you from “I think I have a leak” to a clear yes/no and a next step.
- 0–2 min: Meter check. Go to your water meter. Stop all water use. Check whether the leak indicator dial is spinning. If it is, you have an active leak. Photograph the reading.
- 2–4 min: Toilet dye test. Drop food coloring into the tank of your most-used toilet. Don’t flush. Let it sit while you do the next steps.
- 4–6 min: Quick visual scan. Walk bathrooms, kitchen, and laundry. Look under sinks, around the base of toilets, and behind the washing machine. Note any stains, wet spots, or musty smells.
- 6–8 min: Inspect supply lines and appliances. Check the water heater base, refrigerator line, and dishwasher connections. Look for drips, rust, or mineral deposits at fittings.
- 8–9 min: Check the toilet bowl. Return to the toilet you dyed. Color in the bowl means the flapper is leaking. Flush to clear.
- 9–10 min: Re-read the meter. Compare to your first reading. Any change confirms an active leak. Note the difference.
Decision points:
- Meter moved, dye test positive: replace the flapper. Re-test. If meter still moves, call a plumber.
- Meter moved, no visible source found: don’t open walls. Call a licensed plumber and share your meter readings and photos. See early warning signs for what to document.
- Meter unchanged, no visible signs: no active continuous leak. Schedule a routine inspection if you had a reason to suspect one.
Routine maintenance that actually prevents leaks
Regular maintenance, specifically quarterly visual checks and an annual walkthrough, meaningfully reduces leak risk and the cost of repairs when something does fail.
Quarterly tasks:
- Check all visible supply hoses under sinks and behind appliances for bulging or cracking.
- Look for drips at faucets, showerheads, and hose bibs.
- Test each toilet with a quick dye check if your water bill has crept up.
- Inspect the water heater for rust at the base or moisture around the pressure relief valve.
Annual tasks:
- Test every shutoff valve by turning it off and back on. A valve that won’t turn needs service before you need it in an emergency.
- Replace rubber washing machine hoses that are 5–7 years old. Braided stainless hoses last longer and handle pressure spikes better.
- Inspect the full length of visible supply lines, especially where they pass through walls or cabinets.
- Run each irrigation zone and walk the yard while it’s running.
| Maintenance task | Frequency | Why it matters |
|---|---|---|
| Check supply hoses for wear | Quarterly | Rubber hoses fail without visible warning |
| Toilet dye test | Quarterly or when bill spikes | Catches silent flapper leaks early |
| Test all shutoff valves | Annually | Seized valves fail during emergencies |
| Replace rubber washing machine hoses | Every 5–7 years | Age and pressure cycling cause sudden failures |
| Inspect irrigation system | Each spring | Winter freeze damage shows up at startup |
Seasonal notes worth knowing:
- Winter: Insulate pipes in unheated spaces (crawlspaces, garages, exterior walls). A frozen pipe that bursts can release hundreds of gallons before you notice. Know where your main shutoff is before temperatures drop.
- Spring: Run your irrigation system for the first time with someone walking each zone. Freeze damage to heads and lateral lines is common in Pittsburgh winters.
- Summer: High outdoor temperatures increase water pressure fluctuations. If you notice spitting faucets or banging pipes, check your home water pressure with a gauge at an outdoor hose bib. Normal residential pressure runs 40–80 psi. Anything above 80 psi stresses fittings and appliance connections.
For Pittsburgh homes specifically, galvanized steel supply lines are common in older housing stock. If your home was built before 1970 and still has galvanized pipes, corrosion-related leaks are a matter of when, not if. Upgrading to copper or PEX is worth discussing with a plumber during any service visit.
How to read your water bill for signs of a leak
Your water bill is one of the most underused leak detection tools available. Most utilities bill in units of 100 cubic feet (CCF) or in gallons, and a sudden spike with no change in household habits is a strong signal.
Compare your current bill to the same month in the prior year. Seasonal variation is normal, but a spike of 20% or more with no obvious explanation (house guests, filling a pool, new appliances) warrants a meter test. The EPA notes that a family of four using more than 12,000 gallons per month in winter likely has a leak, since outdoor water use is minimal in cold months.
Many utilities now offer online portals with daily or hourly usage data. Austin Water’s My ATX Water portal, for example, sends alerts when usage spikes or approaches the next billing tier. Check whether your Pittsburgh-area utility offers similar monitoring. If it does, set up alerts. A leak that starts on a Tuesday shows up in your portal data before your next bill arrives.
One pattern to watch for: usage that’s consistent around the clock. Normal household use drops sharply at night when everyone is asleep. If your utility’s hourly data shows steady consumption at 2 AM, something is running that shouldn’t be.
Key Takeaways
The water meter test is the single most reliable first step for confirming any home water leak, and most leaks can be isolated to a source within 30 minutes using free household tools.
| Point | Details |
|---|---|
| Start with the meter test | Stop all water use, read the meter, wait 1–2 hours, and any movement (even tiny) or a leak indicator dial spinning confirms an active leak. |
| Toilets leak silently | A dye test catches flapper leaks in 10 minutes; a leaky toilet can waste roughly 200 gallons per day. |
| Layer your checks | Move from meter confirmation to toilet dye to visual inspection to appliance isolation before calling a pro. |
| Know when to escalate | If the meter confirms a leak and you can’t find the source, call a licensed plumber before opening walls. |
| Ag-plumbing for Pittsburgh homes | Ag-plumbing brings 30 years of local experience and non-invasive diagnostic tools to leak detection in Pittsburgh, PA. |
Why non-invasive diagnosis is the smarter first call
The conventional advice is to find the leak yourself and then call a plumber to fix it. That sequence makes sense for obvious drips. It breaks down completely for hidden leaks, and that’s where most of the real damage happens.
Homeowners who spend two or three days trying to locate a slab leak or an underground service line failure often end up with a larger problem than they started with. Cutting into drywall without acoustic confirmation, or digging near the service line without a thermal scan, turns a diagnostic question into a structural repair. The leak was always going to need a plumber. The only thing the delay added was damage.
Modern non-invasive detection tools have changed the math on when to call. Acoustic devices and infrared cameras can pinpoint a leak behind a wall or under a slab in an hour, with no demolition. The cost of that diagnostic visit is almost always less than the cost of the drywall, flooring, or concrete repair that guesswork requires. Ag-plumbing’s 30 years of experience in Pittsburgh means the team has seen every version of this: the homeowner who waited, the one who dug in the wrong spot, and the one who called early and got out clean.
The DIY checks in this guide are genuinely useful. Run them. But treat a confirmed meter reading with no visible source as a hard stop. That’s the moment to call, not after you’ve opened the wall.
Ag-plumbing’s leak detection services in Pittsburgh
Thirty years of Pittsburgh plumbing experience means Ag-plumbing has seen what a missed leak costs, and the team’s approach is built around finding it before that bill arrives. For homeowners who’ve run the meter test and know a leak exists but can’t locate it, Ag-plumbing provides on-site diagnostic visits using non-invasive methods, with a clear quote before any repair work begins.

Services relevant to leak detection include:
- On-site leak diagnostics using acoustic detection and thermal imaging
- Slab leak detection and repair
- Video camera pipe inspection
- Supply line and fixture repair
- Hydro jetting for drain and sewer line issues
Before calling, have your meter readings ready, photos of any stains or damage, and a note of which DIY tests you ran. That information cuts diagnostic time and helps the team arrive prepared.
To schedule a diagnostic visit or request a quote, visit ag-plumbing.com/plumbing-repair or the main Ag-plumbing services page. The team serves Pittsburgh, PA and the surrounding areas.
Useful sources and further reading
- EPA Detect and Chase Down Leaks Checklist: The EPA’s printable checklist covering meter reading, toilet dye tests, and fixture checks. A solid starting reference for any homeowner.
- City of Phoenix Smart Home Water Guide (PDF): Detailed isolation method and visual inspection walkthrough from a major municipal utility. Covers analog and digital meters.
- Miami-Dade County Leak Detection Tips: County-level guidance with step-by-step homeowner instructions.
- Columbus Water Works Leak Detection Guide (PDF): Printable utility guide covering meter tests, common leak sources, and repair guidance.
- Austin Water — Water Leaks: Practical municipal page covering toilet, faucet, irrigation, and foundation leak checks with utility contact info.
- Ag-plumbing: Leak Detection in Pittsburgh: Practical advice for Pittsburgh homeowners on preventing costly water damage.
- Ag-plumbing: Why Fix Leaks Early: Explains the financial and structural case for early repair, written for Pittsburgh homeowners.
- Ag-plumbing: What Is a Slab Leak?: A homeowner’s primer on slab leaks, signs, and what professional detection involves.
- Professional carpet and tile restoration after water damage: Useful if a leak has already caused flooring or carpet damage and you’re weighing professional remediation.
FAQ
What is the most effective leak detection method?
The water meter test is the most reliable first step for confirming a customer-side leak. Once confirmed, professionals use a layered approach combining acoustic detection, infrared thermography, and video inspection to pinpoint the source without destructive work.
Is Windex a good leak detector?
No. Windex is too thin to form stable bubbles at varying pressures, making it unreliable for bubble testing at pipe joints. Plain dish soap mixed with water is the correct standard and costs almost nothing.
How long does a professional leak detection visit take?
Most residential leak detection visits take 1–3 hours, depending on the leak’s location and accessibility. Slab leaks or underground service line leaks may take longer if excavation or tracer gas testing is needed.
How can I tell if my water bill reflects a leak?
Compare your current bill to the same month last year. The EPA notes that a family of four using more than 12,000 gallons per month in winter likely has a leak. Consistent overnight usage in your utility’s hourly data is another strong indicator.
When should a homeowner call a plumber instead of continuing DIY checks?
Call a licensed plumber when the meter confirms a leak but no visible source can be found, when you see ceiling stains spreading or fast pooling, or when the suspected leak is near electrical panels or gas lines. Early escalation prevents structural damage that turns a small repair into a major one.
Recommended
- Why Fix Leaks Early: a Pittsburgh Homeowner’s Guide – AG-Plumbing
- Leak detection in Pittsburgh: prevent costly damage – AG-Plumbing
- Why Water Leaks Matter: A Homeowner’s Guide – AG-Plumbing
- Why Prevent Water Leaks: A Pittsburgh Homeowner’s Guide – AG-Plumbing
