
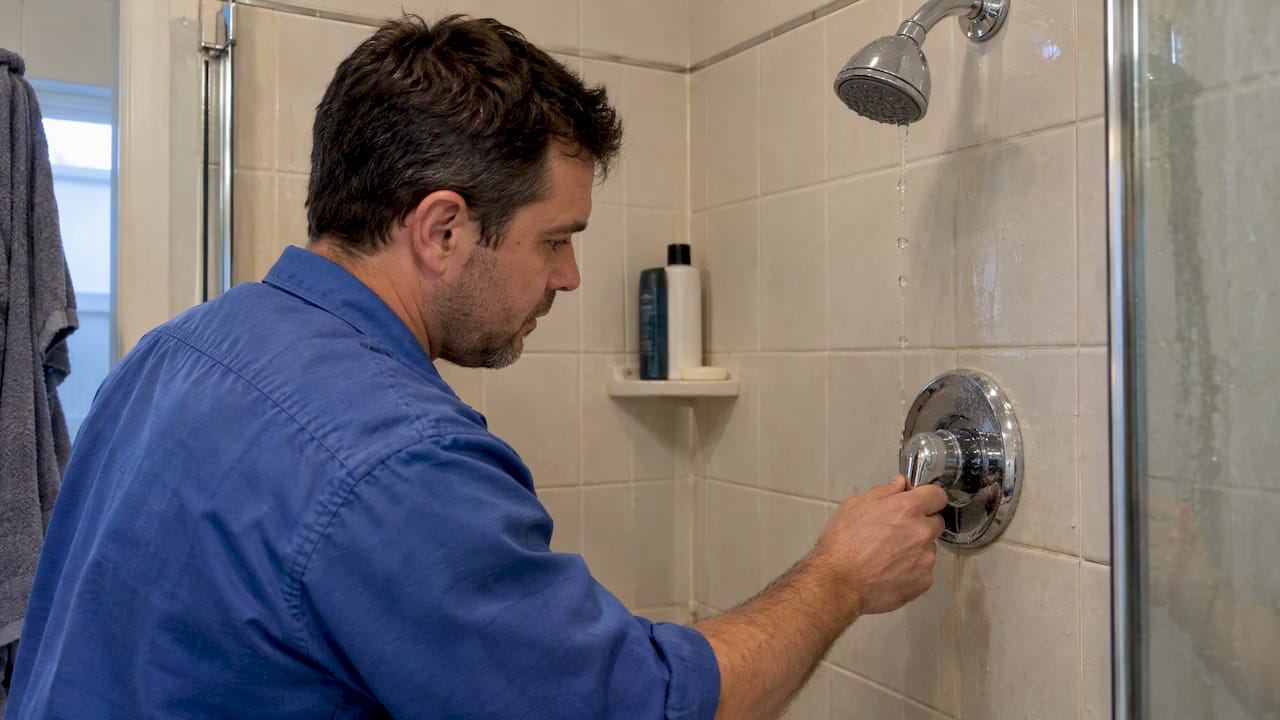
A leaking shower valve is usually a worn cartridge, stem or seal, and that is a small, fixable part. The harder question is where the water is going. If it drips from the showerhead or spout with the handle off, the cause is almost always inside the valve. If water shows up on a ceiling below, a stained wall or soft drywall, the leak may be behind the wall and needs a professional. Below you will find how to tell the difference, what you can safely check yourself, and what a repair typically costs.
TL;DR
- Dripping from the showerhead or tub spout with the handle off usually points to a worn cartridge, stem or seal, not a failed valve body.
- Water at the handle or behind the wall is a different problem: a loose packing nut, a bad connection or a leaking pipe. Stop using the shower until it is checked.
- Nationally, a cartridge replacement runs about $100 to $350, and a full valve replacement about $150 to $550. Opening tile or drywall adds to that.
- A cartridge swap is a reasonable DIY job for a comfortable homeowner. Moving connections, changing valve type or tracing a hidden leak calls for a licensed plumber.
Table of Contents
- First, work out where the water is coming from
- Why shower valves start to leak
- Quick checks you can do in ten minutes
- Fixing a leaking shower cartridge yourself
- What a shower valve repair costs
- Repair or replace the whole valve?
- A note on shower pan leaks
- Our perspective: fix the leak, then check the wall
- Need a hand with a leaking shower valve?
- Keeping the next leak from happening
- FAQ
- Sources
First, work out where the water is coming from
“Leaking shower valve” covers several different problems. The location of the water tells you most of what you need to know.
| What you see | Most likely cause | Who should handle it |
|---|---|---|
| Showerhead drips or runs with the handle in the off position | Worn or scaled cartridge, or worn stem seats | Handy homeowner or plumber |
| Water leaks around or behind the handle | Loose or worn packing nut or stem seal, or a cracked trim seal | Handy homeowner or plumber |
| Water keeps coming from the tub spout while the shower is on | Failing diverter | Plumber, or homeowner if the diverter is in the spout |
| Stain, bubbling paint or soft drywall near the shower, or a wet ceiling below | Leak behind the wall at a valve connection or supply pipe | Licensed plumber |
| Pooling water or damp floor outside the shower with no obvious drip | Shower pan or drain leak | Licensed plumber |
The split matters because the first two rows usually need only a new part, while the last two can mean wall access. The home forum discussions that plumbers and remodelers post on this topic make the same point: valve bodies behind tile are meant to last, and the moving parts inside them are what wear out.
Why shower valves start to leak
A shower valve has two layers. The valve body is the brass housing inside the wall. The cartridge or stem is the moving part that opens, closes and mixes hot and cold water. According to a long-standing cartridge replacement guide, the body can last 30 to 40 years, while the cartridge is exposed to mineral buildup from hard water, worn O-rings and constant movement.
The common causes, roughly in order of how often we see them:
- Worn cartridge or O-rings. The seals harden or wear, and water slips past even when the valve is closed. This is the classic drip from the showerhead.
- Scale and sediment. Minerals build up on the cartridge and the seats, so it no longer seals. Debris can also lodge in the valve after nearby plumbing work.
- A worn stem or packing nut on older two- and three-handle valves. One forum answer to this exact problem is that it is often the packing on the stem rather than a cartridge. Old compression-style valves use rubber seats and washers that wear down over time.
- A failing diverter. A faulty diverter is a common reason water dribbles from the tub spout instead of going up to the showerhead.
- A loose or corroded connection behind the wall. This is the one that does real damage, because you may not see it until the wall is wet.
Quick checks you can do in ten minutes
These cost nothing and help you decide whether to repair or call.
Watch the drip. Turn the handle fully off and look at the showerhead and the spout for a minute. The EPA’s leak-detection materials note that even small drips add up to thousands of gallons a year, so a steady drip is worth fixing, not tolerating.
Test the diverter. Run the shower. If water keeps pouring from the tub spout when the diverter is pulled up, the diverter is the problem, not the valve. The EPA’s checklist suggests a short visual check after turning the fixture on to spot this kind of failure.
Check the handle area. Dry the trim plate and handle, run the shower for a few minutes, then look for water collecting behind the handle. Water here suggests a stem or packing issue, or water getting past the trim.
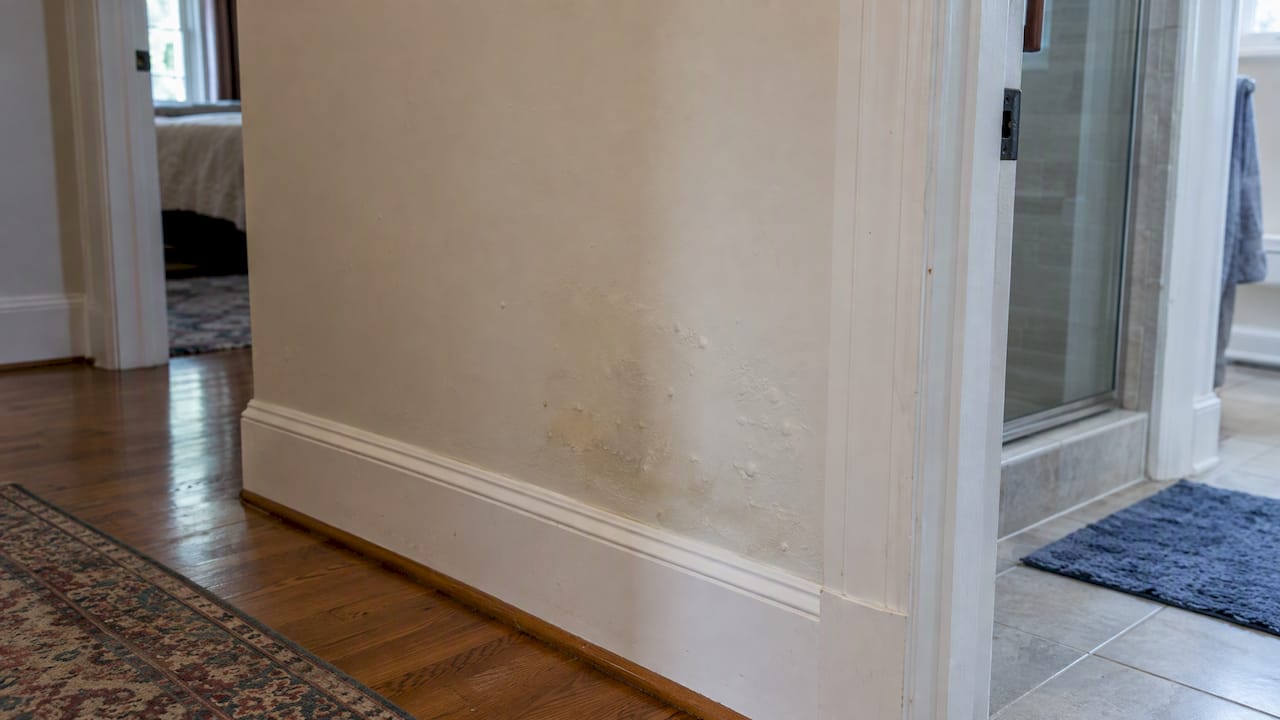
Look at the other side of the wall. Check the closet, hallway or room behind the shower, and the ceiling beneath it. Discolored paint, a musty smell or soft drywall means water is escaping inside the wall. Our guide to signs of a leak behind the wall walks through how to confirm it.
Check your water meter. With every fixture off, a moving meter dial means a leak somewhere. It does not tell you it is the shower, but it tells you the leak is real.
Fixing a leaking shower cartridge yourself
If the drip is at the showerhead or spout, a cartridge replacement is a common homeowner repair. The rough sequence is the same across most single-handle valves, and this Moen cartridge guide shows it in detail for that brand.
- Shut off the water. Use the fixture stop if your valve has one. If not, close the main shutoff. Open a faucet elsewhere to relieve pressure.
- Remove the handle and trim. Pry off the cap, remove the handle screw, then the handle and escutcheon plate.
- Remove the retaining clip or nut. Note its position first. A photo helps.
- Pull the cartridge. Some pull straight out, and some need a puller tool. Do not force it with pliers if it will not move, since a seized cartridge is a reason to stop.
- Bring it to the store. Match the brand, model and spline count exactly. A near match will not seal.
- Clean the valve body. Wipe out scale and debris. The same cartridge guide warns that debris can damage the new cartridge’s O-rings, so flush the valve body before the new part goes in, with the diverter set to tub so debris does not lodge in the showerhead.
- Install the new cartridge in the correct orientation, lightly greasing the O-rings with plumber’s grease.
- Reinstall the retaining clip. This step matters more than any other. Leaving it out can let water pressure push the cartridge out of the valve body, which means an immediate flood.
- Reassemble, open the water slowly and test hot, cold and the off position.
Plan on 30 minutes to 2 hours for a cartridge swap, according to Angi’s estimates, longer if the cartridge is stuck.
When to stop and call a plumber
Stop and call if any of these happen:
- The cartridge or stem will not come out, or the valve body looks cracked or heavily corroded.
- Water still drips after a correct replacement. That points to damaged seats or the valve body.
- You find wet or stained drywall, tile that has loosened, or water on the ceiling below.
- You want to change valve types, for example to a pressure-balancing or thermostatic valve, or move the connections. Professional guidance is that licensed work is essential here, and for any uncertainty about local code and permits.
- You cannot find the source of the leak.
Turning off the water to the bathroom while you wait costs nothing and prevents most of the damage.
What a shower valve repair costs
The national numbers below come from published cost guides. They are not our prices. Local pricing depends on access, the valve and the scope.
| Job | Typical national range | Source |
|---|---|---|
| Cartridge replacement only | $100 to $350 | HomeGuide |
| Full valve replacement | $150 to $550, averaging about $350 | Angi |
| Plumber labor | Often $45 to $150 per hour | Angi |
Two things push the price up. The first is access. If the valve sits behind tile or drywall with no access panel from the other side, the wall has to be opened and then repaired. The second is valve type. Angi puts a full valve assembly job at 1.5 to 3 hours, against 30 minutes to 2 hours for a cartridge, so labor is a large share of the total.
A cheap repair that only treats the symptom can cost more in the end. If a valve has been dripping for months, ask whether the wall behind it has been damaged before you assume the fix is only a part.
Repair or replace the whole valve?
Repair is the right call when the valve body is sound and the problem is a cartridge, stem or seals. Replace the valve when:
- The body is cracked, corroded or has damaged seats that a new cartridge cannot seal against.
- Parts for an old or discontinued valve are hard to find.
- You are already opening the wall for a retile or remodel. One plumbing perspective in the Moen guide is that it is far cheaper to replace an aging valve while the wall is open than to open it again later, and that replacing a cartridge during a renovation is cheap insurance.
- You want better scald protection. Our explainer on why every shower needs a pressure-balancing valve covers what these valves do and why they are worth considering in any upgrade.
A note on shower pan leaks
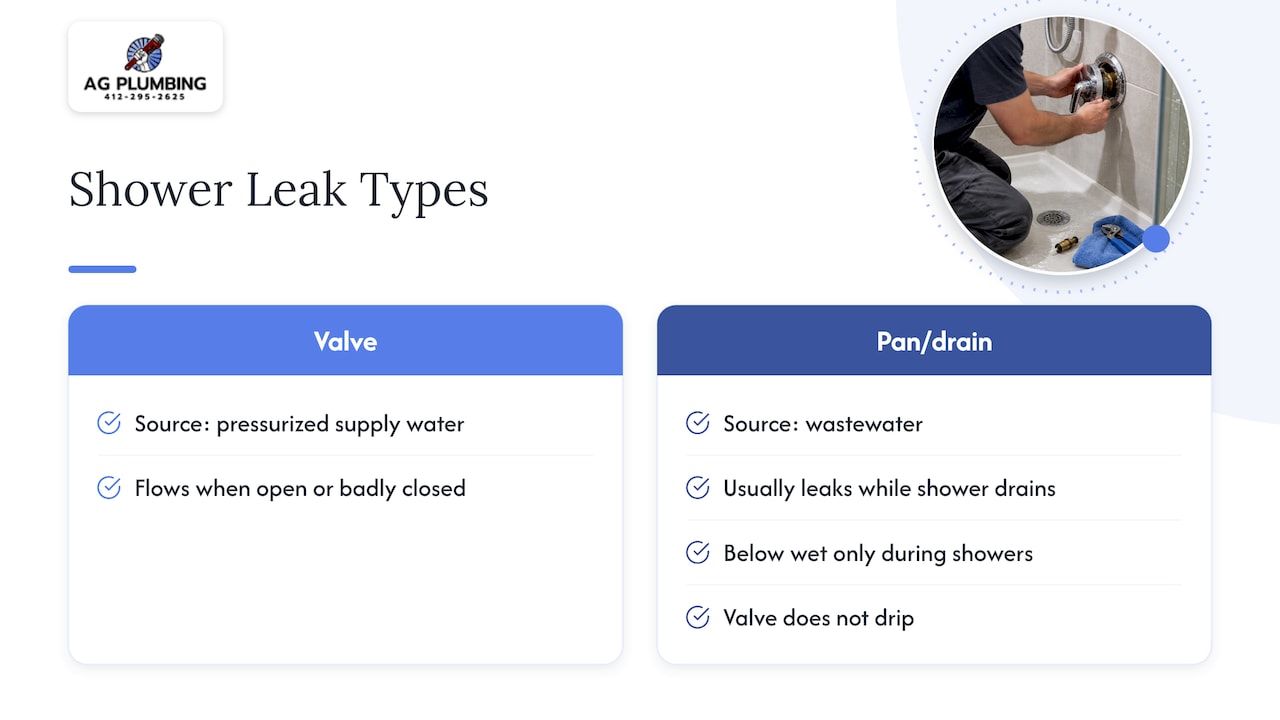
People often search “shower pan leak” alongside valve problems because both show up as damp spots near the shower. They are different failures. A valve leak is pressurized supply water, so it flows whenever the valve is open or closed badly. A pan or drain leak is wastewater and usually appears only when the shower is running and draining. If the floor or ceiling below gets wet only during showers and the valve does not drip, tell the plumber that. It changes the diagnosis and the tests used.
Our perspective: fix the leak, then check the wall
In our work in Pittsburgh homes and buildings, the part that fails is rarely the expensive part. A cartridge is a modest repair. What turns a modest repair into a large one is time. A shower that drips for a year gets scale in the valve, softens the drywall around it and sometimes stains the ceiling below, and then the job is no longer only the valve.
So our advice is plain. If it is a drip at the showerhead and nothing is wet around it, a careful cartridge replacement is reasonable, provided you install the retaining clip and flush the valve. If the leak is behind the handle, behind the wall, or anywhere you cannot see, do not guess. Shut the water off to the bathroom and have someone look. We would rather be called for a small fix than for the wall that comes after it.
If we are replacing a valve, we explain what we found, what the options are and what each costs before we start. That clear communication is something we hold ourselves to on every job.
— Maayan
Need a hand with a leaking shower valve?
If you would rather not pull the handle off and hope for the best, our team handles plumbing repair for homes and businesses in Pittsburgh and the surrounding area. We have 30 years of local experience, and we offer discounts for seniors, military, new customers and referrals. For more reading while you decide, see how to identify when plumbing repair is necessary.
Keeping the next leak from happening
- Pull and service the cartridge every few years. Re-lubricating O-rings and removing scale can keep a cartridge from seizing, which is what turns a simple maintenance task into a wall-opening job.
- Fix drips early. A small drip is the cheapest version of this repair.
- Install an access panel on the opposite side of the wall when remodeling, if the layout allows. It makes any later repair far cheaper.
- Check other fixtures too. The same wear shows up everywhere. Our guides to a leaking sink and common plumbing repair issues help you spot it.
FAQ
Why is my shower dripping even though the water is off?
The most common reason is a worn cartridge, stem or seal inside the valve that no longer closes completely. Mineral buildup can also keep the parts from seating. Replacing the cartridge with an identical one usually fixes it.
Do I need a plumber to replace a shower valve?
Not always. Swapping a cartridge is a task many homeowners can do if they are comfortable with it. Replacing the whole valve, changing valve type, moving connections or dealing with permits is work for a licensed plumber, as is any leak you cannot trace.
What is the average cost to replace a shower valve?
Nationally, most homeowners pay between $150 and $550, with an average around $350 to $400. Replacing only the cartridge usually costs $100 to $350. Wall repair adds to the total.
How long does a shower valve last?
The valve body can last 30 to 40 years, according to the Moen cartridge guide. Cartridges wear faster, especially with scale, so expect to replace them several times over the life of the body.
Is a leak behind the shower wall an emergency?
Treat it as urgent. Shut off the water to the bathroom, stop using the shower and have a plumber find the source. Water inside a wall can damage framing and drywall and lead to mold before it shows on the surface.
Sources
- How Much Does a Shower Valve Replacement Cost? | Angi
- Why Is My Showerhead Not Working? | Angi
- How Much Does a Shower Valve Replacement Cost? | HomeGuide
- Replacing Moen Cartridges
- Lifespan of a shower valve? | Houzz Forum
- Detect and Chase Down Leaks Checklist | EPA WaterSense
- Know Your Flow and Curb Water Waste | EPA
- Shower valve leak discussion | r/Plumbing
Recommended
- How to Stop a Leaking Hose Bib Before It Costs You More
- Outdoor Faucet Leaking? Fix It by Finding the Cause
- How to Fix a Leaking Sink: A Homeowner’s Step-by-Step Guide
- Pressure Balancing Valves: Why Every Shower Needs One
