
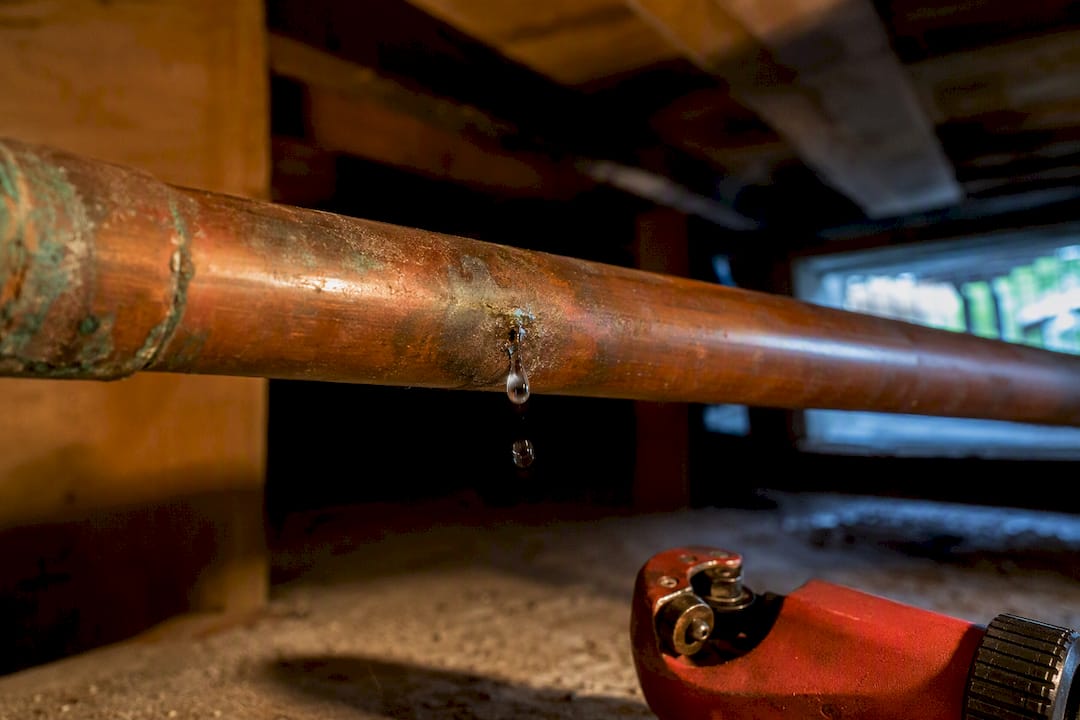
A pinhole leak is a tiny perforation in a copper pipe caused by interior pitting corrosion, and it rarely happens in isolation. If water is actively spraying or pooling, shut off the main and call a licensed plumber. If you just spotted a stain or a drip, confirm it with a simple water meter test before you tear into a wall.
TL;DR:
- Water chemistry-driven pitting often causes multiple leaks system-wide, making systemic treatment more effective than isolated repairs.
- Leak detection through a simple water meter test is highly reliable and can identify hidden leaks before opening walls or ceilings.
- Repair costs vary from $150 for accessible patches to over $8,000 for whole-house epoxy lining or repiping, depending on location and extent.
- Addressing underlying issues like water pH, pressure, and grounding prevents future pinholes, especially in homes with recurring leaks.
- Systemic corrosion patterns often indicate the need for comprehensive evaluation and possible full replacement rather than repeated patching.
Table of Contents
- What Causes Pinhole Leaks in Copper Pipes?
- How Do You Confirm a Pinhole Leak Before Cutting Into a Wall?
- Repair Options: From Emergency Patches to Full Section Replacement
- What Does Fixing a Pinhole Leak Actually Cost?
- How Do You Stop New Pinholes From Forming?
- What Does a Licensed Plumber Actually Check?
- Why Most Pinhole Leak Advice Stops One Step Too Early
- How Ag-plumbing Handles Pinhole Leaks in Pittsburgh
- Sources
- FAQ
What Causes Pinhole Leaks in Copper Pipes?
A pinhole leak forms when localized pitting eats through the pipe wall from the inside out, and the pit almost always traces back to one of four mechanisms working alone or in combination.
Water chemistry is the most common driver. Low pH water, chlorine or chloramine disinfectants, and aluminum-bearing solids left over from treatment plants all attack the protective oxide layer that normally coats copper’s interior surface. Once that layer breaks down in one spot, corrosion concentrates there instead of spreading evenly, and a pit deepens until it punches through. A municipal task force investigation into a wave of residential leaks found aluminum-bearing compounds combined with chlorine were probable contributors, though the report stopped short of naming a single universal cause.
Erosion and turbulence come next. Water moving too fast through undersized pipe, or slamming into a sharp elbow, physically wears down the copper wall over years. This shows up most at fittings, right after a valve, or on long horizontal runs where velocity never has a chance to settle.
Workmanship problems are underrated as a cause. Leftover soldering flux, metal burrs from a bad cut, or debris trapped during installation create rough spots where corrosion gets a foothold years before anyone notices a leak.
Stray electrical current and galvanic corrosion round out the list. When copper touches a dissimilar metal, or when a grounding wire is improperly bonded to the plumbing system, low-level current accelerates metal loss at that junction.
An Indian River County utilities investigation into recurring pinhole failures listed water stagnation, microbiological activity, flux residue, erosion, concentration cells, and stray current as the recurring suspects across dozens of cases. A Virginia Tech thesis analyzing failure reports attributed roughly 30 to 40 percent of pitting cases to chloride and chlorine reactions, with the remainder split across erosion, oxygen-differential corrosion, and aggressive water.
Here’s the practical takeaway: a single pinhole from a bad solder joint is often an isolated fault. A pinhole caused by water chemistry rarely is.
- Water chemistry pitting: usually predicts more leaks system-wide.
- Erosion at a fitting: usually stays localized to that fitting.
- Bad workmanship: usually a one-off, unless the same plumber did the whole house.
- Electrolysis: recurs at every point where dissimilar metals or grounding wires meet.
Because these mechanisms interact, one pinhole often signals more are forming, and treating the underlying water chemistry can stop new pits even while old ones remain in the pipe. That’s why the first repair should never be the last question you ask.
How Do You Confirm a Pinhole Leak Before Cutting Into a Wall?
Copper pinhole leaks give off signs long before water actually appears. Blue-green staining on a pipe or fixture is copper oxide, a telltale sign the metal is dissolving. Ceiling or wall stains, a musty smell in a closet, or a water bill that jumped without explanation are all indirect clues worth chasing down.
The most reliable homeowner test costs nothing and takes ten minutes:
- Turn off every faucet, appliance, and irrigation valve in the house.
- Find your water meter and note the reading, or check if the small leak indicator dial is spinning.
- Wait 15 to 20 minutes without using any water.
- Check the meter again. Any movement means water is escaping somewhere in the system.
- If the meter confirms a leak but you see no water, check the most common hidden locations first: hot water supply lines, pipe runs above ceilings, crawlspaces, and the section of pipe under sinks where fittings cluster.
Water doesn’t always drip straight down from the leak point. It travels along framing members and insulation before it shows up as a stain, which is why a stain on a first-floor ceiling might trace back to a second-floor bathroom several feet away. This is a widely used meter-test workflow that trade sources recommend as the first diagnostic step before opening any drywall.
Pro Tip: Photograph the meter reading with your phone before and after the test. If you end up calling a plumber, that timestamp saves them a repeat test and gets a repair estimate started faster.
When a leak hides inside a wall or slab with no visible access point, acoustic and thermal leak detection equipment locates it without demolition. That service typically runs a few hundred dollars depending on the home’s size and how deep the pipe runs, and it pays for itself the moment it saves you from opening three walls to find one hole. If you’re not confident isolating the leak yourself, a professional leak detection service is worth the call before any wall comes down.
Repair Options: From Emergency Patches to Full Section Replacement
Not every pinhole needs the same fix, and picking the wrong one wastes money either way.
Emergency temporary patches buy you time, nothing more. A slit section of garden hose clamped over the hole, or a rubber patch kit from any hardware store, stops active spraying for a few days at best. These are stopgaps, not solutions. Any patch relying on rubber and hose clamps will eventually fail underwater pressure and normal pipe vibration.
Push-fit couplings, sold under brand names like SharkBite, are the fastest real repair for accessible pipe. Cut out the damaged section, slide the fitting over both clean pipe ends, and you have a permanent, code-compliant joint with no torch required. They work well for a DIYer comfortable with a tubing cutter, provided the pipe is reachable and not corroded on both sides of the cut.
Soldered copper sleeve repair is the traditional durable fix. A plumber slides a copper coupling over the damaged section and sweats it in place with solder, matching the original pipe material exactly. This is where professional experience matters most: getting the joint fully dry and properly fluxed before soldering determines whether the repair lasts years or fails in months.
Cut-and-replace with PEX or copper makes sense when more than a foot of pipe shows pitting, or when the surrounding copper looks visibly thin. PEX resists the pitting corrosion that plagues copper in aggressive water, which is why many plumbers now default to it for replacement sections even inside an otherwise all-copper system.
Epoxy lining coats the interior of existing pipe without removing it from the wall, and contractors typically recommend it for widespread pitting across long runs where cutting open every wall isn’t practical. It’s not a fix for a single pinhole. It’s a whole-system intervention.
Here’s the decision rule that matters most: if the leak is accessible and isolated, repair it directly. If pipes are hidden behind finished walls, or you’ve now had two or more pinholes in different locations, that pattern points to systemic corrosion rather than bad luck. At that point, a full repiping evaluation is a smarter use of your money than another round of patch repairs.
What Does Fixing a Pinhole Leak Actually Cost?
Price depends almost entirely on where the leak sits and how many pipes are affected, and the range is wide enough that guessing wrong can mean a $150 fix or a $10,000 mistake.
An accessible pinhole repair, one where the pipe is exposed under a sink or in a basement, typically runs $150 to $400. Hidden repairs behind a finished wall cost more because of the demolition and patch work involved, running $400 to $900. Epoxy lining for widespread pitting across a home’s supply lines lands in the $2,500 to $8,000 range. A full whole-house repipe spans $2,000 to $15,000 depending on square footage, number of fixtures, and whether walls need to be opened throughout.
Timelines vary just as much. A spot repair on exposed pipe takes 30 minutes to a couple of hours, start to finish. Repairs requiring wall access add a day for cutting, repair, and patching drywall. A full repipe on an average home typically runs two to four days depending on how much of the house needs new supply lines.
Here’s a rule of thumb worth writing down: if you’ve paid for two or more separate pinhole repairs within a year, you’re likely spending 20 to 30 percent of a full repipe’s cost just to keep patching a system with a chemistry problem. At that rate, repiping stops being the expensive option and becomes the cheaper one over a three to five year horizon.
If a leak has caused water damage to flooring, drywall, or cabinetry, document everything with photos before repairs begin and keep repair invoices. Many homeowner insurance policies cover the resulting water damage even when they exclude the plumbing repair itself, and an adjuster will want dated evidence of both the leak and the damage it caused.

How Do You Stop New Pinholes From Forming?
Fixing the hole in front of you solves today’s problem. Stopping the next ten pinholes requires addressing what’s happening inside the pipe, not just where it failed.
Water testing is the starting point. A lab or licensed plumber can check pH, chloride levels, alkalinity, and conductivity, the same variables municipal investigators flagged as common contributors to pitting corrosion. Most water utilities will run a basic chemistry test for free or low cost if you ask.
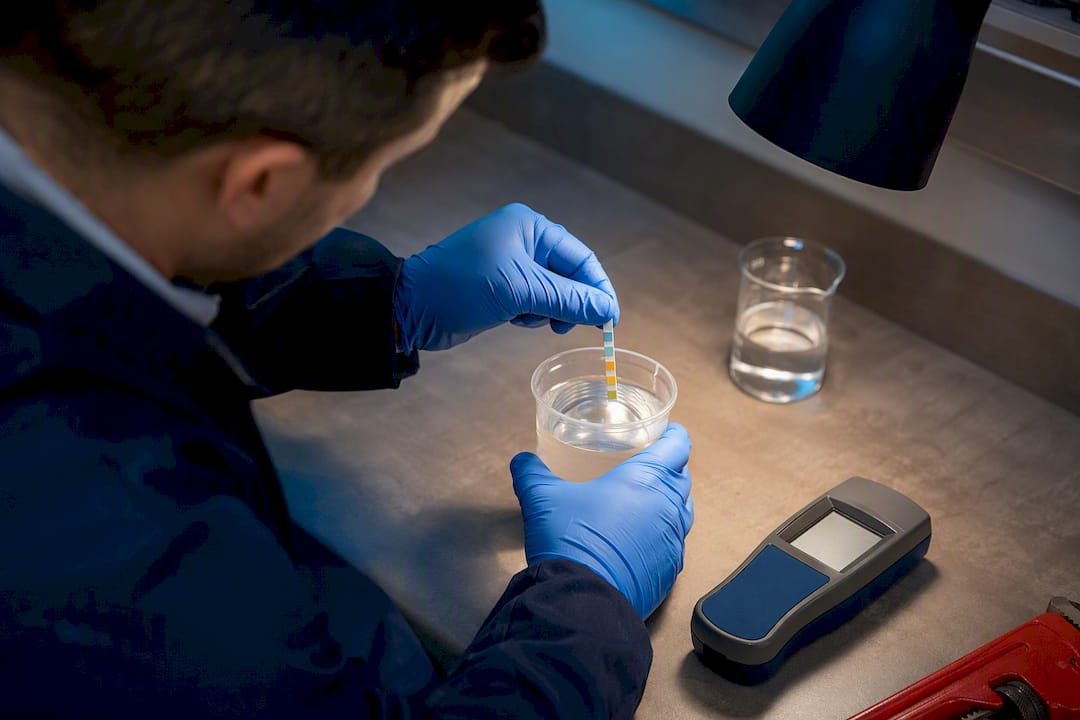
If testing turns up acidic water, an acid neutralizer using a calcite media bed raises pH before water reaches your copper pipes. It’s a maintenance item, not a set it and forget it fix. The media needs periodic replenishment, and a plumber or water treatment specialist should check it annually.
Beyond water chemistry, a few mechanical fixes cut corrosion risk directly:
- Install a pressure-reducing valve if house pressure runs above 80 psi, which slows the erosion that contributes to pitting at fittings.
- Verify your electrical grounding and bonding are correctly wired to the plumbing system, not creating a stray-current path.
- Replace fittings where dissimilar metals meet, since galvanic corrosion concentrates at those junctions.
- Consider a selective repipe to PEX for the specific runs that have already failed twice, rather than waiting for a third leak.
Pro Tip: If your water tests aggressive but you’ve only had one pinhole so far, installing a neutralizer now is far cheaper than waiting for three more leaks to justify the same fix.
Weigh treatment against repiping by looking at your leak history, not just your water chemistry report. One pinhole with clean test results might just need a better repair. Three pinholes with acidic water need both a neutralizer and, honestly, a serious look at replacing the worst-affected runs. Understanding what drives pipe corrosion in the first place makes that decision a lot less guesswork.
What Does a Licensed Plumber Actually Check?
A professional diagnostic starts with the same visual inspection you’d do yourself, then goes further. A plumber isolates plumbing circuits to narrow down which branch is leaking, runs acoustic detection equipment to pinpoint a hidden leak’s exact location, and can pull a water sample for lab testing when chemistry looks suspect. For serious cases, a scoped camera inspection shows pitting patterns inside pipe sections before they fail.
Before your appointment, gather:
- Photos of any visible staining, drips, or damage
- Water meter readings from your own leak test
- Dates and locations of any prior pinhole repairs
Peer-reviewed research on copper pinhole failures backs up why local diagnosis matters so much: causes vary system to system, and what fixed your neighbor’s leak might miss yours entirely. An experienced plumbing team with extensive hands-on experience applies current diagnostic techniques to figure out which mechanism is actually at work in your system.
Why Most Pinhole Leak Advice Stops One Step Too Early
Most guides online treat a pinhole leak like a single event: patch it, move on. The research says otherwise. Municipal task force studies and peer-reviewed failure analyzes agree on one thing above all: pinhole corrosion is a systems problem wearing the disguise of a single hole. Fixing one leak without asking why it happened is like bailing water out of a boat without finding the crack.
The conventional advice, “just replace the section,” isn’t wrong. It’s incomplete. A repair that ignores water chemistry, house pressure, and grounding practically guarantees a callback within a year or two. What the reader should prioritize first isn’t the repair method at all. It’s the diagnostic question: is this an isolated fault, or a symptom? Answering that honestly, even if it costs a modest water test, saves far more than it costs. The homeowners who end up spending the most on copper pipe repairs are almost always the ones who fixed the same underlying problem three separate times before finally addressing it once.
— Maayan
How Ag-plumbing Handles Pinhole Leaks in Pittsburgh
A DIY patch buys time. It doesn’t tell you whether your water chemistry is quietly creating the next five leaks. Some plumbing services provide a direct path to that answer, combining leak detection, plumbing repair, repiping, and water treatment installation under one licensed team instead of piecing together separate contractors for each step.

Bookings typically start with an inspection to locate the leak and check surrounding pipe condition, followed by a written estimate before any work begins, so you know the cost and timeline up front rather than after the wall is already open. If the diagnosis points to a systemic corrosion issue rather than a one-off failure, the service provider can help determine whether a targeted repair, a water treatment install, or a partial repipe makes the most financial sense for your specific pipes and water chemistry. Experienced plumbing providers with many years serving Pittsburgh and the surrounding area have seen how differently the same symptom can play out from one house to the next. Start with a plumbing repair evaluation and get a clear answer instead of another guess.
Sources
- The Mystery behind pinhole leaks in Copper Piping (Indian River County utilities)
- An assessment and modeling of copper plumbing pipe failures due to pinhole leaks (Virginia Tech thesis)
- Copper Pinhole Failures: Plumbing Susceptibility and Management | Journal of Water Resources Planning and Management
- Plumbingpriceguide
FAQ
What causes a pinhole leak in a copper pipe?
Pinhole leaks come from localized pitting corrosion inside the pipe, driven by water chemistry (low pH, chlorine, aluminum solids), erosion at fittings, poor workmanship, or stray electrical current between dissimilar metals.
How much does it cost to fix a pinhole leak in a copper pipe?
An accessible pinhole repair typically costs $150 to $400, while a hidden repair behind a wall runs $400 to $900; epoxy lining or a full repipe cost considerably more depending on scope.
How can I prevent pinhole leaks in my copper pipes?
Test your water for pH and chloride levels, install an acid neutralizer if the water is acidic, add a pressure-reducing valve if pressure runs high, and confirm your plumbing is properly grounded to rule out stray current.
I accidentally nicked a copper pipe, but it doesn’t leak. What should I do?
Have it inspected soon. A nick that hasn’t started leaking yet can still thin the pipe wall enough to fail later under normal pressure, and a quick professional look now is cheaper than an emergency repair after it does.
Does one pinhole leak mean I’ll get more?
Often, yes, especially if the cause is water chemistry rather than a single workmanship error; treating the underlying water chemistry can prevent additional pits from forming even where existing damage remains.
Recommended
- Cost-saving plumbing tips for Pittsburgh homeowners
- Why Fix Leaks Early: a Pittsburgh Homeowner’s Guide
- Top Leak Detection Methods for Homeowners and Pros
- Why Prevent Water Leaks: A Pittsburgh Homeowner’s Guide
