
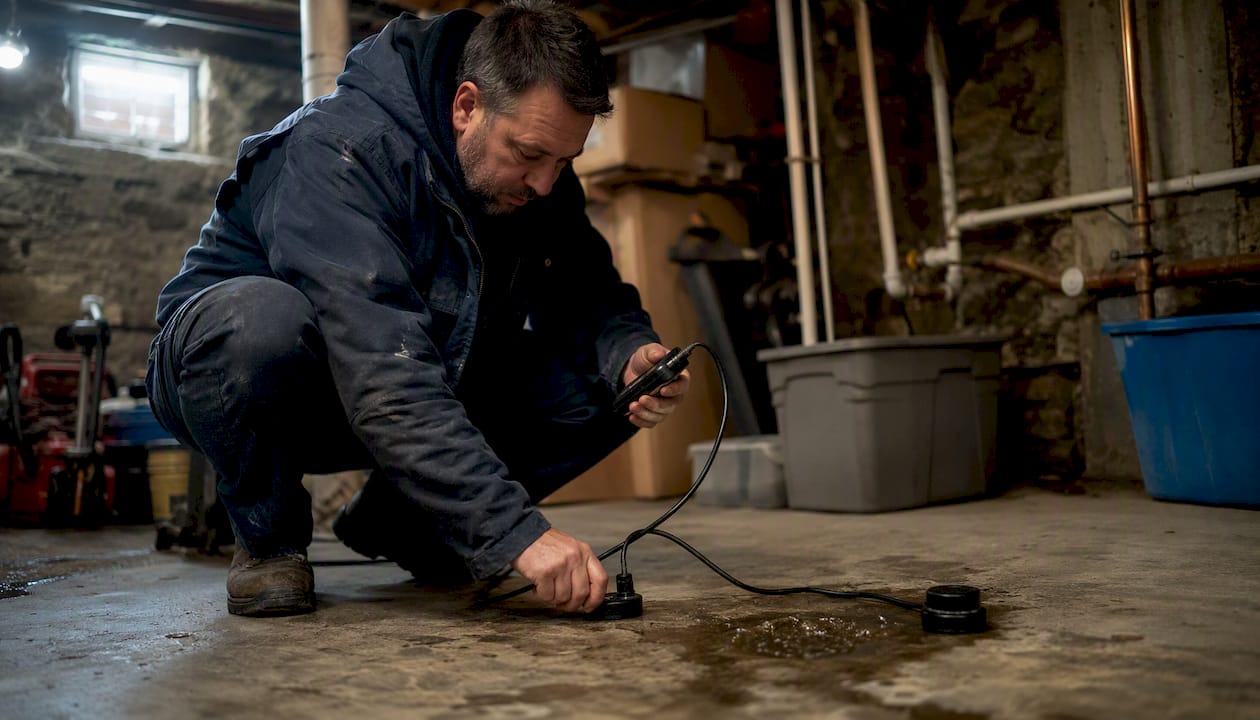
The most practical leak detection methods, matched to common scenarios: use the water-meter test as your first confirmation step; run a toilet dye test for flapper leaks; use acoustic listening or thermal imaging to localize hidden supply-line leaks without opening walls; and call in tracer-gas testing or video camera inspection for slab or underground leaks that resist everything else.
Here’s a quick map of each method and where it fits:
- Water-meter test — confirms a leak exists; free, takes 10 minutes, no tools needed
- Toilet dye test — catches silent flapper leaks; free, DIY-safe, per EPA WaterSense protocols
- Visual / soapy-bubble check — finds accessible joint and fitting leaks; free, low invasiveness
- Acoustic / electronic listening — locates buried or slab leaks by sound; low invasiveness, pro tool
- Thermal / infrared imaging — reveals wet insulation and hot-water line leaks through surfaces; non-invasive, pro tool
- Video pipe (camera) inspection — inspects drain and sewer lines internally; non-invasive for the pipe, requires access port
- Tracer-gas testing — pinpoints leaks under concrete or behind walls using hydrogen-based gas; non-invasive at the surface, requires licensed tech
- Pressure / hydrostatic testing — confirms a leak in an isolated section; low-to-moderate invasiveness
- Smart flow monitors — detects slow ongoing leaks continuously; permanent installation, point-of-entry or point-of-use
Key Takeaways
The most reliable path from suspected leak to confirmed repair is a tiered sequence: confirm with a meter test, localize with non-invasive tools, and escalate to tracer gas or camera inspection only when simpler methods leave the location unclear.
| Point | Details |
|---|---|
| Start with the meter test | Turn off all fixtures, check for meter movement; it’s free and confirms a leak in minutes. |
| Toilet dye catches silent waste | Drop dye in the tank and wait 10 minutes; color in the bowl means the flapper is leaking. |
| Non-invasive tools before cutting | Acoustic correlation and thermal imaging narrow the location without opening walls or floors. |
| Tracer gas for slab leaks | Hydrogen-based gas testing pinpoints leaks under concrete when acoustic and thermal methods can’t. |
| Ag-plumbing for Pittsburgh diagnostics | Ag-plumbing carries the full toolkit and provides a written finding before any repair work begins. |
Table of Contents
- How do you know if you have a leak before calling anyone?
- What’s the right order for diagnosing a leak?
- Non-invasive leak detection methods explained
- When non-invasive methods aren’t enough: advanced confirmatory techniques
- Smart leak detectors and flow monitors: point-of-use vs. point-of-entry
- How do the methods compare? A quick reference
- What does leak detection typically cost, and how long does it take?
- DIY checks you can do today vs. when to hire a licensed plumber
- How Ag-plumbing locates leaks in Pittsburgh
- The case for sequencing over speed
- Ag-plumbing can find and fix your leak in Pittsburgh
- Sources
- FAQ
How do you know if you have a leak before calling anyone?
The fastest early signals are a water bill that jumped without a clear reason, the sound of running water when every fixture is off, damp patches or staining on ceilings and walls, musty odors in enclosed spaces, and warm spots on a concrete floor above a hot-water line. Any one of these warrants a quick check before you spend money on diagnostics.
Run these checks in order:
- Water-meter test first. Turn off every fixture and appliance. Find your meter, note the reading, and wait 15–30 minutes without using any water. If the reading changes, or if the small flow-indicator dial on the meter is spinning, you have a leak somewhere in the system.
- Toilet dye test. Drop dye tablets or a few drops of food coloring into the tank (not the bowl). Wait 10–15 minutes without flushing. Color appearing in the bowl confirms the flapper is leaking — a common source of silent water waste.
- Isolate appliances. Shut off the supply to dishwashers, washing machines, and ice makers one at a time. Recheck the meter. This narrows whether the leak is in a fixed pipe or a flexible supply line.
- Check hose bibs and irrigation. Walk the perimeter and look for soggy soil near spigots or irrigation heads. A slow drip at a hose bib is easy to miss but adds up fast.
Pro Tip: Run the meter test before any other diagnostic. It costs nothing and tells you immediately whether you’re chasing a real leak or a billing anomaly. If the meter is stable, the problem is upstream of your meter or in the billing.
The EPA WaterSense pressure-loss and dye protocols use exactly this sequence: attach a pressure gauge, shut the supply, and check for pressure decay; then run the dye test on every toilet. These steps are the baseline for WaterSense home certification, which means they’re a solid standard for any homeowner to follow.
What’s the right order for diagnosing a leak?
Professionals follow a tiered sequence that moves from free and non-destructive toward targeted and confirmatory. Skipping tiers wastes money; reversing them risks unnecessary demolition.
Tier 1 — Confirm and roughly locate (DIY-capable):
- Water-meter test to confirm a leak exists
- Toilet dye test on every toilet
- Visual inspection of accessible pipes, joints, and fixtures
- Isolation of appliances and zones by shutting supply valves
Tier 2 — Non-invasive localization (usually requires a pro):
- Acoustic listening or noise correlation to narrow the leak to a section of pipe
- Thermal / infrared imaging to detect temperature anomalies through walls or floors
- Moisture probes in suspect areas to confirm dampness without opening surfaces
Tier 3 — Confirmatory and targeted (licensed tech required):
- Tracer-gas injection to pinpoint the exact leak point under concrete or behind walls
- Video camera inspection for drain, sewer, and accessible supply lines
- Hydrostatic / pressure testing on isolated sections to confirm integrity
Stop and call a plumber immediately if: you suspect a gas line is involved, the leak is near an electrical panel, you see evidence of structural movement or foundation cracking, or you’ve had repeated pressure loss that Tier 1 and 2 checks haven’t explained.
Pro Tip: Narrowing with acoustic or thermal tools before any cutting or excavation can reduce repair costs significantly. A correlator that pinpoints a slab leak to within a foot or two means one targeted core drill instead of a trench across the floor.
Oatey’s professional guide confirms this sequencing: pros select tools based on pipe material, accessibility, and noise environment, and they use non-destructive options first to avoid unnecessary openings.
Non-invasive leak detection methods explained
These are the workhorses of professional diagnostics. None of them require cutting into walls or digging up a yard to get useful information.
Acoustic listening and noise correlation
Leak noise travels through pipe walls and into surrounding material. A ground microphone or electronic listening device picks up that sound at the surface. Acoustic correlators go further: two sensors are placed at different points along a pipe, and the system calculates the leak location from the time difference in the signal arriving at each sensor. This is the standard approach for buried and slab leaks.
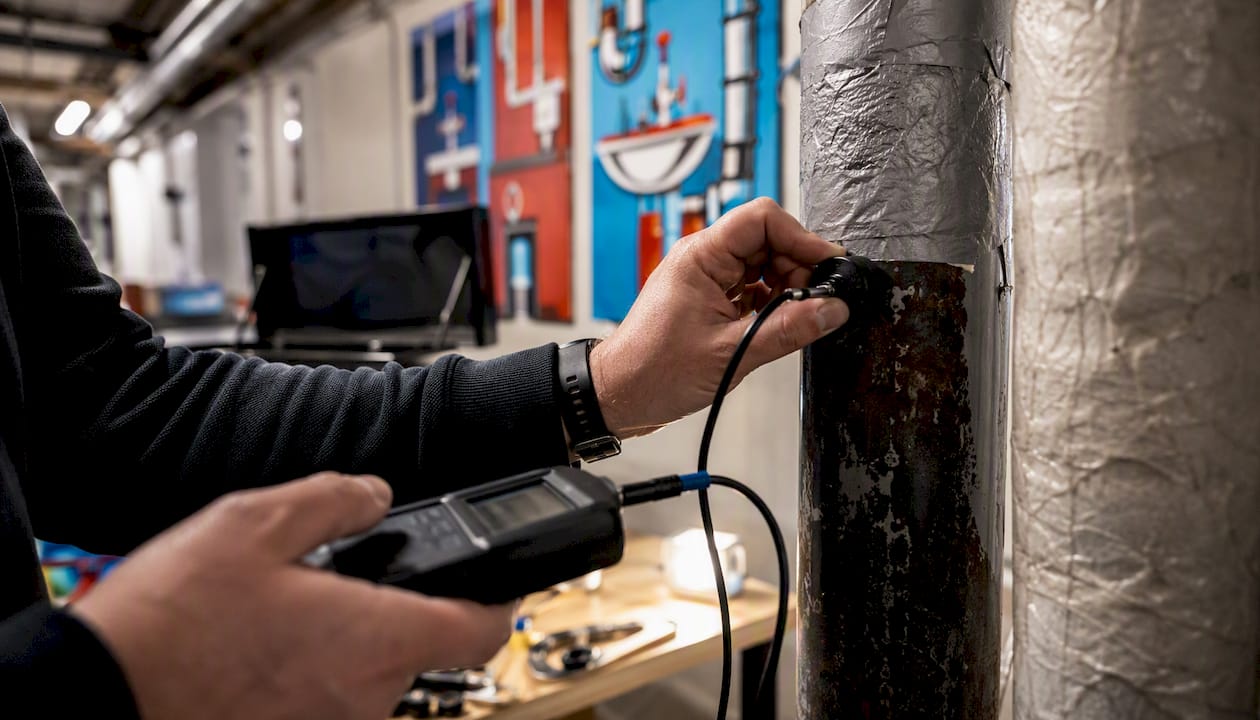
Limits: acoustic methods work best on metallic pipes. Plastic pipe absorbs sound more, which reduces signal strength. High ambient noise (traffic, HVAC) can also interfere. A peer-reviewed survey of leak detection technologies lists acoustic emission detection as one of the primary industrial and utility methods, alongside fiber-optic and ultrasonic sensors.
Thermal and infrared imaging
A thermal camera reads surface temperature differences. A leaking hot-water line warms the slab or wall above it; a cold-water leak in a warm space creates a cool patch. Neither requires contact with the surface. The technique works well on hot-water supply lines and wet insulation, where temperature differentials are clear.
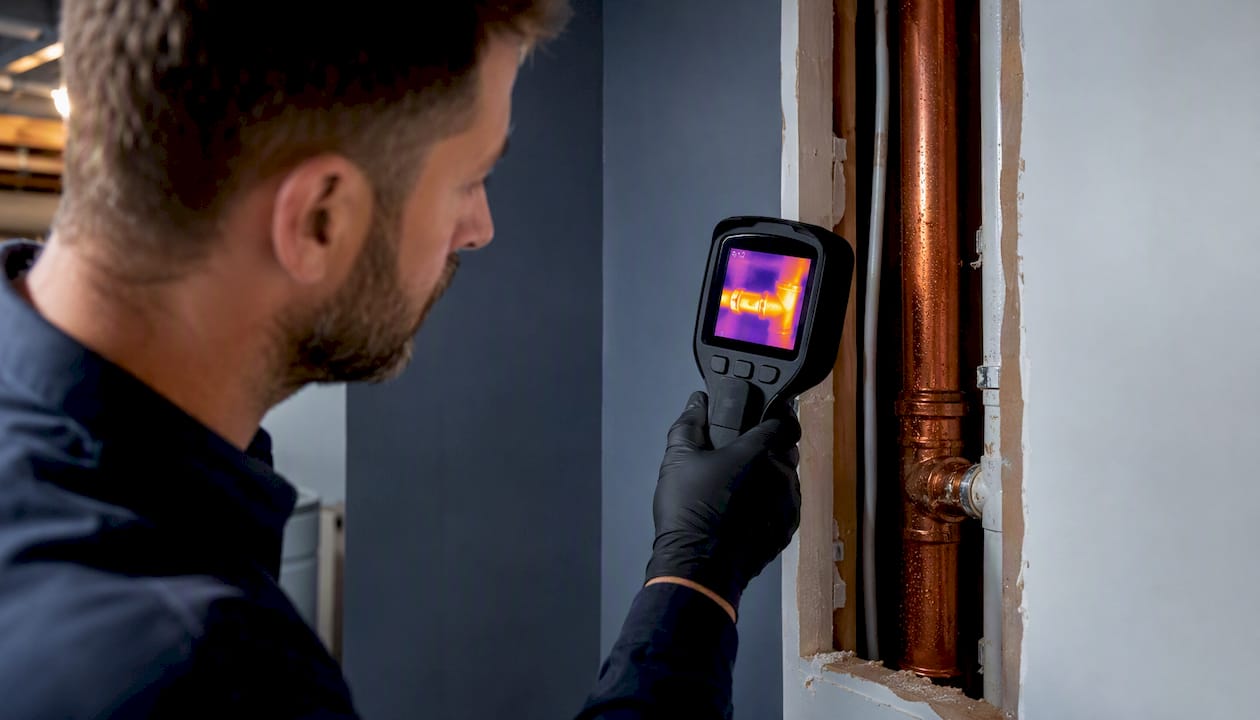
Caveats: ambient temperature, insulation thickness, and surface material all affect how readable the image is. A thermal camera shows a temperature anomaly, not a confirmed leak. A tech still needs to correlate the image with other findings before opening anything.
Moisture probes and point-of-use sensors
Probe-style moisture meters give a reading at a specific point in drywall, wood, or concrete. Wireless moisture sensors placed under sinks, near water heaters, or behind appliances send alerts when they detect dampness. Neither type locates a leak in a pipe, but both confirm that water is present in a specific area, which narrows the search considerably.
Video pipe (camera) inspection
A flexible camera on a cable goes into a cleanout or access port and travels through the pipe, transmitting live video. It’s the clearest way to see cracks, root intrusion, joint separation, or corrosion inside a drain or sewer line without excavation. For supply lines, it requires an access port but causes no structural damage. When camera inspection reveals a sewer defect, trenchless repair is often the logical next step.
Tracer dyes
Non-toxic fluorescent dyes added to a water system show up under UV light at the point of exit. They’re effective for visible flows, pool leaks, and HVAC condensate lines. For underground or concealed leaks, dye alone usually isn’t enough — the dye needs somewhere to emerge that you can actually see.
Combining two non-invasive methods before any confirmatory test is standard practice among experienced leak detection techs. Acoustic correlation narrows the location to a section; thermal imaging confirms a temperature anomaly at that spot. Together, they give enough confidence to make a targeted opening rather than a speculative one.
Pro Tip: If acoustic correlation puts the leak within a two-foot window and thermal imaging shows a warm patch in the same area, that’s enough to justify a single targeted core drill rather than opening the entire floor.
When non-invasive methods aren’t enough: advanced confirmatory techniques
Some leaks resist acoustic and thermal methods. The pipe material absorbs sound, the temperature differential is too small, or the leak is simply too deep. That’s when pros move to confirmatory techniques.
Tracer-gas testing
The most sensitive non-surface-destructive method available. Hydrogen molecules are small enough to migrate through concrete and soil and register on the detector even when the leak rate is very low. INFICON’s technical overview describes this as a final-step method for leaks beneath concrete or behind walls that other techniques couldn’t pinpoint.
Pros: extremely sensitive, no surface damage required, works through concrete slabs.
Cons: requires a licensed technician, the pipe must be drained and pressurized, and the gas mixture must be handled safely.
Pressure and hydrostatic testing
A technician isolates a section of pipe using plugs or valves, pressurizes it, and monitors for pressure decay over a set period. A drop in pressure confirms a leak in that section. Hydrostatic testing uses water pressure rather than air, which is safer for most residential pipe materials. The EPA’s standard test procedures for underground storage tanks describe formal hydrostatic and tracer-gas protocols for regulated systems, and the same principles apply to residential pressure testing.
Pros: definitive pass/fail result for a known section; relatively simple setup.
Cons: requires isolation of the section, which may mean shutting down part of the system.
Endoscopic inspection and targeted excavation
When a camera can’t reach a section and tracer gas gives a general area but not a precise point, a small endoscopic port (a drilled hole rather than a full opening) can let a tech visually confirm the defect. If the leak is in soil or under a driveway, soil probing with a rod locates the wet zone before any digging starts, reducing excavation to the minimum necessary.
Safety note: gas line work, confined-space entry, and any test involving pressurized gas requires a licensed technician. Electrical hazards near wet areas are a real risk. These are not DIY procedures.
Smart leak detectors and flow monitors: point-of-use vs. point-of-entry
The distinction matters for what you’re trying to catch. EPA WaterSense guidance on leak detection devices frames it clearly: point-of-use sensors detect local dampness at a specific location, while point-of-entry inline flow monitors watch whole-house consumption and can trigger alerts or automatic shutoffs when flow patterns indicate a leak.
Point-of-use devices:
- Wireless moisture sensors placed under sinks, near water heaters, behind toilets
- Alert via app when they detect water; some trigger a local alarm
- Low cost, easy to install, no plumbing modification needed
- Don’t detect leaks in walls, slabs, or buried lines
Point-of-entry devices:
- Installed on the main supply line; monitor flow rate continuously
- Detect slow leaks by flagging continuous low-level flow (e.g., flow at 3 AM when no one is using water)
- Higher-end models include automatic shutoff valves
- Require a plumber for installation; higher upfront cost
EPA WaterSense notes that inline devices often include shutoff valves and that combined systems reduce water loss and damage. The hybrid approach — a main-line flow monitor paired with local moisture sensors — gives both early warning of a slow leak anywhere in the system and immediate confirmation of where water is appearing.
Pro Tip: For vacation homes or properties left unoccupied for weeks at a time, a hybrid system is the most cost-effective protection available. A main shutoff triggered by abnormal flow stops a burst pipe from running for days; a local sensor under the water heater catches a slow drip before it becomes a mold problem.
How do the methods compare? A quick reference
Cost ranges are approximate and vary by region, site complexity, and whether excavation or additional access is required. Always request an itemized quote for confirmatory methods.
What does leak detection typically cost, and how long does it take?
The meter test and toilet dye check cost nothing and take under 30 minutes. Everything beyond that involves a technician’s time and equipment.
- Visual inspection and basic acoustic listening: typically $100–$250 for a service call; results in 30–60 minutes
- Acoustic correlation or thermal imaging: $150–$600 depending on site complexity; 45–120 minutes on-site
- Video camera inspection: $100–$400; 30–90 minutes including setup and review
- Tracer-gas testing: $300–$800; can take 2–4 hours including pressurization, scanning, and documentation
- Hydrostatic / pressure testing: $150–$400 per section; 1–3 hours depending on isolation complexity
Factors that push costs higher: slab or under-concrete location (requires pressurization and surface scanning), multiple potential leak points, need for utility locating before any excavation, and permit requirements for gas-line work.
Pro Tip: Ask for an itemized quote that separates the diagnostic fee from any repair estimate. A reputable tech will give you a written scope before starting confirmatory work. If a company won’t separate diagnostics from repair pricing, that’s worth noting.
DIY checks you can do today vs. when to hire a licensed plumber
Some of this you can handle yourself. Some of it you shouldn’t touch.
Safe DIY checks:
- Water-meter test (all fixtures off, check for movement)
- Toilet dye test on every toilet in the house
- Visual inspection of accessible pipes under sinks, in utility rooms, and at hose bibs
- Soap-bubble test on visible gas fittings (never use an open flame to check for gas)
- Checking for soggy soil near irrigation heads and outdoor spigots
Call a licensed plumber when:
- The meter test confirms a leak but visual checks find nothing obvious
- You suspect a slab leak (warm floor, sound of water under the slab, high bill with no visible source)
- The leak is near an electrical panel or in a wall with wiring
- You’ve had repeated pressure loss that returns after temporary fixes
- There’s evidence of mold, structural staining, or foundation movement
- Any gas line is involved
Questions to ask before booking a tech:
- What leak detection methods do you carry on the truck?
- Can you isolate sections of the system to narrow the location?
- Do you provide a written diagnostic report before quoting repairs?
- Are you licensed and insured for the type of work involved?
Pro Tip: Before the tech arrives, take a baseline water-meter reading and note which fixtures and appliances are off. That 10-second step gives the tech a starting point and can cut diagnostic time noticeably.
For a practical homeowner checklist, Ag-plumbing’s leak detection tips walks through the same sequence in plain language.
How Ag-plumbing locates leaks in Pittsburgh
Ag-plumbing follows the tiered non-invasive-first workflow described throughout this article. On a diagnostic visit, the team arrives with thermal imagers, acoustic correlators, video camera inspection equipment, tracer-gas capability, and in-line pressure testing tools. The goal is always to narrow the location with non-invasive methods before any surface is opened.
What the workflow looks like in practice:
- Confirm the leak with a meter check and pressure test on arrival
- Deploy acoustic correlation or thermal imaging to localize the source
- Use video camera inspection for any drain or sewer line concern
- Move to tracer-gas testing if the leak is under a slab or behind a wall and other methods haven’t pinpointed it
- Provide a written diagnostic finding and repair options before any work begins
Ag-plumbing has served Pittsburgh, PA and the surrounding areas for 30 years. That local experience matters: Pittsburgh’s older housing stock includes cast-iron drain lines, galvanized supply pipes, and clay sewer laterals that each respond differently to acoustic and camera inspection. Knowing which tool fits which pipe type is not something you learn from a manual.
When a leak is under a concrete slab, the difference between a tech who uses acoustic correlation and tracer gas versus one who guesses and cuts is often the difference between one targeted repair and a floor torn apart looking for the right spot.
Pro Tip: Before a diagnostic visit, clear access to the water meter, main shutoff, and any crawl space or utility room entry. A tech who can move freely through the space will finish faster and give you a more accurate finding.
When camera inspection reveals a sewer defect, Ag-plumbing integrates sewer repair and trenchless options directly into the repair quote, so you’re not starting over with a different contractor.
The case for sequencing over speed
Most homeowners who call a plumber after a high water bill want the leak found and fixed in one visit. That’s understandable. But the anxiety to act fast is exactly what leads to unnecessary demolition — a wall opened in the wrong spot, a floor cut where the leak isn’t.
The tiered approach isn’t slow. It’s precise. A meter test takes 15 minutes. Acoustic correlation takes an hour. Tracer gas takes a morning. Each step either closes the case or hands you a tighter target for the next one. Skipping to excavation because it feels decisive usually costs more time and money than working through the sequence.
For Pittsburgh homeowners especially, where older pipe materials are common and slab construction varies by neighborhood, non-invasive narrowing before any cutting is the standard Ag-plumbing applies on every diagnostic call.
Ag-plumbing can find and fix your leak in Pittsburgh
Thirty years of local experience means Ag-plumbing’s technicians have seen every leak scenario Pittsburgh’s housing stock produces: galvanized supply lines, clay sewer laterals, slab construction, and aging cast-iron drains. On a diagnostic visit, you get the full toolkit — acoustic correlation, thermal imaging, camera inspection, tracer-gas capability, and pressure testing — plus a written finding before any repair work begins.

If the camera finds a sewer defect, trenchless repair options are available without tearing up your yard. If the leak is in a supply line, targeted access keeps the repair footprint small. The diagnostic fee and repair estimate are always itemized separately, so you know exactly what you’re approving.
Serving Pittsburgh, PA and the surrounding areas. Schedule a diagnostic visit at Ag-plumbing or call to speak with a licensed technician today.
Sources
- EPA WaterSense — Free of leaks technical sheet (homes)
- Non‑Invasive Leak Detection: INFICON tracer gas overview
- How to Detect a Water Leak (2026) — Complete Guide
- How do plumbers find leaks? Professional guide — Oatey
- Review article on leak detection technologies — PMC
FAQ
What are the main leak detection methods?
The primary methods are the water-meter test, toilet dye test, acoustic listening and correlation, thermal/infrared imaging, video camera inspection, tracer-gas testing, and pressure/hydrostatic testing. Each fits a different leak type and location, from simple flapper leaks to buried slab leaks.
What are the two most common leak detection tests?
The water-meter test and the toilet dye test are the most widely used starting points. The EPA WaterSense protocol uses both as required verification steps for certified homes.
Which leak detection method is the most accurate?
Tracer-gas testing is generally the most precise for hidden leaks under concrete or behind walls, capable of pinpointing a leak to within inches using a handheld probe. Video camera inspection is equally definitive for drain and sewer lines because it provides direct visual confirmation.
What is the best leak detection system for a home?
A hybrid system combining a point-of-entry inline flow monitor with local moisture sensors gives the most complete coverage. The flow monitor catches slow leaks anywhere in the system; the moisture sensors confirm where water is appearing. EPA WaterSense guidance notes that combined systems reduce water loss and damage more effectively than either device type alone.
When should I call a plumber instead of testing myself?
Call a licensed plumber when the meter test confirms a leak but visual checks find nothing, when you suspect a slab leak, when the leak is near electrical components or a gas line, or when pressure loss keeps returning after temporary fixes. Ag-plumbing handles plumbing repair diagnostics in Pittsburgh, PA and the surrounding areas.
Recommended
- Leak Detection Tips for Homeowners: 10 Quick Checks – AG-Plumbing
- Leak detection in Pittsburgh: prevent costly damage – AG-Plumbing
- Why Fix Leaks Early: a Pittsburgh Homeowner’s Guide – AG-Plumbing
- Why Water Leaks Matter: A Homeowner’s Guide – AG-Plumbing
