
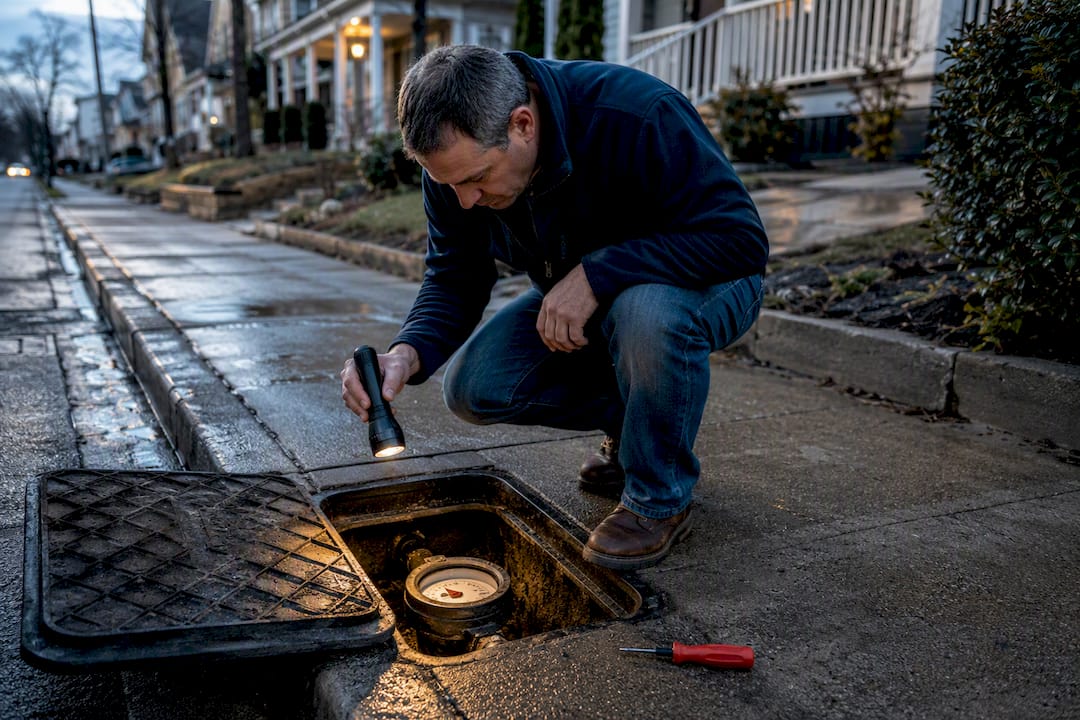
If your water bill spiked and nothing about your habits changed, run the meter test first. Turn off every tap, appliance, and irrigation zone, then watch the meter’s leak indicator. If it moves, or if two readings taken 30 minutes to two hours apart differ, you have a leak somewhere between the meter and your fixtures. Follow that with a 10-minute toilet dye test, since silent toilet leaks cause more high bills than any other single source.
TL;DR:
- Silent toilet leaks are the most common cause of unexplained high water bills and can waste hundreds of gallons daily without obvious signs.
- Running the meter test with all water sources off helps identify leaks, especially if the leak indicator moves or the readings differ over time.
- Leaks in irrigation systems or underground lines can be subtle but can cause significant water loss, requiring the irrigation valve to be fully shut off for accurate diagnosis.
- Appliance and softener cycles often mimic leaks and should be turned off during testing to avoid false positives.
- Documenting meter readings, dye tests, and repair receipts before calling professionals increases the chances of utility bill adjustments and successful leak resolution.
Table of Contents
- What’s Actually Causing Your High Water Bill Leak
- How to Run the Water Meter Test Step by Step
- Toilet Dye Test and Fixture Checks
- Checking Irrigation Systems and Underground Lines
- Appliances, Softeners, and Wells: Ruling Out False Alarms
- Reading Your Bill: Usage vs. Rate Changes
- When to Call a Plumber vs. Your Water Utility
- Field-Tested Tips From AG Heating, Cooling & Plumbing
- A Plumber’s Quick Rules for Diagnosing a High Bill
- Book a Leak Inspection With Ag-plumbing
- Sources
- FAQ
What’s Actually Causing Your High Water Bill Leak
Not every spike is a leak. Some are billing errors, rate hikes, or a teenager who discovered long showers. But when usage jumps and nobody’s behavior changed, the culprits tend to follow a predictable order. Testing in that order saves you time and stops you from chasing the wrong pipe.
Here’s the sequence that actually works, ranked by how often each one turns out to be the problem:
- Silent toilet leaks. A worn flapper or misadjusted fill valve can leak hundreds of gallons a day without a sound. This is the single most common cause of an unexplained spike, which is why the dye test comes before anything else.
- Irrigation and sprinkler leaks. Underground zone lines crack, valves stick open, or heads misalign, and because the system runs automatically, nobody notices until the bill arrives.
- Appliance and softener cycles. Ice makers, dishwashers, and water softeners regenerate on timers and can mimic a leak on the meter if you don’t shut them off during testing.
- Service-line or slab leaks. These hide underground or inside a foundation. They’re less common but far more expensive, both in water wasted and in repair cost.
- Billing and rate changes. Sometimes the water is fine. A tiered rate structure, a drought surcharge, or an estimated read can inflate a bill with no leak at all.
Test in this order because a toilet leak is cheap and fast to rule out, while excavation for a slab leak is neither. Starting with the meter test alone, without isolating irrigation and appliances first, is how homeowners get false readings and waste a weekend chasing a phantom leak that was actually the ice maker refilling.
How to Run the Water Meter Test Step by Step
Your water meter is the most reliable diagnostic tool you own, and it’s already installed. Most meters sit in a concrete box near the curb or street, though older homes sometimes have them in a basement or crawlspace. Lift the lid and look for a small triangle, star, or gear symbol. That’s your leak indicator, and it spins whenever water is flowing anywhere in the house.
Before you test anything, shut off every water source: taps, the dishwasher, the washing machine, the ice maker, the water softener, and any irrigation controller. Skipping one of these is the most common reason homeowners get a false leak reading.
You have two solid testing options:
- The 30-minute sensitivity check. Confirm nothing is running, then watch the leak indicator for a few minutes. Any movement at all means water is flowing somewhere it shouldn’t be.
- The EPA two-hour protocol. Record the exact meter number, wait two hours with everything off, then read it again. Any difference in the numbers confirms a leak and gives you a rate to work with.
To estimate your loss in gallons per day, subtract the first reading from the second, then scale that difference to a full 24 hours. A small twitch on the indicator usually points to a minor leak, like a slow toilet fill valve. A steady, fast spin signals a bigger problem, often a supply line or a running toilet with a fully open flapper.
Pro Tip: If the meter moves even with your main house shutoff valve closed, the leak is on the utility’s side of the line, between the meter and the street. That’s a call to your water provider, not a plumber.
How much water is too much? The EPA flags any household using more than 12,000 gallons in a single winter month as a likely sign of a serious leak, since that’s roughly 400 gallons a day for a family of four with no irrigation running. Compare that number against your own billed usage before you assume everything’s normal.
If your readings show steady, unmistakable flow with everything off, you’ve confirmed a leak. The next step is figuring out exactly where, and that starts with the toilet.
Toilet Dye Test and Fixture Checks
Toilets account for more mystery water loss than any other fixture in the house, mostly because a leaking flapper or fill valve makes no noise you’d notice. The fix is a $5 test you can run in ten minutes.
- Lift the toilet tank lid and add several drops of food coloring or a dye tablet to the tank water, not the bowl.
- Wait 10 minutes without flushing.
- Check the bowl. If color shows up there, water is leaking past the flapper seal into the bowl and down the drain, silently, all day long.
A positive dye test almost always traces back to one of two parts: a worn rubber flapper that no longer seals, or a fill valve that keeps cycling because the water level sits too high. Both are inexpensive fixes, usually $10 to $20 in parts, and most homeowners can swap a flapper themselves in under 15 minutes. A fill valve replacement takes a little more patience but is still a standard DIY job.
While you’re at it, check every faucet and showerhead for drips. A slow, steady drip from a faucet can add up to a significant amount of water lost over a year, which is exactly the kind of loss that never shows up as an obvious puddle. If a fixture keeps leaking after you replace the washer or cartridge, or if you notice water pooling anywhere it shouldn’t after a repair, stop the DIY approach and call a plumber before it turns into a bigger job.
Checking Irrigation Systems and Underground Lines
If your toilets pass the dye test clean, walk your yard next, ideally while the irrigation system is actually running. Look for misting where there shouldn’t be any, soggy patches between zones, sunken or unusually green grass, and heads that tilt or spray sideways instead of in their intended pattern.
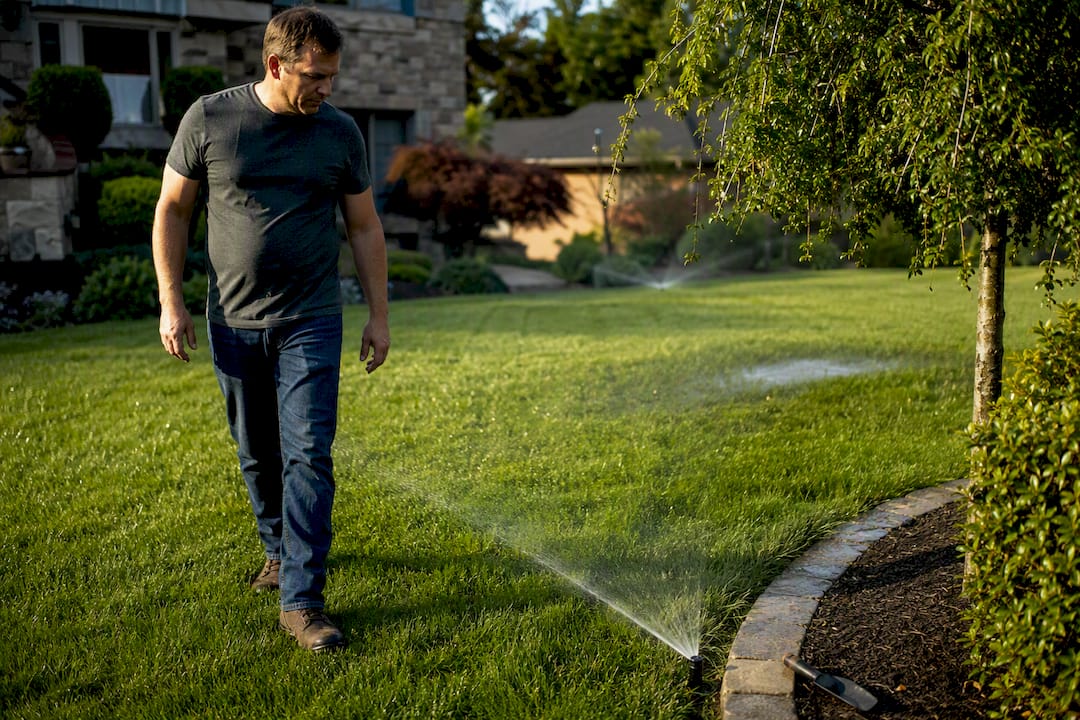
Small damage here matters more than it looks. A leak as narrow as 1/32 of an inch in an irrigation line can waste around 6,300 gallons a month, which is enough to double or triple a normal bill on its own. That’s a pinhole, not a burst pipe, and it’s exactly the kind of damage that goes unnoticed for months underground.
Watch for these signs of a deeper, underground problem beyond the sprinkler lines:
- Unexplained wet spots in the yard, especially away from any planting bed or downspout
- Warm patches on flooring inside the house, which can indicate a hot water line leaking under a slab
- Cracks or shifting in the foundation that appeared alongside the higher bill
- A section of lawn that stays lush and green even during dry spells
To isolate irrigation from your meter test, shut off the irrigation valve completely, not just the controller, before you check the meter. A programmed controller that’s simply “off” can still leave the backflow valve or a zone valve partially open. If the meter stops moving once irrigation is fully isolated, you’ve found your leak. If it keeps moving, the problem is likely a service line or something underground that needs a professional with acoustic or tracer-gas detection equipment.
Appliances, Softeners, and Wells: Ruling Out False Alarms
Automatic systems are the number one reason homeowners think they have a leak when they actually have a machine doing exactly what it’s programmed to do. Before you trust any meter reading, shut down anything that runs on its own schedule.
Turn off or disconnect these before testing:
- The refrigerator’s ice maker line
- The water softener, especially during a regeneration cycle
- Any whole-house humidifier tied into the plumbing
- A well pump, if your water comes from a private well
A softener mid-regeneration can pull water for 20 to 40 minutes and look identical to a leak on your meter. A struggling well pump can cycle on and off erratically, creating the same false signal. Skipping this step is a common reason people testing for a leak on their own end up frustrated.
That said, real appliance failures do happen. A musty smell near the dishwasher or washing machine, warped flooring, or a slow steady drip under an appliance usually points to a failed supply hose or a cracked internal fitting. Replacing a supply line is a simple owner fix. A failing internal valve or a softener that won’t stop cycling is worth a call to an appliance tech or plumber before it causes water damage.
Reading Your Bill: Usage vs. Rate Changes
Sometimes the pipes are fine and the bill is the problem. Before assuming a leak, compare gallons used per day across a few billing periods, not just the total dollar amount, since a longer billing cycle alone can make a normal bill look inflated.
Check for these before calling a plumber:
- Whether the bill says “estimated” instead of “actual,” which means the utility guessed your usage instead of reading the meter
- Whether your rate tier changed, since many utilities charge more per gallon once you cross a usage threshold
- One-time charges like drought surcharges, infrastructure fees, or late penalties that raise the total without any change in actual water use
- Whether the billing period is longer or shorter than your last cycle, which skews the raw total even if daily usage stayed flat
If the numbers still don’t add up after checking all of that, contact your utility and ask for a meter test or a formal billing review. Bring your own physical meter reading, dated photos, and, if you’ve already found and fixed a leak, any repair receipts. Many utilities, including Portland’s water bureau, offer documented leak-adjustment programs, but they typically require proof that the leak existed and was repaired within a specific window.
When to Call a Plumber vs. Your Water Utility
Not every high bill needs a plumber, and not every leak needs a utility call. Knowing which is which saves you a wasted service visit.
- Call the utility first if the meter moves but everything inside your house checks out clean, meaning the leak sits between the meter and the street. That section belongs to the utility in most jurisdictions, not to you.
- Call a licensed plumber for a confirmed leak inside your home’s plumbing: a running toilet that won’t stop after a flapper replacement, a suspected slab leak, an underground line leak on your side of the meter, or any sign of structural water damage.
- Prepare your documentation before either call. Bring before-and-after meter readings, dated dye-test photos, notes on which appliances you shut off during testing, and at least two or three billing statements showing the usage trend.
- Ask the right questions when you call a plumber: What detection method will they use, acoustic sensors, tracer dye, or a camera inspection? Will they need to excavate, and is a permit required? Can they give a written estimate breakdown before starting work?
A plumber who can answer those clearly, and who explains the detection method before quoting a price, is the one worth hiring.
Field-Tested Tips From AG Heating, Cooling & Plumbing
After three decades of chasing leaks across Pittsburgh basements, yards, and slabs, a few patterns hold up every time. The homeowners who get fast utility adjustments are almost always the ones who documented everything before they called for a repair.
- Photograph your meter reading with a timestamp, both before and after any test, and keep every receipt from a repair.
- On a professional leak-detection visit, expect a staged process: meter isolation, dye or tracer testing, acoustic listening equipment, a pressure test, and a camera inspection before anyone recommends excavation.
- Never force a stuck main shutoff valve. If it doesn’t turn, or if you smell gas near a water line, stop and call a professional immediately rather than risking a bigger failure.
- High household water pressure, above roughly 70 to 80 psi, can force seepage through fittings that would otherwise hold, so a pressure check is worth asking for if leaks keep recurring.
- Excavation is always the last resort, not the first assumption, even when a leak seems obviously underground.
Reading a meter or dyeing a toilet tank is well within any homeowner’s ability. Deciding whether a wet patch means a cracked slab or a stray sprinkler head is where experienced leak detection actually earns its cost.
A Plumber’s Quick Rules for Diagnosing a High Bill
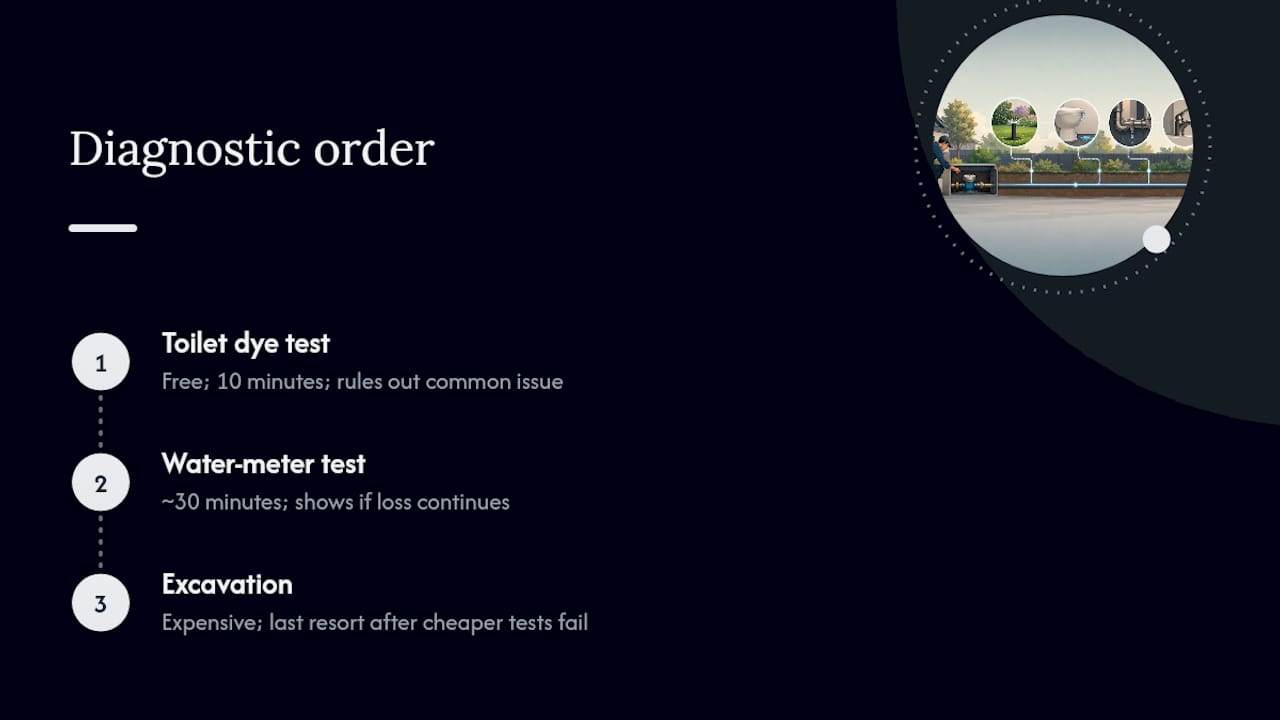
Toilet first, meter second, excavation last. That order isn’t arbitrary. It’s a cost hierarchy: the dye test costs nothing and rules out the most common problem in ten minutes, the meter test costs you thirty minutes and tells you whether to keep looking at all, and digging is the expensive last resort you only reach for after everything cheaper has failed to explain the water loss.
Most homeowners can handle a flapper swap, a fill valve adjustment, or a supply hose replacement without help. Where I’d draw the line is anything involving a shutoff valve that won’t budge, a meter that keeps spinning with the whole house isolated, or a wet spot that keeps reappearing in the same place. Those point to something structural, not cosmetic.
Good documentation for a bill adjustment is simple: a dated photo of your meter, a dated photo of your dye test result, and your repair receipt. Utilities move faster on adjustment requests that arrive with proof already attached.
— Maayan
Book a Leak Inspection With Ag-plumbing
Chasing a high water bill leak on your own only goes so far. Once you’ve isolated the problem to a service line, a slab, or an irrigation system that won’t stop losing water underground, A plumbing company with extensive local experience can finish what the meter test started, using licensed technicians who employ camera inspection and provide documented findings your utility may accept for a bill adjustment.

Before your visit, gather what you’ve already collected: meter photos with timestamps, your dye-test result, and two or three recent billing statements showing the usage jump. That paperwork lets a technician skip straight to confirming the leak’s location instead of repeating tests you’ve already run. Ag-plumbing’s team handles everything from plumbing repair for a stubborn running toilet to full sewer repair when the line under the yard turns out to be the real source. Discounts may be available for seniors, military members, and new customers, and the company holds BBB accreditation that can be verified before booking. If your meter test came back positive and you’re ready for someone to find the exact leak point, contact Ag-plumbing to schedule an inspection.
Sources
A few official references back up nearly everything in this guide, and they’re worth bookmarking if you want to verify a number or re-run a test later:
- Fix a Leak Week | US EPA
- Why Is My Water Bill So High? Causes Ranked by Likelihood | Utility Explained
- Why is my bill high? | KC Water
FAQ
Why is my water bill so high with no leaks?
A high bill without a leak usually usually traces back to a rate or tier change, an estimated meter read that overshoots actual usage, or a longer billing cycle than your previous statement. Compare gallons used per day, not just the dollar total, across two or three bills before ruling out a hidden leak entirely.
What is the most common cause of a high water bill?
A silent running toilet is the single most frequent culprit, since a worn flapper or misadjusted fill valve can leak for weeks without any visible sign. The 10-minute dye test catches this faster than any other diagnostic step.
How much can a leaky faucet raise your water bill?
A single dripping faucet seems minor day to day, but the loss compounds over months into real gallons and real dollars. A running toilet or a constantly leaking fixture scales into the hundreds of gallons per day, illustrated by NYC’s own cost breakdown showing how a leaking fixture stacks up against a slow seep over a year.
How do I know if the leak is my responsibility or the utility’s?
Run the meter test with your main shutoff valve closed. If the meter still moves, the leak sits between the meter and the street, which is typically the utility’s section of pipe, not yours.
What should I do if I find a leak I can’t fix myself?
Document the meter readings, dye-test photos, and any visible damage, then contact a licensed plumber for anything involving a slab, a service line, or a shutoff valve that won’t operate. Ag-plumbing’s leak detection services cover exactly this kind of diagnosis for Pittsburgh-area homes.
Recommended
- Leak Detection Tips for Homeowners: 10 Quick Checks
- Why Water Leaks Matter: A Homeowner’s Guide
- Why Fix Leaks Early: a Pittsburgh Homeowner’s Guide
- Top Leak Detection Methods for Homeowners and Pros
