
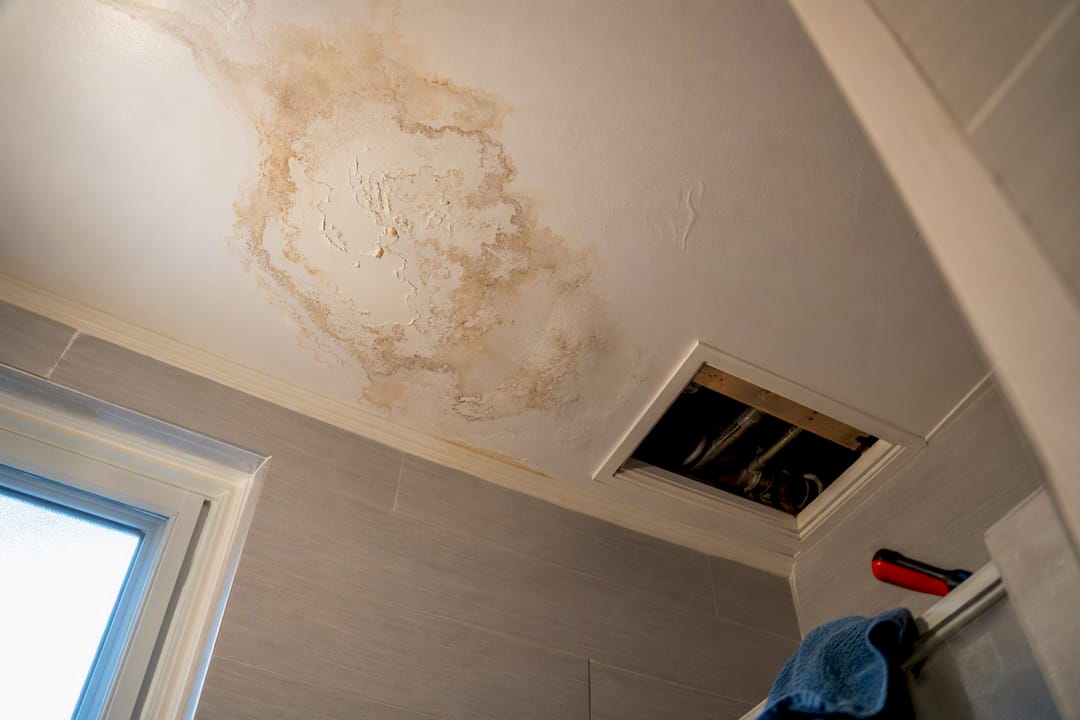
If water is actively dripping or pooling on your ceiling below a bathroom, shut off the water source and clear the area now. Kill the power at the breaker for that room if water is anywhere near a light fixture or outlet. Then place a bucket under the worst spot, and if the ceiling is bulging, poke a small controlled hole at the lowest point so it drains into the bucket instead of collapsing on its own.
TL;DR:
- Most ceiling leaks from bathrooms are caused by slowly failing wax rings or shower pan seals, often visible as stains long before they worsen.
- A bulging ceiling indicates pooled water and requires controlled drainage through a small hole to prevent collapse.
- Continuous leaks with water near electrical fixtures demand shutting off power immediately and possibly the main water supply to prevent hazards.
- Fixing the source before drying and repair is crucial, as sealing wet materials can lead to mold growth and recurring damage.
- Professional diagnosis with moisture meters and acoustic detection can identify hidden leaks, saving time and reducing unnecessary demolition costs.
Table of Contents
- Finding the Source of a Ceiling Leak From a Bathroom
- Is This a Ceiling Leak Emergency?
- Containing the Damage Before Help Arrives
- When to Call a Plumber for a Bathroom Ceiling Leak
- Drying Out and Repairing the Ceiling the Right Way
- What 30 Years of Bathroom Leak Calls Have Taught Us
- Why the Standard Advice on Ceiling Leaks Misses the Point
- Get Your Bathroom Ceiling Leak Fixed by Local Pittsburgh Plumbers
- Sources
- FAQ
Finding the Source of a Ceiling Leak From a Bathroom
The timing of the leak tells you almost everything before you touch a single pipe. A stain that only spreads right after someone flushes points to the toilet. One that only appears when the shower is running usually means the drain assembly or the caulk line has failed. A leak that never stops, even with every fixture off, means a pressurized supply line is cracked or loose somewhere in the wall or floor.
Start with the toilet. Check for water pooling around the base, rock the bowl gently to see if it shifts on its wax ring, and drop food coloring into the tank. If color shows up in the bowl without flushing, the fill valve or flapper is leaking internally, though that alone won’t cause ceiling damage. A wobbling bowl or a ring of grime at the base almost always means the wax ring has failed, letting water seep down through the subfloor with every flush.
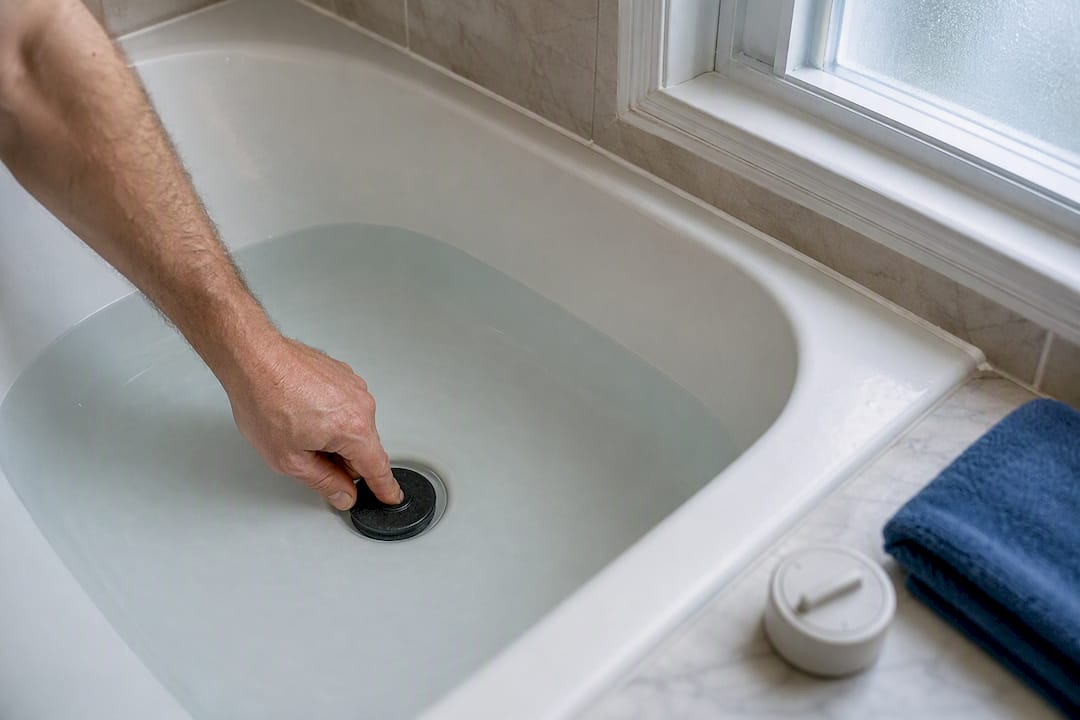
Move to the shower or tub next. Plug the drain, fill it a few inches, and watch for any drop in water level over ten minutes, which signals a bad drain gasket or cracked shower pan. Run your fingers along the grout and caulk lines. Cracked or missing caulk around the tub lip is one of the most common failure points in older bathrooms, and it lets shower water track behind the tile with every use.
Check the sink last. Clear out the vanity cabinet and look at the P-trap and the flexible supply lines feeding the faucet, since these connections loosen over years of use and drip slowly onto the cabinet floor before ever reaching the ceiling below.
If the stain only shows up during or after heavy rain, the source might not be your plumbing at all. Check the bathroom exhaust vent and any roof penetrations nearby.
Pro Tip: Shut off every fixture in the house, then check your water meter. If the meter is still spinning with nothing running, you have a pressurized supply leak, not a drain-side problem, and that changes how urgently you need a plumber.
Is This a Ceiling Leak Emergency?
Not every drip is a crisis, but some signs mean you stop reading and start acting.
- Sagging or bulging drywall signals water has pooled in the cavity above and structural collapse is a real risk. Controlled drainage of that bulge, a small hole poked at its lowest point with a screwdriver, releases the trapped water safely instead of letting the ceiling give way on its own.
- Water near light fixtures, outlets, or wiring means you cut power to that circuit at the breaker box before doing anything else. Never touch a wet switch or fixture with the power still on.
- A steady, unrelenting flow that doesn’t slow when fixtures are off means a supply pipe has burst or cracked under pressure. Shut off the fixture valve first; if you can’t locate it or the flow doesn’t stop, shut off the main water supply to the house.
- Rapid, heavy flow accompanied by cracking sounds from the ceiling means you get people out of the room immediately, then address water and power.
Photograph everything before you clean up. Wet ceilings, warped floors, water stains, and the fixture you suspect caused it all matter later, both for your plumber’s diagnosis and for any insurance claim you might file.
Containing the Damage Before Help Arrives
Once the immediate danger is handled, focus on limiting how much water damage spreads while you wait for repairs.
- Slide buckets or bins under active drips, and lay tarps or towels across the floor beneath the affected ceiling.
- Move furniture, rugs, and electronics out of the drip zone, and pull anything already wet off the floor so it doesn’t wick moisture into carpet or wood.
- Locate the toilet’s shutoff valve behind the base or the sink’s valves under the cabinet, and turn them clockwise to stop flow to that specific fixture without killing water to the whole house.
- If the main shutoff is your only option, know its location ahead of time. It’s usually near the water meter or where the main line enters the house.
- For a bulging ceiling, drain it at the lowest point of the sag into a bucket held directly underneath, working slowly so the water releases in a controlled stream rather than all at once.
Resist the urge to patch, paint, or sand anything while the cavity above is still wet. A homeowner who repaints a damp ceiling patch is usually looking at mold and a second repair within a few months, because sealing in moisture is exactly how hidden mold gets started.
When to Call a Plumber for a Bathroom Ceiling Leak
Call a plumber immediately if you’re dealing with a steady, pressurized leak you can’t stop at the fixture valve, a ceiling that’s sagging or bulging, any contact between water and electrical components, or a leak source you simply can’t pin down after checking the toilet, shower, and sink.
Professionals have tools that go beyond visual inspection. Moisture meters, thermal imaging cameras, and acoustic leak detection let a technician find a hidden pipe leak inside a wall or floor without tearing out drywall to guess. That precision usually saves money compared to blind demolition.
Typical repairs include:
- Replacing a failed wax ring under the toilet
- Re-sealing or replacing a shower pan or drain flange assembly
- Repairing or replacing a cracked or loosened supply line
On insurance: sudden and accidental leaks are commonly covered, like a burst supply line, while gradual leaks tied to deferred maintenance, like a slowly failing wax ring you ignored for months, are often excluded. Weigh the repair cost against your deductible before filing, and keep every receipt and photo either way.
Drying Out and Repairing the Ceiling the Right Way
Fixing the leak is only step one. The cavity above your ceiling needs to dry completely before anyone touches drywall or paint.
Run fans and a dehumidifier in the room for several days, and pull down any wet insulation or waterlogged drywall rather than trying to dry it in place. Saturated drywall rarely regains its structural strength even after it looks dry.
Mold becomes a real concern fast once moisture sits trapped in a ceiling cavity. Small, isolated spots you can reach and clean yourself are usually manageable, but visible mold covering more than roughly 10 square feet, or any mold near ductwork or affecting someone with respiratory issues, calls for a remediation professional rather than a DIY bleach solution.
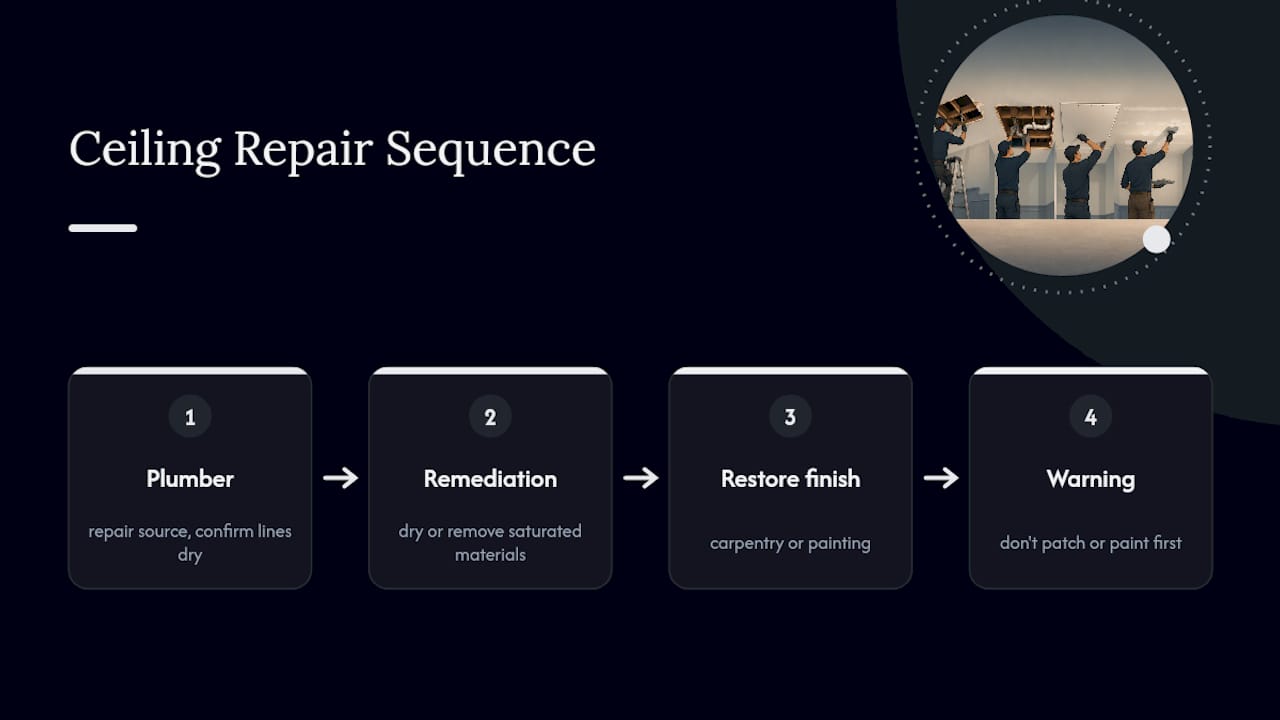
Resist patching or painting until you’ve confirmed the area is fully dry and the leak source is actually fixed, not just quieter. The right order is: plumber repairs the source and confirms the lines are dry, remediation removes anything wet beyond saving, then a carpentry or paint contractor restores the finish. Skipping that sequence, or reversing it, is the single biggest reason homeowners deal with the same ceiling stain twice. If your situation involves storm damage or a roof source above the bathroom, a restoration specialist can handle structural drying alongside the repair.
What 30 Years of Bathroom Leak Calls Have Taught Us
Ag-plumbing has spent three decades responding to exactly this scenario across Pittsburgh homes, and the pattern rarely changes. Wax rings and shower pan seals fail slowly, homeowners notice the stain long before they smell trouble, and by the time a call comes in, the fix is usually smaller than the anxiety suggests.
The failure our technicians see most often isn’t the leak itself. It’s someone patching the ceiling before confirming the source is dry, which means a second visit and a second repair bill within the year. Getting the sequence right the first time, fix, dry, then finish, is what actually saves homeowners money.
Why the Standard Advice on Ceiling Leaks Misses the Point
Most guides treat a ceiling leak like a single event: find it, fix it, done. That’s not how these leaks actually behave. A wax ring or caulk seam fails gradually, dripping for weeks before a stain ever shows, which means the visible damage you’re reacting to is often the tail end of a much longer problem, not the start of one.
The conventional advice to “call a plumber right away” also skips a step that actually matters: doing your own five-minute fixture check first. Knowing whether your leak tracks with flushing, showering, or nothing at all turns a vague service call into a specific one, and that specificity is what keeps a diagnostic visit from turning into an hour of guesswork billed at an hourly rate.
If there’s one thing worth prioritizing above all else, it’s patience on the back end. The urge to paint over a stain the same week the leak stops is understandable and almost always premature. Dry first. Fix cosmetics second. Every callback we see for repeat mold traces back to someone skipping that order.
— Maayan
Get Your Bathroom Ceiling Leak Fixed by Local Pittsburgh Plumbers
Checking a wax ring or timing a shower drip is something you can handle yourself. Tracing a hidden supply leak inside a wall, or confirming a cavity is truly dry before you close it back up, is where a trained eye pays for itself. Ag-plumbing brings 30 years of exactly this kind of diagnostic work to homes across Pittsburgh, with the moisture meters and acoustic detection tools to find the source without tearing your bathroom apart guessing.

If you’ve already run through the checks in this guide and you’re still not sure whether it’s your toilet, your shower pan, or a supply line, that’s exactly the call worth making. Ag-plumbing’s plumbing repair services cover wax ring replacement, shower pan and drain flange repair, and supply-line fixes, all diagnosed on-site before any work starts. Reach out through Ag-plumbing to get a technician scheduled and stop guesswork before it turns into a second repair bill.
Sources
- Emergency roof leak steps | Angi
- How to deal with bathroom ceiling leaks | American Family Insurance
- Leaks, water damage and mold | Office of the Insurance Commissioner
- How Insurance Covers Ceiling Leaks: Everything You Need to Know About Ceiling Leak Claims | ClaimsMate
FAQ
What should I do first if water is leaking through my ceiling from a bathroom?
Shut off the water at the fixture or main, cut power to the room if water is near any electrical components, and contain the flow with buckets or a controlled drainage hole if the ceiling is bulging.
Does homeowners insurance cover a ceiling leak from a bathroom?
Usually yes for sudden, accidental leaks like a burst supply line, but coverage often excludes gradual leaks tied to long-term neglect, so document the damage and timeline carefully before filing.
Can I ignore a small ceiling water leak?
No. Even a small, slow leak feeds mold growth inside the ceiling cavity and typically signals a fixture problem, like a failing wax ring or worn caulk, that only gets more expensive to fix the longer it runs.
How long can a leaking ceiling be left before it needs repair?
Address it as soon as you spot it. A leak left for days can saturate drywall and insulation beyond saving, and one left for weeks raises real mold risk, so the safest window for a simple fix is now, not later.
How do I know if the leak is coming from the toilet, shower, or a pipe?
Match the timing: leaks right after a flush point to the toilet, leaks during a shower point to the drain or caulk, and a leak that continues even with every fixture off means a pressurized supply line is the culprit.
Recommended
- Why Fix Leaks Early: a Pittsburgh Homeowner’s Guide
- Leak detection in Pittsburgh: prevent costly damage
- Top bathroom plumbing ideas for Pittsburgh homeowners
- Why Water Leaks Matter: A Homeowner’s Guide
