
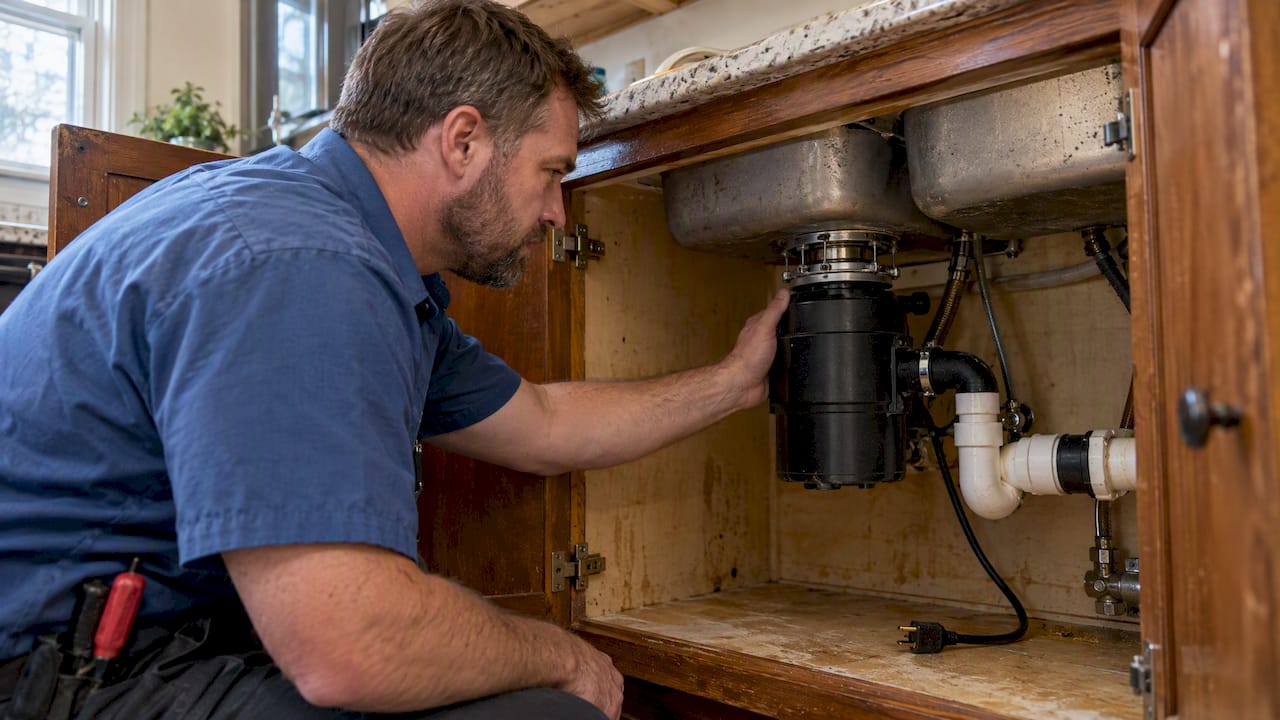
If your garbage disposal hums but won’t run, it usually means the motor has power but the grinding disk is jammed. Cut the power first, then try freeing the jam with the manual wrench before pressing reset. If you smell burning, see a leak, or the reset trips repeatedly, stop and call a professional rather than forcing it.
TL;DR:
- The typical cause of a humming garbage disposal is a mechanical jam, often caused by foreign objects like bones or fibrous waste lodged in the rotating parts.
- Cutting power and using a hex wrench to manually turn the grinding plate usually frees the jam within minutes, preventing the need for replacement.
- Repeatedly pressing the reset button without clearing the jam risks overheating the motor and may cause further damage, especially if the motor shows signs of failure.
- Proper installation and even mounting alignment prevent vibrations and hums from day one, reducing the chance of jams and mechanical issues.
- Regular weekly cleaning with ice and baking soda, along with mindful use avoiding fibrous or chunky waste, can stop most disposers from humming or jamming prematurely.
Table of Contents
- Essential safety steps before you touch anything
- Quick checklist you can run through in under five minutes
- How to free a jam with the hex wrench and remove debris safely
- Reset procedure, breaker checks, and diagnosing motor failure
- Everyday habits that prevent humming and jams
- Clear red flags and what a plumber will do on a service visit
- Why trust this guidance: field experience behind every step
- How to lubricate the disposal unit if applicable
- What warranty coverage typically includes for humming or jams
- A step-by-step guide to diagnosing a humming disposal
- Common causes of humming beyond jams and motor failure
- Why proper installation and alignment prevent humming
- Tips for safely removing lodged objects
- What matters most when your disposal starts humming
- A licensed option when the hum won’t quit
- FAQ
- Sources
Essential safety steps before you touch anything
A humming disposal is still a live electrical appliance, so treat it that way before you do anything else. Kill the power at the wall switch, unplug the unit under the sink, or flip the dedicated breaker, and confirm it’s dead before reaching near the chamber.
- Never put your hand inside the disposer, even with the power off; use long-handled tongs, pliers, or the hex wrench from below instead.
- Clear any standing water in the sink before working, and wear gloves and eye protection.
- Stop immediately and call a professional if you smell burning, see smoke, or notice a leak, since that points to electrical or motor failure rather than a simple jam, according to Whirlpool’s jam-clearing guidance.
Pro Tip: Keep one hand on the breaker switch mentally, not literally, until the job is done. Re-check that the unit is powered off before every hands-near-the-chamber step, not just at the start.
Quick checklist you can run through in under five minutes
Most humming disposals get fixed with a short, ordered routine. Work through these steps in order rather than jumping ahead.
- Cut power at the switch, cord, or breaker, and confirm the unit is dead.
- Press the reset button gently; if it won’t stay depressed, wait 10 to 20 minutes for the motor to cool.
- Insert a 1/4-inch Allen wrench or the supplied wrenchette into the bottom-center hex hole and work it back and forth.
- Shine a flashlight down into the chamber and remove any visible debris with tongs or pliers, never your hand.
- Restore power and run cold water while testing the unit briefly.
- If humming continues or the reset keeps tripping, move on to electrical checks or call a plumber.
This sequence mirrors the manufacturer approach: turn off power, free the disk, remove debris, cool the motor, reset, then restart with water, as described in Whirlpool’s disposer troubleshooting steps.
How to free a jam with the hex wrench and remove debris safely
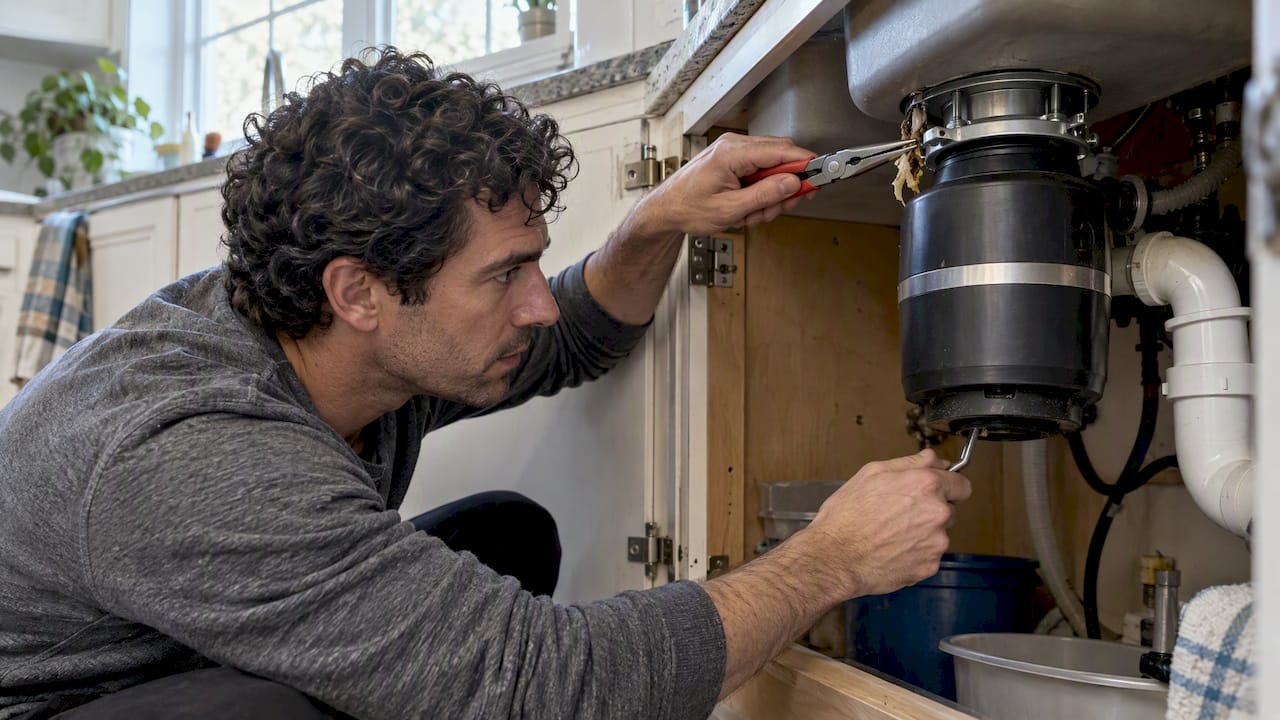
Confirm the power is off before you do anything else. This matters because the hex opening connects directly to the grinding turntable, and a stray flip of the switch while your hand or a tool is near the mechanism is how injuries happen.
Locate the bottom-center hex hole on the underside of the unit. Insert a 1/4-inch Allen wrench or the manufacturer’s wrenchette and turn it back and forth until the turntable spins freely in both directions. A humming disposal almost always means a mechanical jam rather than a dead motor, since humming tells you power is reaching the motor but the plate is blocked, per RepairClinic’s troubleshooting guide.
- If your model has no bottom-access hole, use long-handled tongs from above, only after you’ve verified the power is off.
- Utensils, small bones, and fibrous scraps like celery strings are the most common culprits; grip and pull them straight out rather than twisting.
- Most disposals use blunt impellers, not sharp blades, to shred food by centrifugal force, so a jam is typically an obstruction rather than a dulled edge.
Pro Tip: If the wrench meets heavy resistance and won’t budge after a few gentle passes, stop. Forcing it risks bending the shaft or cracking the housing, and that turns a five-minute fix into a replacement.
Reset procedure, breaker checks, and diagnosing motor failure
The red reset button, an overload protector, sits on the bottom of the unit and pops out when the motor overheats. Press it firmly until it clicks; if it won’t stay in, the motor likely needs more time to cool.
- Wait 10 to 20 minutes after a jam before pressing reset again, since reattempting too soon can overheat the motor further, according to RepairClinic’s hums-but-doesn’t-work guide.
- Check the breaker panel for a tripped breaker tied to the disposal circuit, and check any nearby GFCI outlet for a tripped reset.
- A silent unit, a burning odor, or metallic grinding during operation points toward motor failure or worn bearings rather than a simple jam, and that calls for a service visit rather than more DIY attempts.
If you’re unsure whether you’re dealing with a jam or a dying motor, our guide to diagnosing plumbing noise walks through the distinction in more detail.
Everyday habits that prevent humming and jams
Most disposal problems trace back to a handful of habits, and fixing them costs nothing. Running cold water before, during, and for 7 to 15 seconds after grinding keeps grease solid long enough to shred and flush through the P-trap instead of coating the mechanism, a practice Consumer Reports recommends based on its testing.
- Avoid large bones, fibrous scraps like celery and corn husks, grease, and large volumes of starchy peels such as potato skins.
- Run a weekly cleaning cycle with ice cubes and baking soda to scour the grind chamber, then add lemon for scent.
- Watch for leaks, frequent resets, or unusual noises as early signs that the unit is wearing out.
Statistic Callout: Consumer Reports found that a final cold-water flush after grinding helps clear particles from the P-trap, reducing the buildup that leads to jams and odors over time.
Heavy household use sometimes justifies a step up to a higher-horsepower unit, which Angi’s repair and replacement guide notes handles tougher loads and tends to last longer than lighter-duty models. For broader drain upkeep that reduces strain on your disposal, see our drain clog prevention tips.
Clear red flags and what a plumber will do on a service visit
Some symptoms mean the DIY steps above aren’t going to help, and continuing to try can make things worse. A burning smell, a visible leak under the sink, resets that trip repeatedly, or loud metal-on-metal grinding all point to a problem beyond a simple jam.
- Frequent resets or recurring humming after you’ve already cleared a jam often signal failing motor bearings or an electrical fault, which Angi notes is usually not worth repairing on an aging unit.
- A plumber will typically diagnose the source of a leak, inspect or replace the motor and bearings, check the electrical connection and GFCI, and recommend full replacement when the repair cost approaches the price of a new unit.
- Before calling, note your model number, snap a few photos of the leak or wiring, and write down what you’ve already tried so the technician can skip straight to the real problem.
For a broader sense of what warrants a repair call versus a replacement, our plumbing repair issues guide covers related symptoms worth watching for.
Why trust this guidance: field experience behind every step
This guide draws on manufacturer procedures and documented repair steps rather than guesswork, cross-checking the jam-clearing sequence against both Whirlpool’s own instructions and RepairClinic’s step-by-step walkthrough.
We have experience serving homeowners with disposal jams, leaks, and full replacements across residential kitchens of various ages and layouts. Our approach stays the same on every call: confirm what’s actually broken before recommending a fix, and never push a repair when replacement makes more financial sense.
How to lubricate the disposal unit if applicable
Most garbage disposals don’t require routine lubrication the way a motor with exposed bearings might. The motor housing is sealed, and the grinding chamber relies on water flow rather than grease to stay clean, so there’s no oil port to maintain on a typical unit.
Where lubrication does come up is on the rubber splash guard and occasionally on a squeaky mounting assembly. A small amount of food-safe silicone grease on the splash guard’s underside can quiet a rubbing noise, and a few drops on the mounting ring can resolve a squeak that shows up during installation or after years of use. Avoid petroleum-based lubricants near any rubber gasket, since they can degrade the material over time.
If you hear a mechanical squeal rather than a hum, and the turntable already spins freely by hand, lubricating these rubber and mounting components is worth trying before assuming the motor itself needs service. If the noise persists after that, it’s more likely a bearing or motor issue, which falls under the electrical and motor failure checks covered earlier rather than a lubrication fix.
What warranty coverage typically includes for humming or jams
Warranty terms vary by manufacturer and model tier, so the first step is always checking the paperwork or sticker that came with your specific unit rather than assuming blanket coverage. Most residential disposals carry a limited warranty on the motor and major components, typically covering defects in materials or workmanship rather than damage from misuse.
A jam caused by dropping a utensil or bone into the chamber is almost never covered, since that’s considered user-caused rather than a manufacturing defect. Motor failure that happens without any foreign object involved is more likely to fall under warranty, particularly within the first few years of ownership, though documentation and proof of purchase are usually required.
Keep your receipt and model number on hand, since a warranty claim typically needs both. If you’re unsure whether your symptom qualifies, contacting the manufacturer directly with your model number is faster than guessing, and it avoids voiding coverage by attempting a repair that the warranty terms don’t allow homeowners to perform themselves.
A step-by-step guide to diagnosing a humming disposal
Think of diagnosis as a narrowing process: start with the simplest, most common cause and only move to the next step if the first doesn’t resolve it.
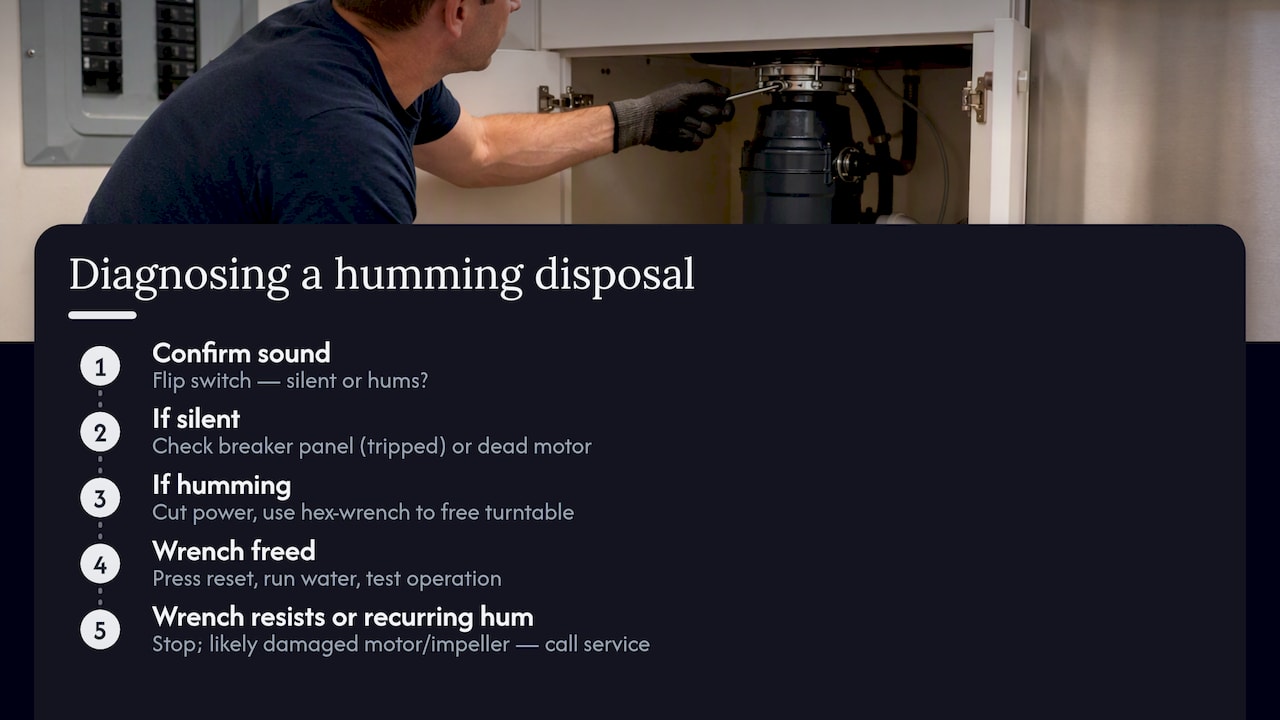
First, confirm the unit hums at all when you flip the switch. If it’s completely silent, you’re likely dealing with a tripped breaker or a dead motor rather than a jam, and you should check the breaker panel before anything else. If it hums, that confirms the motor has power, which points toward a mechanical jam as the far more likely cause, per RepairClinic’s diagnosis.
Next, cut power and attempt the hex-wrench dejam described earlier. If the turntable frees up and spins smoothly, press reset and test with water. If the wrench meets hard resistance or the turntable won’t budge at all, stop rather than forcing it, since that can indicate a cracked impeller plate or seized bearing rather than a simple obstruction.
Finally, if the jam clears but humming returns within days or the reset won’t hold even after cooling, that pattern suggests a failing motor rather than a recurring jam. At that point, the fix shifts from a wrench and a reset button to a service call, since repeated electrical cycling on a failing motor risks a burnout.
Common causes of humming beyond jams and motor failure
Jams and dying motors explain most cases, but a few other issues produce the same hum-without-spin symptom and are worth ruling out.
Loose mounting hardware can let the unit vibrate against the sink flange, producing a buzzing hum that sounds mechanical even when the grinding disk itself is fine. Tightening the mounting ring often resolves this without touching the hex wrench at all.
A foreign object lodged between the shredder ring and the turntable, rather than sitting freely in the chamber, can create a hum without fully locking the motor, which makes the jam harder to feel when you turn the wrench. Working the wrench through a full rotation, not just a quarter turn, usually dislodges this type of partial obstruction.
Low household voltage, from an overloaded circuit or an aging electrical panel, can also cause a disposal to hum weakly without ever reaching full speed. This is less common than a jam but worth considering if multiple appliances on the same circuit seem underpowered. A licensed electrician or plumber can test voltage at the outlet to confirm whether this is the actual cause.
Why proper installation and alignment prevent humming
A disposal that hums from day one, or shortly after installation, often has an alignment problem rather than a jam. The mounting assembly needs to seat evenly against the sink flange; if it’s tightened unevenly, the unit can sit at a slight angle that puts uneven stress on the motor shaft and bearings.
Misalignment during installation can also cause the discharge tube or dishwasher inlet to bind slightly, which transmits vibration back into the housing and shows up as a persistent hum or buzz even when the grinding chamber is completely clear. This is different from a food jam because the wrench will turn freely, yet the hum doesn’t go away.
Getting the mounting ring level and the three mounting screws evenly tightened during installation prevents most of these issues before they start. If your disposal has hummed since the day it went in and the wrench test shows the turntable spins freely, a licensed plumber can check and correct the mounting alignment rather than replacing a unit that may be perfectly healthy.
Tips for safely removing lodged objects
Removing the object causing the jam is usually the actual fix, and doing it safely matters as much as doing it at all. Confirm power is off at the source, not just at the wall switch, since some installations wire the disposal through an under-sink cord you can unplug directly.
- Use tongs or needle-nose pliers to grip and pull objects straight out rather than twisting, which can push them deeper into the chamber.
- For small, slippery items like a dropped spoon handle, a magnetic retrieval tool works well if the object is metal.
- Shine a flashlight into the chamber first so you know exactly what you’re grabbing before you reach in with a tool.
Once the object is out, run the hex wrench through a full rotation to confirm the turntable moves freely before restoring power. If debris keeps reappearing after you’ve cleared it once, check whether food scraps are traveling down from the sink strainer during normal use rather than assuming the same object got lodged again.
What matters most when your disposal starts humming
The conventional advice on disposal humming tends to bury the one fact that actually matters: a hum with no spin is overwhelmingly a mechanical problem, not an electrical mystery. Most guides spend as much time on wiring and breakers as they do on the wrench, which sends homeowners chasing the wrong fix first.
What’s underrated is how often the fix is genuinely a two-minute job. People see a disposal go quiet except for that hum and assume the worst, when turning the hex wrench a few times resolves it more often than not. What’s overrated is the instinct to keep mashing the reset button, since doing that without clearing the jam first just risks overheating a motor that was never actually broken.
My take: try the wrench before you touch the breaker panel, and treat a second or third reset failure as your signal to stop rather than a reason to try harder. The homeowners who get hurt or replace a disposal unnecessarily are usually the ones who skipped that order.
— Maayan
A licensed option when the hum won’t quit
When the wrench and reset don’t resolve it, or you’d rather not open up the cabinet at all, a professional plumbing repair team can handle disposal diagnosis and replacement. We check the motor, wiring, and mounting before recommending a repair or a new unit, so you’re not paying for guesswork.

Before you call, have your disposal’s model number, a photo of any leak or damage, and a quick rundown of what you’ve already tried. You can see what our plumbing repair service covers and get in touch to schedule a visit.
FAQ
My garbage disposal is humming and I press the reset button. What should I do?
Cut power first, then try freeing the jam with a 1/4-inch Allen wrench or wrenchette in the bottom hex hole before pressing reset again. If the reset button won’t stay depressed, wait 10 to 20 minutes for the motor to cool before trying once more, as described in Whirlpool’s jam-clearing instructions.
Why is my garbage disposal humming even though it’s not clogged?
A hum without a visible clog can come from loose mounting hardware, a partial obstruction wedged between the shredder ring and turntable, or low voltage reaching the unit. It can also point to early motor or bearing wear, which tends to show up as humming before the motor fails completely.
What can I pour down a garbage disposal to unclog it?
A disposal jam is almost always physical, not something a liquid dissolves, so the fix is the hex wrench and manual clearing described above rather than pouring anything down the drain. For routine cleaning rather than unclogging, Consumer Reports recommends ice and baking soda weekly, with lemon added for scent.
Why is my garbage disposal humming but not working?
Humming but not spinning almost always means the motor has power but the grinding plate is jammed by food or an object, according to RepairClinic’s troubleshooting guide. Cut power, clear the jam with the hex wrench from below, then press reset and restore power to test it.
Sources
- RepairClinic: Insinkerator garbage disposal hums but doesn’t work (how-to)
- Whirlpool product help: Clearing a jammed disposer
- Consumer Reports: How to clean your garbage disposal
- Angi: Garbage disposal repair and replacement guidance
Recommended
- Diagnose Plumbing Noise: Step-by-Step Guide for Homeowners
- How to Fix Noisy Pipes: A Practical Home Guide
- Emergency Plumbing Guide: Quick Solutions for Homeowners
