
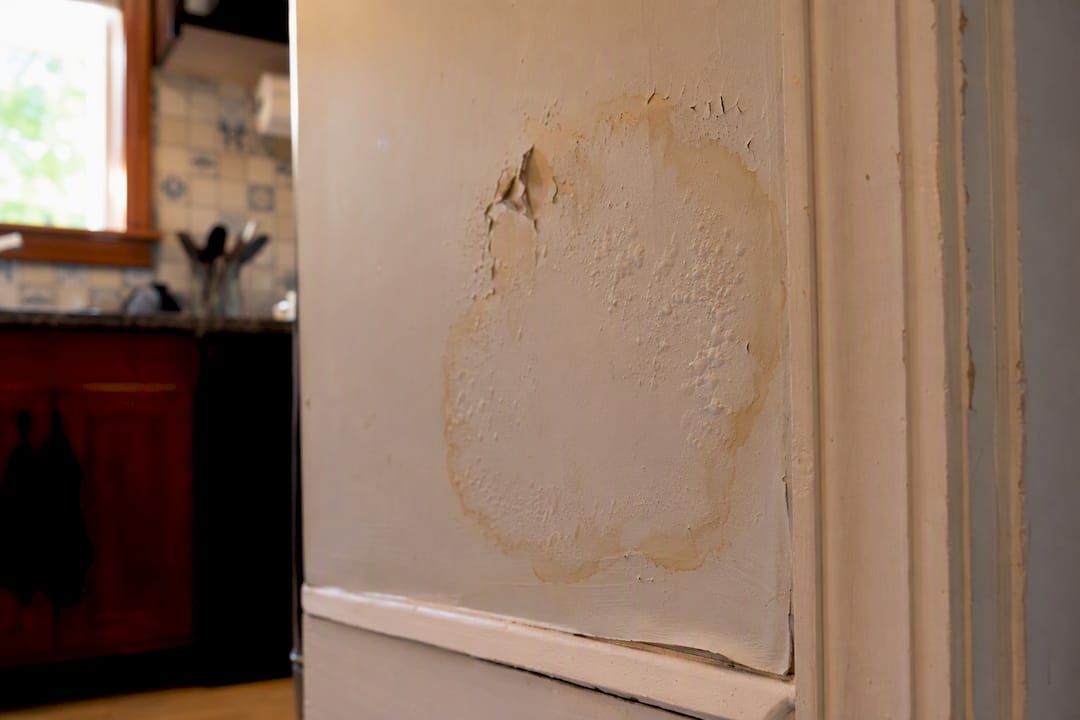
A brown stain, bubbling paint, or a musty smell almost always means a plumbing leak, but you need to confirm it before you cut into anything. Two moves matter right now.
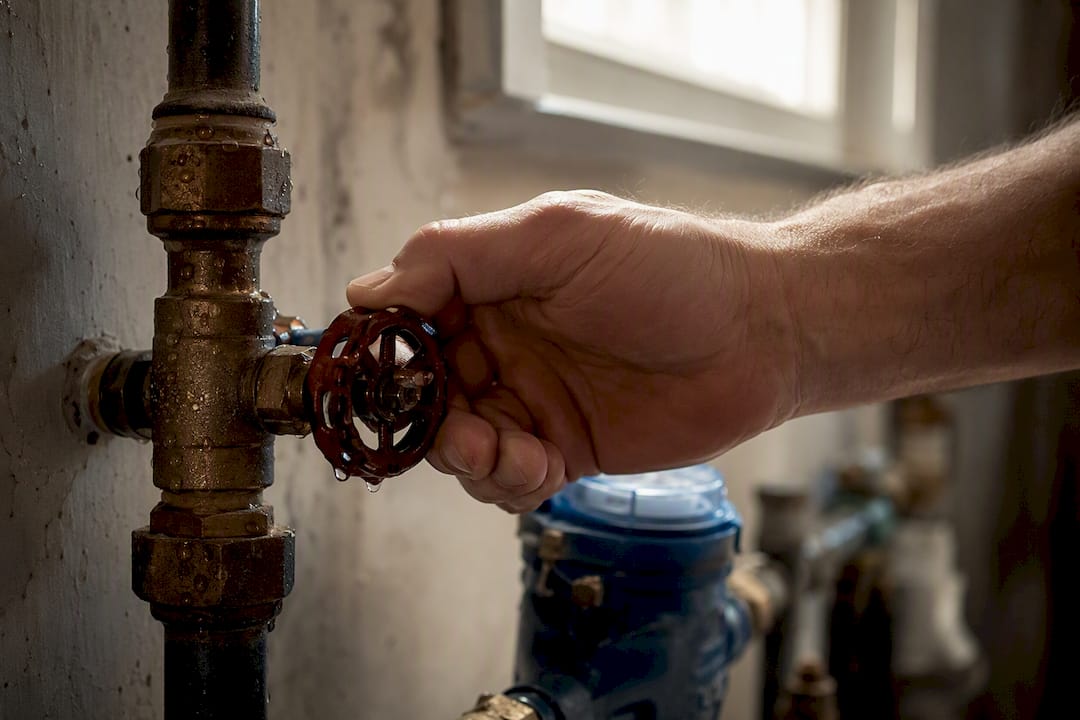
- Run a quick water meter test. If the dial keeps spinning with every faucet off, water is moving somewhere it shouldn’t.
- Shut off the main if you see active dripping or wet drywall near outlets. Call an emergency plumber immediately if water is pooling near any electrical fixture.
Key Takeaways
A leak behind a wall is confirmed through a water meter test and non-invasive tools, not guesswork, and access, not the pipe repair itself, drives most of the cost.
| Point | Details |
|---|---|
| Confirm before you cut | Run a meter test: shut off all water, wait one to two hours, and watch for movement. |
| Stains lie about location | Water travels along studs and joists, so the visible mark is often far from the actual source. |
| Access drives the bill | In-wall repairs commonly cost $500 or more, compared to less for an exposed pipe repair. |
| Insurance depends on cause | Sudden, accidental leaks are usually covered; gradual leaks from neglect typically aren’t. |
| Call a pro for hidden leaks | Ag-plumbing uses moisture meters, thermal imaging, and acoustic detection to target repairs and limit demolition. |
Table of Contents
- Signs of a Leak in Walls You Shouldn’t Ignore
- What Tools Do Plumbers Use to Detect Leaks Behind Walls?
- Should You DIY the Fix or Call a Plumber Now?
- What Does It Cost to Fix a Leak Behind a Wall?
- What Happens When a Plumber Diagnoses and Repairs a Wall Leak?
- Practical Tips From AG Heating, Cooling & Plumbing
- A Plumber’s Honest Take on Wall Leaks
- Get a Wall Leak Diagnosed Without Guesswork
- Sources
- FAQ
Signs of a Leak in Walls You Shouldn’t Ignore
A yellow-brown ring on drywall, paint that bubbles or peels for no reason, and trim that’s swollen or warped are the classic tells. Add a musty smell that lingers even after you air out the room, and you’re likely dealing with water leak-in-wall conditions that have been building for a while, not a fresh drip.
Here’s the part that trips people up: the stain on your ceiling or wall is rarely directly above or beside the actual pipe. Water follows gravity and the path of least resistance along studs, joists, and insulation, so it can travel several feet before it shows up as a visible mark. A stain in the hallway might trace back to a supply line inside the bathroom wall on the other side.
Two other signals get overlooked constantly:
- A water bill that jumps without any change in usage habits.
- Hearing running water when every faucet, toilet, and appliance in the house is off.
Even a small, steady leak behind wall material can waste a significant amount of water annually, according to the EPA’s Fix a Leak Week guidance, which is why catching these signs early saves both water and drywall.
What Tools Do Plumbers Use to Detect Leaks Behind Walls?
Professionals lean on non-invasive tools first because cutting drywall speculatively wastes money and can miss the actual source entirely, as detailed by EZ Plumbing’s leak detection services.
- Moisture meters press against the wall surface and map how far the wet zone extends, giving a rough outline of where water has traveled.
- Thermal or infrared cameras spot temperature differences, since wet insulation and damp drywall often read cooler than the surrounding material. They can mislead if a cold water pipe simply runs through that section of wall with no leak at all, which is why thermal readings need a second method to confirm.
- Acoustic listening devices pick up the sound of water under pressure escaping a supply line, which helps pinpoint pressurized leaks that moisture meters can’t isolate on their own.
- Borescopes go through a small access hole to give a direct visual before anyone commits to opening a larger section of wall.
Moisture meters map wetness, thermal cameras flag suspect areas, and acoustic gear pinpoints pressurized leaks. No single tool tells the whole story on its own, which is why plumbers layer them together before touching a saw.
Our leak detection methods page breaks down how each of these tools gets used in sequence during an actual service call.
Should You DIY the Fix or Call a Plumber Now?
Accessible leaks, such as a drippy P-trap under the sink or a loose supply line to the toilet, are fair game for a confident DIYer with basic tools. Anything behind a wall is a different situation.
Call a plumber immediately if:
- Water is actively leaking and you can’t see or reach the source.
- Moisture is near outlets, switches, or any wiring.
- You smell mold or see dark spotting on drywall or baseboards.
- You’ve run the meter test and confirmed continuous flow but can’t locate it.
Before the visit, document what you can: photos of stains or bubbling, your before/after meter readings, and a rough timeline of when you first noticed the problem. That record speeds up diagnosis and strengthens any insurance claim.
What Does It Cost to Fix a Leak Behind a Wall?
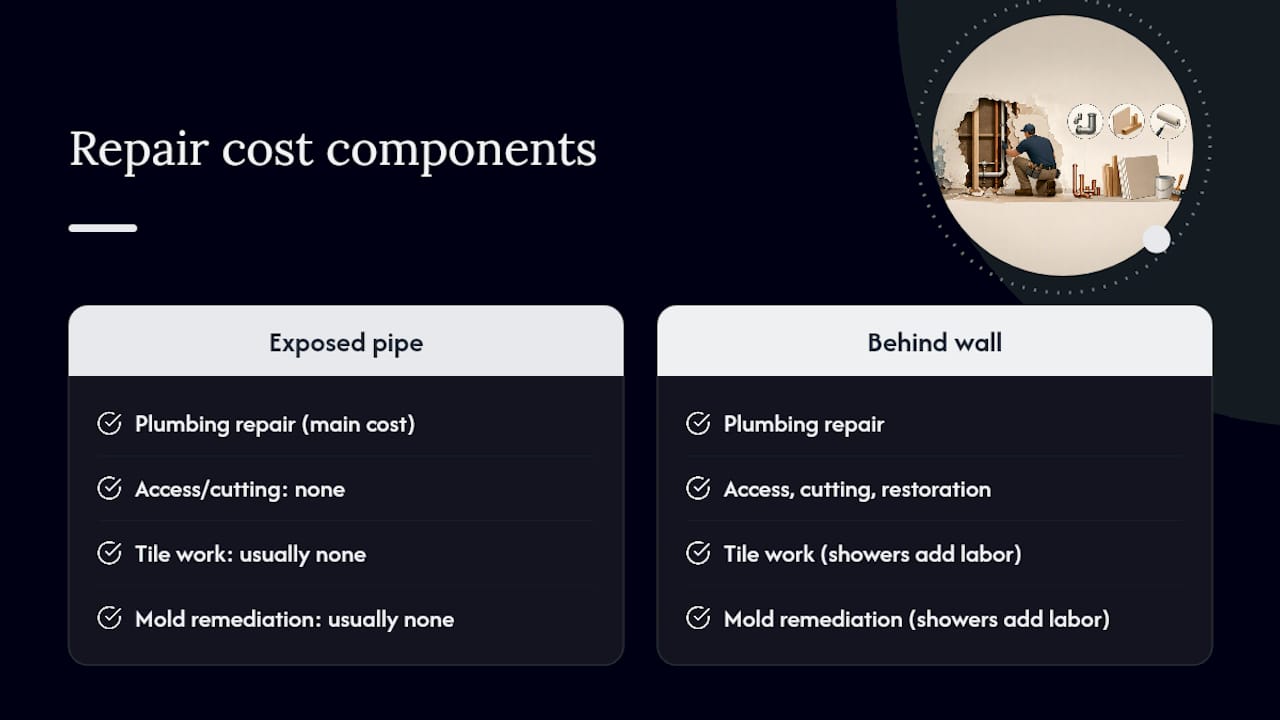
Repairing a leak behind wall material almost always costs more than the plumbing fix itself, because reaching the pipe is the expensive part, not repairing it.
Access, cutting, and restoration can double or triple the total bill compared to a repair on an exposed pipe, according to Angi’s drywall repair cost data, and shower walls tend to land on the higher end because tile work and mold remediation add labor on top of the plumbing itself, per Modernize’s shower repair cost breakdown.
Insurance usually splits the difference based on cause. A sudden, accidental failure, a burst supply line, a fitting that blows out, is typically covered. A slow leak from years of neglect usually isn’t, since most policies treat gradual damage as a maintenance issue rather than a covered loss. Some insurers sell hidden-water endorsements specifically to close that gap, according to Nationwide’s guidance on water damage coverage. Worth a call to your agent before you assume either way.
What Happens When a Plumber Diagnoses and Repairs a Wall Leak?
A professional visit follows a fairly predictable sequence, and knowing it ahead of time helps you understand why the plumber isn’t just grabbing a saw on arrival.
- Gather evidence first: your photos, meter readings, and the plumber’s own moisture meter or thermal scan narrow down the general area.
- Confirm with acoustic detection if the leak is on a pressurized supply line, then verify the exact spot with a small access hole and borescope before cutting anything larger.
- Make the repair: often a replaced fitting or a short section of repiped PEX or copper, followed by a pressure test to confirm the fix held.
- Dry the cavity completely before any patching begins. Skipping this step is how a $500 repair turns into a mold remediation job.
- Patch and restore drywall, tile, or paint only after moisture readings confirm the area is dry.
Permits or code upgrades sometimes add scope if the repair touches shared walls or older galvanized piping that needs updating to meet current code.
Practical Tips From AG Heating, Cooling & Plumbing
Ag-plumbing has spent 30 years working Pittsburgh homes where the plumbing fix is easy but the access isn’t, which is exactly why minimal-access repair is the default approach on every wall leak job. Smaller openings mean less drywall, less paint matching, and a smaller bill.
A targeted three-inch access hole guided by a moisture meter reading almost always beats an exploratory cut through half a wall. The pipe doesn’t care how big the hole is. Your repair budget does.
AG plumbers document conditions with photos and moisture readings on arrival, which gives homeowners a paper trail if they file an insurance claim.
Pro Tip: Before your appointment, take your own photos of the affected area, write down your meter reading, and clear out under-sink cabinets near the suspected leak. It shaves real time off the diagnostic visit.
A Plumber’s Honest Take on Wall Leaks
Every week we lose comes with mold risk and a bigger repair bill. Confirm the leak fast, favor non-invasive diagnostics over guesswork, and call for help the moment water and electrical risk overlap.
Get a Wall Leak Diagnosed Without Guesswork
Ag-plumbing runs the same non-invasive detection sequence covered above on every wall leak call: moisture mapping, thermal scanning, and acoustic listening before anyone touches a saw. That targeted approach is how a Pittsburgh homeowner avoids paying for a torn-out wall when a three-inch access hole would have done the job.

A visit starts with the diagnostics, moves to a targeted repair using PEX or copper as needed, and includes drying coordination so the wall isn’t patched over trapped moisture. If restoration work is needed beyond plumbing, we can point you toward the right next step. Before you book, jot down your meter reading and snap a few photos of the affected wall. Ready to get it looked at? Schedule a plumbing repair with Ag-plumbing, or check out who we serve to see if your property fits our service area around Pittsburgh, PA.
Sources
Before you call anyone, you can confirm whether you’re dealing with a continuous internal leak in about two hours, using nothing but your water meter.
This method, outlined by Mountain View’s water conservation program, is the same first check a professional will ask if you’ve already done. While you wait on the meter, walk the perimeter of the suspected area. Check under sinks, behind the washing machine, and along ceiling lines below bathrooms for other explanations, since a slow roof leak or condensation from a poorly insulated duct can mimic plumbing symptoms.
If you find active water and it’s anywhere near an outlet, switch, or light fixture, shut off the breaker to that area before touching anything wet, then shut off the main water valve.
Pro Tip: Photograph the meter reading with your phone’s timestamp before and after the test. That single photo pair is often the first thing an insurance adjuster or plumber asks for.
Our guide to leak detection tips for homeowners walks through more of these quick checks if you want a fuller list before booking a visit.
FAQ
How do you tell if pipes are leaking behind a wall?
Look for stains, bubbling paint, soft drywall, or musty odors, then confirm with a water meter test: shut off all water for one to two hours and check if the meter still moves.
Does homeowners insurance cover water leaks in walls?
Usually yes for sudden, accidental leaks like a burst pipe, but coverage typically excludes damage from gradual leaks caused by long-term neglect, per Nationwide’s coverage guidance.
How much does it cost to fix a shower leak behind the wall?
Shower wall leak repairs typically start around $500 and can reach $2,500 or more depending on tile access, drywall repair, and whether mold remediation is needed.
Can plumbers detect leaks behind walls without demolition?
Yes. Plumbers, including the team at Ag-plumbing, use moisture meters, thermal imaging, and acoustic listening devices to locate leaks and confirm the spot with a small access hole before any larger cutting.
Recommended
- Top Leak Detection Methods for Homeowners and Pros – AG-Plumbing
- Leak Detection Tips for Homeowners: 10 Quick Checks – AG-Plumbing
- How to Identify When Plumbing Repair Is Necessary – AG-Plumbing
- Why Fix Leaks Early: a Pittsburgh Homeowner’s Guide – AG-Plumbing
