
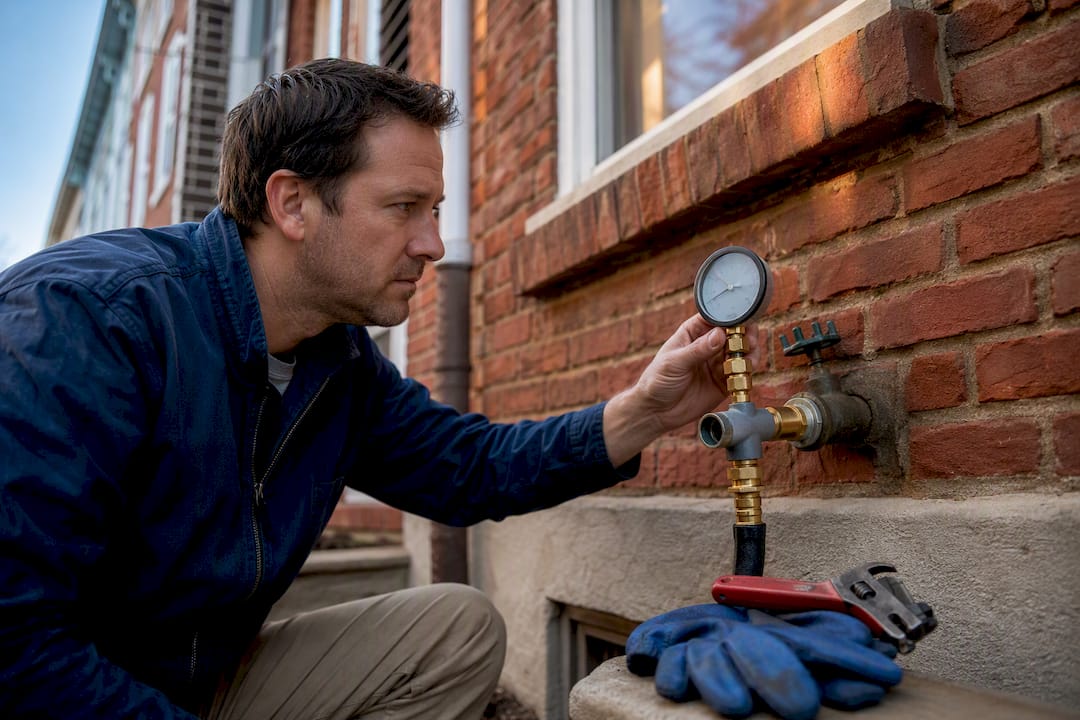
If your upstairs shower has turned into a trickle while everything downstairs runs fine, you’re almost certainly dealing with a local restriction, not a citywide supply problem. Check your bathroom sink and shower head against a downstairs faucet right now, note whether hot, cold, or both are weak, then start with the aerator and shutoff valves before you touch anything else.
TL;DR:
- Most upstairs water pressure issues stem from fixture-level restrictions or local shutoff valves rather than the main supply or municipal pressure.
- Checking pipe pressure with a gauge at an outdoor hose bib helps distinguish between fixture problems and supply-side restrictions, with most homes averaging 40 to 60 PSI.
- Cleaning or replacing aerators and shower heads often solves the majority of single-bathroom pressure complaints caused by mineral buildup or partial blockages.
- A failing pressure regulating valve or internal pipe corrosion can cause uneven pressure, especially on upper floors, and typically require professional diagnosis and repair.
- Hidden leaks behind walls or in older galvanized pipes often cause pressure drops and should be prioritized before attempting extensive fixes or water pressure adjustments.
Table of Contents
- Is Your Low Water Pressure Upstairs a Fixture, Room, or Whole-House Problem?
- Quick DIY Troubleshooting Checklist
- Fixing the Fixtures Most Likely Causing Low Flow Upstairs
- Could Your Pressure Regulator or a Closed Valve Be the Culprit?
- When Old Pipes and Hidden Leaks Make Upstairs Pressure Worse
- When to Call a Plumber for Low Upstairs Water Pressure
- What Pros Check First on an Upstairs Pressure Call
- My Take: Fix the Easy Things First, Then Stop Guessing
- Book a Pressure Diagnostic With AG Heating, Cooling & Plumbing
- Sources
- FAQ
Is Your Low Water Pressure Upstairs a Fixture, Room, or Whole-House Problem?
Before you fix anything, figure out how far the problem spreads. That single step saves you from cleaning a shower head when the real issue is your main shutoff valve three floors down.
Run the water at two or three fixtures upstairs, then compare them to a faucet on the ground floor. If only one fixture is weak, you’re looking at a clogged aerator, a bad cartridge, or a nearly closed local valve. If every upstairs fixture is weak but downstairs is fine, the problem lives somewhere between your main line and the second floor, which usually means a partially closed valve, scale buildup in older branch piping, or a pressure regulator that’s failing.
An outdoor hose bib gives you a clean baseline reading, since it sits close to where water enters your house before any interior branching. Attach an inexpensive gauge and compare that number to what you’re getting upstairs. Most homes should read somewhere in the 40 to 60 PSI range; anything below 40 PSI feels noticeably weak at the tap.
Elevation matters more than most homeowners realize. Water pressure decreases as water climbs vertically, so a second-floor bathroom can lose noticeable pressure compared to a ground-floor sink purely from height. That’s why a marginal supply problem that’s barely noticeable downstairs turns into a real annoyance upstairs.
While you’re testing, watch for these leak indicators:
- Your water meter’s small leak indicator spins even with every fixture off
- Damp drywall, warped flooring, or a musty smell near pipe runs
- A water bill that’s climbed with no change in usage
- A hissing sound inside walls when nothing is running
Any of those point toward a hidden leak rather than a simple fixture clog, which changes your next move entirely.
Quick DIY Troubleshooting Checklist
Set aside 20 to 30 minutes and work through these steps in order. Skipping ahead tends to waste time chasing the wrong fix.
- Turn off every fixture in the house and watch the water meter. If the small leak indicator is still spinning, you have an active leak somewhere in the system.
- Note exactly which fixtures are affected, and whether it’s hot water, cold water, or both. Hot-only problems point toward the water heater, not the supply line.
- Remove the aerator or shower head from the weak fixture and inspect it for mineral buildup or grit.
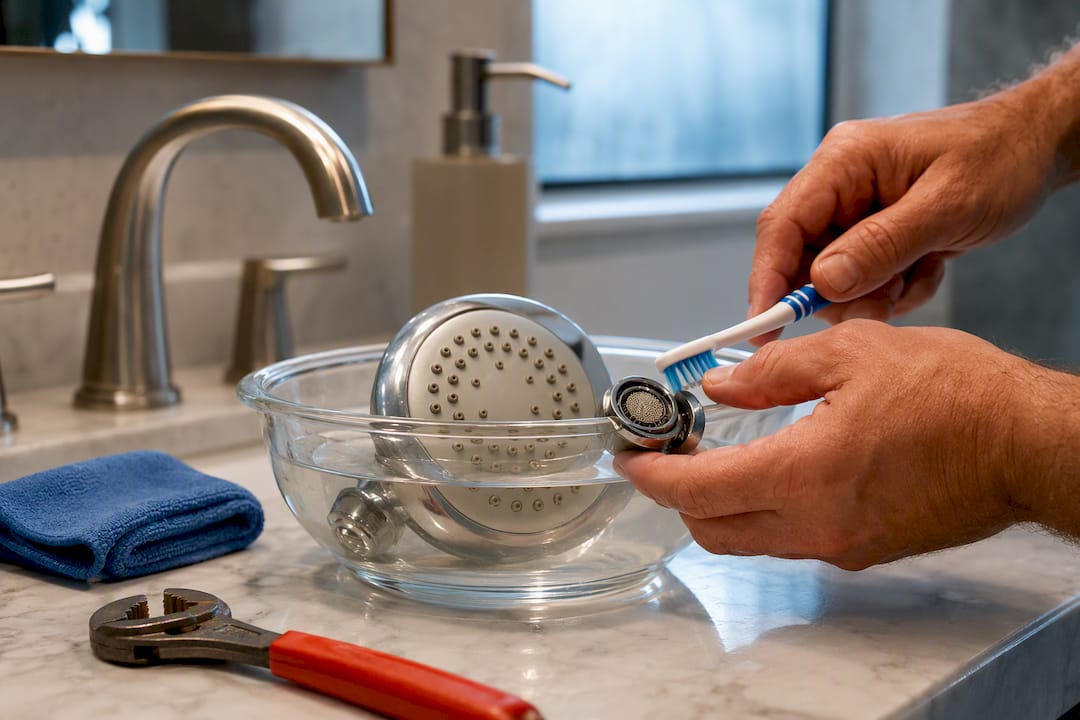
- Soak the parts in vinegar for 30 minutes to an hour if you see white, chalky deposits, then scrub with an old toothbrush before reassembling.
- Check every shutoff valve, both the ones under the affected sink and your home’s main shutoff, to confirm they’re turned fully open.
- Attach a pressure gauge to an outdoor hose bib and write down the PSI reading so you have a number to compare against future tests, or against what a plumber measures later.
Pro Tip: Keep a small notebook or a notes app entry with your PSI readings and the date. If pressure drops again in six months, having a baseline makes it much faster to tell whether the problem is new or has been building slowly.
This checklist alone resolves a large share of one-bathroom pressure complaints, since aerator clogs and closed valves are far more common than people expect.
Fixing the Fixtures Most Likely Causing Low Flow Upstairs
Aerators and shower heads sit at the very end of your plumbing line, which makes them the first place mineral scale and grit settle out. That’s also why fixture-level restrictions cause the majority of single-bathroom pressure problems rather than anything deeper in the system.
Unscrew the aerator from the faucet spout using pliers wrapped in a cloth to avoid scratching the finish. For a shower head, twist it off by hand or use a wrench with the connection wrapped in tape. Look inside for a fine screen clogged with white or greenish mineral deposits, which is standard hard-water buildup rather than a sign of a bigger problem.
Soak both pieces in white vinegar, using a bowl deep enough to submerge them fully. Thirty minutes handles light buildup; leave stubborn deposits overnight. Rinse and scrub with a toothbrush, then reassemble and test the flow before moving to anything more involved.
If cleaning doesn’t restore flow, or if buildup returns within a few months, replace the part outright. A new aerator costs a few dollars; a decent shower head runs somewhere between $15 and $40 depending on style.
A few signs point past the aerator toward the cartridge or mixing valve inside your shower:
- Water pressure changes dramatically when you adjust temperature, not just flow
- The shower runs fine at the sink but weak specifically when the shower valve is engaged
- You hear grinding or feel resistance when turning the shower handle
- Hot and cold mix unevenly, surging or dropping without you touching the controls
A worn cartridge or pressure-balancing valve usually needs professional replacement, since accessing it often means removing the shower trim plate and working inside the wall cavity. If you’ve cleaned the aerator, confirmed the valve isn’t the issue, and pressure is still weak only at that one shower, the restriction is likely further back in the branch line feeding that bathroom.
Keep a small aerator wrench, plumber’s tape, and a spare aerator or two on hand. It turns a five-minute annoyance into a five-minute fix instead of a weekend project.
Could Your Pressure Regulator or a Closed Valve Be the Culprit?
Most homes on municipal water have a pressure reducing valve, or PRV, mounted where the main line enters the house, usually near the water meter or just after it comes through the foundation wall. Its job is to knock down high street pressure to a safe range for your fixtures and appliances. When a PRV starts failing, it often drops pressure unevenly across the house, and upstairs fixtures feel it first because they have the least margin to spare.
Watch for these symptoms that point specifically to the PRV rather than a fixture clog:
- Pressure that’s fine on the first floor but noticeably weak on every second-floor fixture
- Sudden pressure changes with no obvious cause, sometimes fluctuating during the day
- A humming or vibrating noise coming from the valve body itself
- Pressure that was normal for years and then dropped gradually over weeks
Test it by comparing your outdoor hose bib reading against a gauge attached to an upstairs fixture, if you can find an adapter that fits. A significant gap between the two, beyond what elevation alone explains, suggests the PRV isn’t regulating evenly anymore.
Adjusting a PRV without measuring first is a common mistake homeowners make, and it’s one that can backfire badly. Turning the adjustment screw blind, hoping to force more pressure upstairs, risks pushing your whole-house pressure well past safe levels, which can damage washing machine hoses, water heater fittings, and other pressure-sensitive connections. A PRV should only be adjusted with a gauge in place to monitor pressure changes during adjustment. If you’re not confident reading and interpreting that gauge, this is exactly the kind of task worth handing to a licensed plumber rather than experimenting on your own.
When Old Pipes and Hidden Leaks Make Upstairs Pressure Worse
Some pressure problems have nothing to do with a single fixture and everything to do with what’s happening inside your walls. Galvanized steel pipe, common in homes built before the 1960s, corrodes from the inside over decades. That corrosion narrows the interior diameter of the pipe gradually, the same way plaque narrows an artery, and it shows up first at the fixtures farthest from the main line, which upstairs almost always is.
Mineral scale from hard water does something similar even in newer copper or PEX systems, though it builds up more slowly. Combined with the elevation penalty of climbing to a second floor, even a modest restriction can turn into a real problem upstairs while the ground floor barely notices.
A few checks help separate a supply-side issue from something contained to your own plumbing:
- Ask a neighbor on the same street whether they’ve noticed pressure changes recently, which can point to a municipal supply issue rather than something in your house
- Run the water meter leak test again during a quiet part of the day, since a slow leak sometimes only shows up under certain pressure conditions
- Check for pressure swings at specific times of day, since municipal systems often run lower pressure during peak morning and evening demand
- Look for water stains, unexplained dampness, or a spike in your utility bill as signs of a hidden leak rather than a corrosion problem
A hidden leak is the scenario you don’t want to sit on. Even a small, slow leak behind a wall wastes water continuously and can eventually cause structural damage, mold growth, and a much bigger repair bill than if you’d caught it early. If your meter test confirms a leak, that takes priority over any pressure troubleshooting.
When corrosion, scale, or a failing PRV are confirmed as the root cause, the long-term fix usually falls into one of three categories: replacing corroded sections of pipe, swapping out a worn PRV, or in homes with genuinely low municipal supply pressure, adding a booster pump to push water upstairs with more force. None of these are weekend DIY projects, and getting the diagnosis wrong before committing to one is an expensive mistake to make.
When to Call a Plumber for Low Upstairs Water Pressure
Some signs mean it’s time to stop troubleshooting and pick up the phone. Call a licensed plumber if you notice any of the following:
- Your water meter’s leak indicator keeps moving even with every fixture in the house turned off
- You see actual water stains, damp spots, or pooling that you can’t explain
- Pressure is low throughout the entire house, not just upstairs, suggesting a main line or PRV issue
- The PRV is humming, vibrating, or producing wildly inconsistent readings
- You’ve worked through the full checklist above and pressure still hasn’t improved
Before your appointment, jot down your PSI readings from both the outdoor hose bib and an upstairs fixture, which fixtures are affected, whether hot or cold water is involved, and any recent plumbing work done in the house. That saves the technician time and often speeds up the diagnosis.
A typical service visit includes a pressure test at multiple points in the house, a leak detection check, and a visual inspection of accessible pipe and valve connections. Costs vary by region and by what’s actually wrong, but simple valve or cartridge fixes tend to run on the lower end of typical repair pricing, while PRV replacement or sections of repiping cost more given the labor and parts involved. Get a firm quote before work begins rather than relying on a rough estimate over the phone.
What Pros Check First on an Upstairs Pressure Call
When AG Heating, Cooling & Plumbing arrives for a low-pressure call, the first-visit routine rarely changes: compare fixtures room by room, attach a gauge at an outdoor spigot and again upstairs, check the PRV setting, then run a meter test with everything off. That order catches roughly four out of five causes before any tools come out.
The mistake we see most often is a homeowner cranking the PRV adjustment screw to try to force more pressure upstairs, without ever putting a gauge on it first. That single move causes more emergency calls than the original low-pressure complaint ever did.
Simple maintenance prevents most of this. Clean aerators and shower heads once a year, especially in hard-water areas. Check that shutoff valves under sinks and near your water heater are fully open after any repair work in the house. And if your home still has galvanized piping, get it inspected periodically rather than waiting for a full blockage to force the issue.
My Take: Fix the Easy Things First, Then Stop Guessing
Most upstairs pressure complaints have boring answers. A clogged aerator, a valve someone bumped half shut, a shower cartridge worn out after a decade of daily use. That’s why I’d always start with the meter test, the aerators, and the shutoff valves before assuming you need a plumber or a repiping job. Those three checks take under 30 minutes combined and rule out the causes responsible for the overwhelming majority of one-bathroom complaints.
Where I’d draw a hard line is the PRV. It’s tempting to grab a wrench and just add a quarter turn, hoping for a quick win. Don’t. Note your PSI before you touch it, and if you’re not measuring the result in real time, you’re gambling with every pressure-sensitive fitting in your house. That’s not a place to improvise.
If you’ve worked through the checklist, confirmed your valves are open, cleaned every aerator in sight, and pressure upstairs is still weak, or worse, you’ve found signs of a leak, stop troubleshooting. Write down your PSI readings, note which fixtures are affected, and call a licensed plumber with that information in hand. You’ll get a faster, cheaper diagnosis than if you keep guessing at fixes one weekend at a time.
— Maayan
Book a Pressure Diagnostic With AG Heating, Cooling & Plumbing
If you’ve worked through the checklist and pressure upstairs still isn’t right, AG Heating, Cooling & Plumbing brings 30 years of local experience straight to your bathroom instead of leaving you to guess at PRV settings or pipe corrosion on your own.

Our technicians run a full pressure test at multiple points in your home, inspect the PRV, check for hidden leaks, and give you a straight answer on whether the fix is a simple valve adjustment or something bigger like repiping a corroded section. Before your visit, have your PSI readings and a list of affected fixtures ready. That single step often cuts diagnostic time in half.
Ready to stop troubleshooting and get a real answer? Schedule a plumbing repair visit with AG Heating, Cooling & Plumbing and get your upstairs water pressure back to normal.
Sources
For more technical detail, see how backflow preventers work at the meter, or explore booster-pump mechanics through Outback Solar Pumps.
- Portland
- Low water pressure in one bathroom only — Repair Home Guide
- Home water pressure problems — The Spruce
FAQ
How Do I Increase Water Pressure on the Second Floor?
Start by cleaning or replacing aerators and shower heads, confirm all shutoff valves are fully open, and test with a pressure gauge at an outdoor hose bib to see if the issue is fixture level or supply side. If those checks don’t help, a failing PRV or corroded branch pipe is likely, and that typically needs a licensed plumber.
Why Is Water Pressure Low Only on the Top Floor?
Elevation reduces pressure roughly 0.43 PSI per foot of height, so second-floor fixtures already have less margin than ground-floor ones. Any additional restriction, whether it’s mineral scale, a partially closed valve, or a failing PRV, shows up upstairs first because there’s less pressure to spare.
Can a Plumber Fix Low Water Pressure?
Yes. A licensed plumber can test pressure at multiple points, check and repair or replace a faulty PRV, detect hidden leaks, and replace corroded pipe sections that a homeowner can’t access safely. AG Heating, Cooling & Plumbing handles diagnostic visits and repairs for exactly this kind of upstairs pressure problem.
What’s Causing Low Pressure in My Upstairs Shower Specifically?
The most common causes are a clogged shower head, mineral buildup inside the aerator screen, or a worn shower cartridge or mixing valve. If pressure is weak at every upstairs fixture rather than just the shower, look at the shutoff valves and the PRV instead.
How Do I Know if It’s a Leak and Not Just Low Pressure?
Turn off every fixture in the house and watch your water meter’s small leak indicator. If it’s still spinning with nothing running, you have an active leak, and that takes priority over any pressure troubleshooting.
Recommended
- Why Water Pressure Drops: A Homeowner’s Guide
- How to Increase Water Pressure at Home in 2026
- Why Check Water Pressure: A Homeowner’s Guide
