
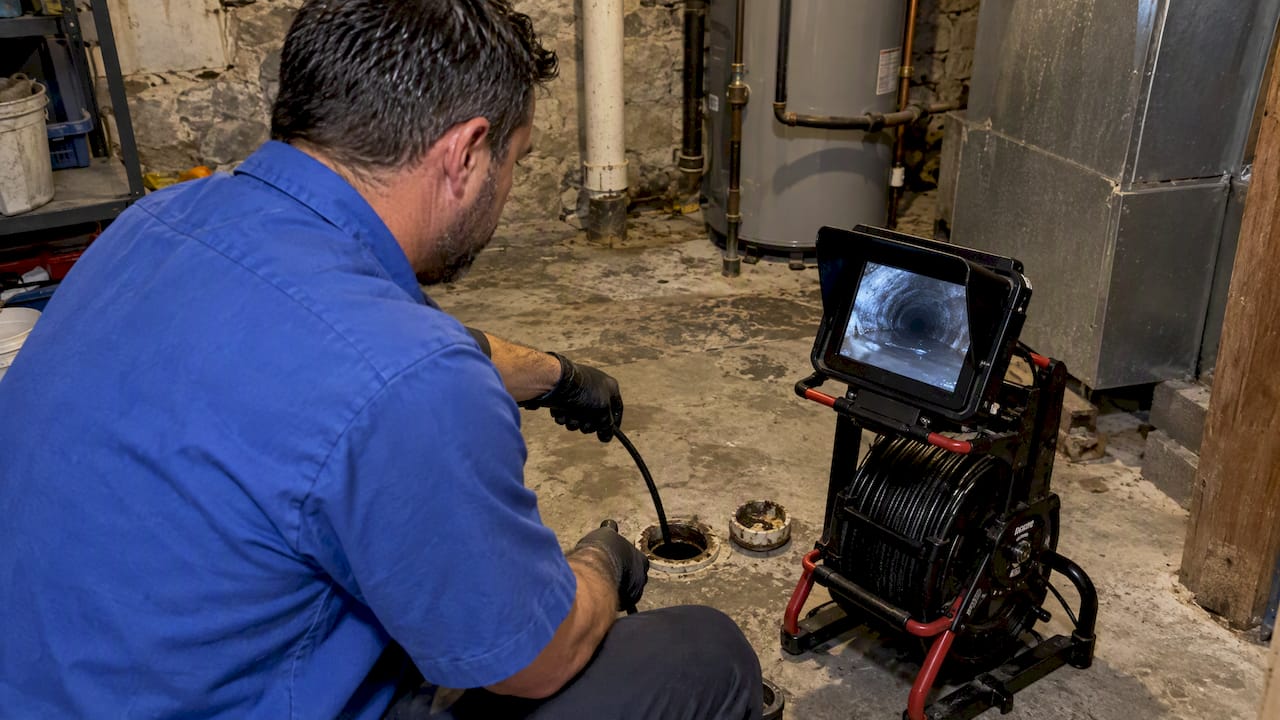
A sewer line belly is a low spot in your sewer pipe where wastewater pools and solids settle, which commonly causes recurring clogs and backups. Don’t try to fix it blind. Have a professional clean the line and run a TV inspection first, because the camera shows how deep the sag is and how much of the pipe it blocks. That finding decides whether you monitor or repair.
TL;DR:
- Have a professional clean the line before a camera inspection, then request video and a written log recording sag length, depth, and obstruction.
- Monitoring fits a short, shallow sag with low obstruction, sound pipe, and no backups; compare later footage with a documented baseline.
- Excavation restores pipe grade, while CIPP lining seals and smooths an intact pipe but follows its existing sag rather than correcting it.
- Repeated backups, quickly returning clogs, cracks, offset joints, or major obstruction favor repair; require itemized bids, permit details, warranty terms, and final testing.
Table of Contents
- What is a sewer line belly and why does slope matter?
- What causes a sewer line belly?
- What are the signs of a sewer belly?
- How do professionals diagnose a belly?
- When can you monitor a belly, and when is repair needed?
- Which repair options fix a sewer belly?
- What happens during a sewer line repair?
- How do you choose a contractor and compare bids?
- Why I insist on a camera first
- How we can help with a sewer line belly
- FAQ
- Sources
What is a sewer line belly and why does slope matter?
A sewer line belly is a section of pipe that has lost its designed slope. Plumbers also call it a sag, a dip, or a low spot. The pipe still runs, but instead of falling steadily toward the main sewer or septic tank, it dips down and then climbs back up.
That matters because your home’s sewer is a gravity system. Nothing pumps waste along. Water and solids move because the pipe tilts downhill at a consistent grade, and the flow carries paper and solids with it. When the grade breaks, the pipe fills at the low point and a pool of standing wastewater forms there. Water can still creep past that pool, but heavier solids drop out of the flow and stay behind.
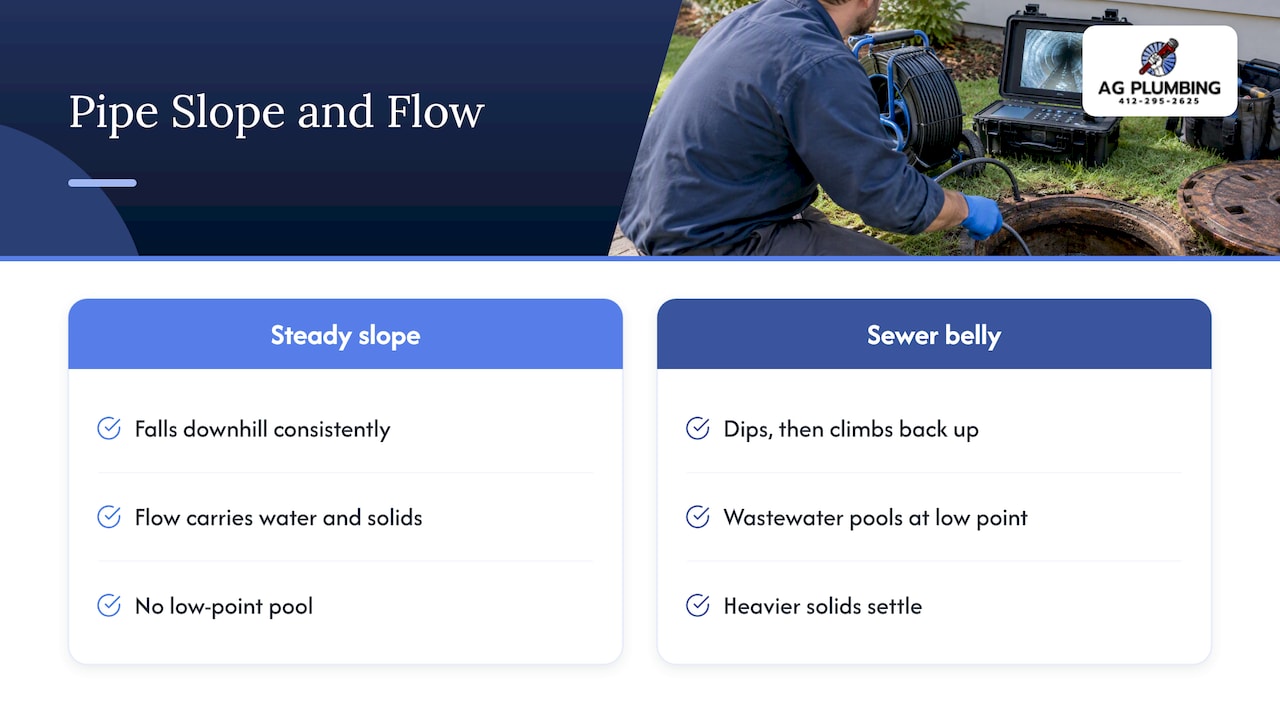
Over weeks and months, that pool becomes a catch basin. Grease, wipes, paper and sediment build up at the bottom of the dip, and each new load of waste meets a bigger obstacle. The result is the classic pattern of a belly: a drain that clears after cleaning, then slows again within days or weeks. In the worst case, the buildup closes off enough of the pipe that waste backs up into your lowest drains.
Municipal engineers see the same mechanics at scale. One environmental assessment of a municipal collection system describes improperly sloped or shallow sewer mains as contributors to backups, and recommends replacing pipe to restore slope where shallow installation is a systemic problem. The same principle applies to your lateral. Even a modest deviation can disrupt flow, and a belly rarely fixes itself. It usually gets worse as debris accumulates and the soil underneath keeps shifting.
Understanding this also explains why snaking or chemical cleaners rarely solve the problem for good. They remove the clog, but the dip that created it is still there, waiting to collect the next one.
What causes a sewer line belly?
Bellies almost always trace back to what happened under the ground, not to anything you flushed. The pipe itself is usually the victim. Knowing the likely cause helps you set realistic expectations for the repair, because a pipe that sagged from settlement needs a different fix than one that was laid wrong from day one.
- Soil settlement or poor compaction. When a trench is backfilled loosely, the soil beneath the pipe compresses over the years and the pipe sags into the void. This is the most common story in older neighborhoods.
- Incorrect original installation. Some lines were simply laid without enough fall, or with a low spot built in. A belly caused by installation tends to be present from the start and may show up soon after you move in.
- Ground movement. Frost heave, flooding, saturated clay soils and heavy loads such as a new driveway, patio or construction traffic can push a pipe out of line. Work on nearby buried utilities can also disturb the bedding under your pipe.
- Broken or offset joints. A joint that shifts or a section that partially collapses creates a localized sag, and the damaged spot snags debris right away.
- Root intrusion and debris buildup. Roots find small openings and grow into the pipe. They rarely cause the original sag, but they can make an existing one much worse by catching paper and grease.
In practice, two causes often work together. A pipe that settled slightly becomes a place where roots take hold, and the roots then trap enough debris to turn a mild dip into a chronic clog. That is why the camera matters: it shows whether you are dealing with a simple sag, a damaged joint, a root problem, or all three.
Pipe material and age also play a role. Older clay and cast iron lines, common in established neighborhoods, have many joints and can shift at each one. Newer plastic pipe is smoother and longer between joints, but it still depends on firm bedding to stay on grade. If your home sits on a hillside or on fill soil, settlement is more likely, and it is worth mentioning to whoever inspects the line.
What are the signs of a sewer belly?
You usually notice the effects before you ever see the cause. Because the belly sits underground, the clues show up at your fixtures and in your yard. One slow drain does not prove anything, but a pattern across the house is worth acting on.
- Slow drains in several fixtures. When tubs, sinks and toilets on the lowest level all drain sluggishly, the problem is likely in the main line rather than in one branch.
- Clogs that keep coming back. A line that clears and then clogs again soon after cleaning is the strongest hint. The cleaning removed the symptom, not the low spot.
- Gurgling sounds. Bubbling from drains or toilets, especially when another fixture drains, means air is being pushed around a partial blockage.
- Persistent sewer odors. A smell that comes and goes, indoors or near the cleanout, can point to standing wastewater sitting in the line.
- Wet or unusually lush patches in the yard. Soggy ground or a strip of greener grass along the sewer run can signal a leak at a damaged joint. A sinking spot in the lawn may mean the soil around the pipe is settling.
- Repeated service calls. If you have paid for several cleanings and the problem always returns, a belly or other structural defect deserves a closer look.
For a broader checklist, our guide to sewer line warning signs every homeowner should know walks through what each symptom can mean.
Treat one or two mild signs as a reason to schedule an inspection soon. Treat a backup, a sinkhole or a strong sewage smell as urgent. Sewage in your home is a health hazard, so keep people and pets away from affected areas until the line is cleared and the area is cleaned.
How do professionals diagnose a belly?
The standard answer is a camera. Television inspection, often called CCTV or televising, is how professionals find sags, offsets, cracks and roots. A small camera on a flexible rod or crawler travels through the line while an operator records the video and notes what appears on screen. You cannot reliably diagnose a belly from symptoms alone, and guessing leads to repairs in the wrong place.
Good inspections follow written standards. A public-works specification from Iowa State’s transportation institute covers cleaning, inspection and testing of sewers, including television inspection requirements, inspection logs and the recording of sags with their length and estimated depth. It also describes testing methods such as low-pressure air testing and vacuum testing for verifying a repaired line. A university facilities specification for sewer TV inspection adds that the contractor must keep a written log with location identifiers and any root intrusion, and must retake footage if the picture quality is poor.
Here is what a thorough inspection should include:
- Pre-cleaning. The line is cleaned, often by hydro jetting, so debris and standing water do not hide the defect. A belly full of water looks like a smooth flooded stretch on camera, which can hide cracks and the true depth.
- A written log. It should record sag length and estimated depth, service connections, root intrusion and any structural problems found.
- Clear video. You should receive the footage, with notes marking the problem areas.
- Objective measures. Two numbers matter most: the slope of the pipe through the sag, and the percentage of the pipe diameter that is obstructed or holding water. Those figures let a pro grade how serious the belly is instead of calling it “bad” or “not too bad.”
Pro Tip: Ask for the video file and the written log, not just a verbal summary. If a contractor cannot show you the footage, you cannot compare their findings with a second opinion.
When can you monitor a belly, and when is repair needed?
Not every belly demands an excavator. Severity depends on how much of the pipe is obstructed, how long the sag runs, whether the pipe is structurally sound, and whether you have already had backups. The camera log gives you the facts to make that call.
Practitioners commonly grade a belly by the percent of pipe diameter it obstructs. In general terms, a minor belly blocks a small portion of the pipe, a moderate one blocks a meaningful share and calls for periodic re-inspection, and a severe one blocks a substantial portion of the pipe and usually calls for repair. These are practitioner rules of thumb rather than a legal code, so ask your inspector which thresholds they use and why.
Monitoring can be reasonable when:
- The sag is short and shallow, with low obstruction.
- The pipe walls and joints look sound on camera.
- You have had no backups, and drains run normally between routine cleanings.
In that case, a sensible plan is a documented baseline video, periodic cleaning, and a repeat inspection on a schedule your inspector recommends. Compare each new video with the baseline to see whether the sag is growing.
Repair is recommended soon when:
- The belly obstructs a large share of the pipe.
- You have had repeated backups or clogs that return quickly.
- The sag is long, or the footage shows cracks, offset joints or partial collapse.
- Roots are entering at the low spot and keep regrowing.
A belly that sits beneath a driveway, a slab or a mature tree can also push the decision toward repair, because the cost and difficulty of fixing it later only go up. If you are weighing the decision, our overview of sewer line repair options explains the practical differences in plain language.
Which repair options fix a sewer belly?
Repair choices fall into two families: digging the pipe out and replacing it, or rehabilitating it from the inside without a long trench. The right one depends on what the camera shows. A pipe that is merely sagging but still intact opens more options than a pipe that has collapsed.
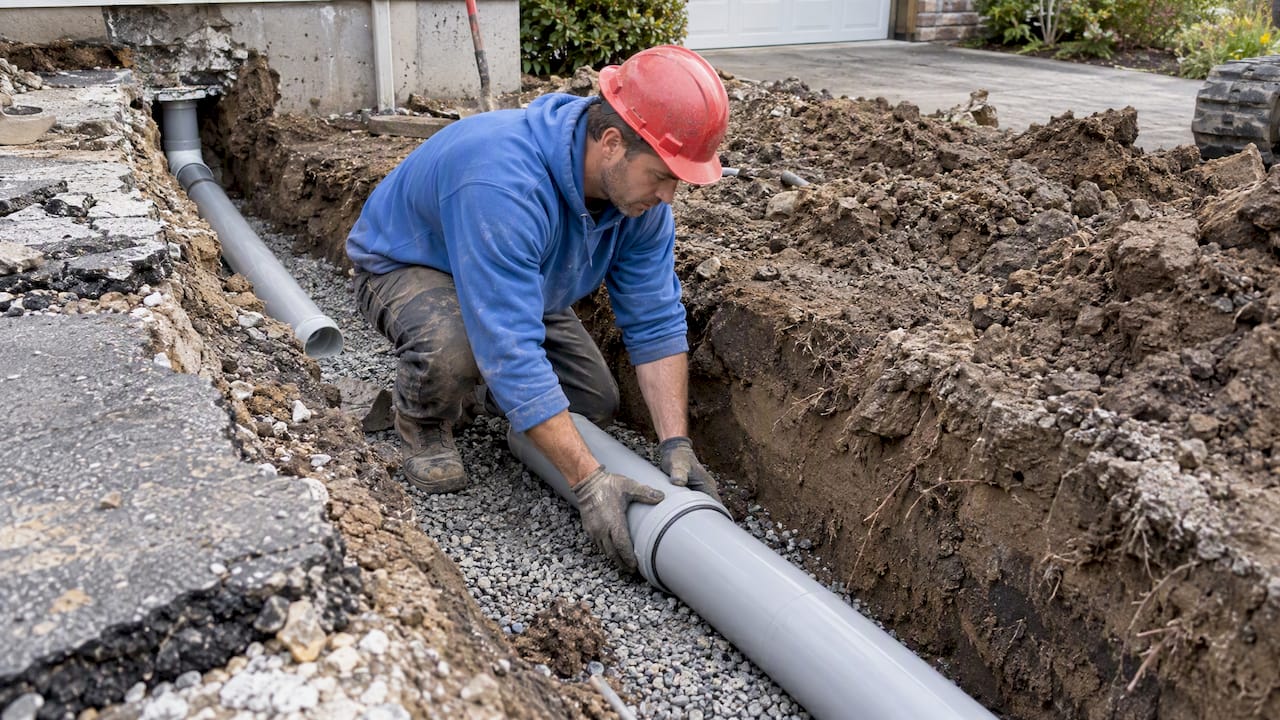
Excavation and full replacement. A crew digs down, removes the failed section, rebuilds firm bedding, and lays new pipe at the correct grade. This is the approach when the pipe has collapsed, when joints have failed badly, or when the belly itself must be physically corrected by re-grading the pipe. It is also the most direct way to restore the slope. The tradeoff is disruption: trenching through a lawn, driveway or landscaping, followed by restoration.
Cured-in-place pipe (CIPP). A resin-soaked tube is pulled or inverted into the existing pipe and cured so it hardens into a tight-fitting new pipe inside the old one. Iowa State’s trenchless chapter describes CIPP lining as a widely used rehabilitation method that requires cleaning and preparation and follows ASTM and installation standards. NASSCO’s CIPP specification guideline outlines minimum requirements covering cleaning, bypass pumping, installation, testing, quality control and a final television inspection. One caution matters for bellies: a liner follows the shape of the host pipe. It can seal cracks and joints and give a smooth interior, but it does not by itself lift a sagging pipe back to grade, so the depth of the dip must be acceptable to your inspector.
Spray-applied pipe liner (SAPL). A mortar-based or similar material is sprayed onto the interior wall of the host pipe. NASSCO’s SAPL specification guideline covers installation in gravity pipelines and stresses cleaning, bypass pumping and clearing standing water so inspection and lining can proceed. This approach tends to be used in constrained or larger host pipes where other liners are awkward.
Spiral-wound liners. A strip of profiled material is wound into the pipe to form a new lining. NASSCO’s guidance on spiral-wound pipe liners describes machine-wound and structural-grout versions, and emphasizes cleaning and bypass pumping so bellies are visible and manageable before rehabilitation.
Cleaning and hydro jetting. This is preparation, and sometimes interim maintenance, rather than a cure. The key principle is camera first. Jetting without looking can push debris into a worse spot or damage a weakened pipe, which is why we explain why you should not jet blind when roots are involved.
Here is how the main choices compare at a glance:
- Excavation: Most disruptive, but corrects grade and handles collapsed or badly broken pipe.
- CIPP: Minimal digging and a smooth, sealed interior, best when the pipe is intact and the sag is modest.
- SAPL: Suited to constrained pipes, with the same need for thorough cleaning and water control.
- Spiral-wound: A structural liner option for specific host pipe conditions.
- Cleaning and jetting: Required prep and maintenance, not a permanent fix for a true belly.
No single method wins every time. Ask for the reasoning behind a recommendation, and tie it back to the measurements in your inspection log.
What happens during a sewer line repair?
Most repair jobs follow a similar sequence, whichever method you choose. Knowing it ahead of time helps you spot a bid that skips steps.
- Inspection. A camera run documents the sag, its length and depth, and any structural defects.
- Cleaning. The line is cleaned and standing water removed so the defect is fully visible.
- Scope selection. You and the contractor choose between excavation and a trenchless method based on the footage.
- Permits and bypass planning. Permits are pulled where required, and a plan is made for managing flow while the work happens.
- Repair. The crew replaces or lines the pipe.
- Final inspection and testing. A closing camera run and testing confirm the pipe is sound and flowing correctly.
Bypass pumping or upstream plugging may be used during the work to control sewage flow, a step that the NASSCO CIPP guideline names among its minimum requirements. For you, that usually means limiting water use in the house for a stretch of hours. A good contractor will tell you exactly when to avoid running the washing machine, showers and dishwasher.
The closing step is the one homeowners skip too often. Testing methods such as low-pressure air or vacuum testing, described in the Iowa State sewer testing specification, verify that a new or lined pipe is tight. The final video should show a clean, continuous pipe with no standing water pooling where the belly used to be.
Expect some site restoration after excavation, such as backfilling and surface repair, and a quick cleanup after a trenchless job. Our walkthrough of the sewer repair process from start to finish covers what each day on site typically looks like. If excavation touches your driveway or yard, it also helps to read up on site restoration after heavy digging, since washouts and settling can follow if the backfill is not handled well.
Pro Tip: Ask the contractor to confirm that the final video will be recorded after the repair is complete, with the file delivered to you. That footage is your proof of the work and a useful baseline for any future inspection.
How do you choose a contractor and compare bids?
Sewer repairs can vary widely in price, and a bid is only comparable when the scope is written down. Your goal is an apples-to-apples comparison, so request the same deliverables from everyone you ask.
- A CCTV report with annotated findings. It should show sag length, percent obstruction and the video itself, not a one-line verdict.
- An itemized proposal. Look for separate lines for cleaning, repair method, permits, bypass or pumping, restoration and testing.
- Options with pricing. Ask for a monitoring plan alongside a trenchless option and a replacement option, so you can see what each path costs and what it buys you.
- Permit handling. Find out who pulls permits and who schedules any required municipal inspection.
- Warranty terms in writing. Ask what is covered, for how long, and whether it transfers if you sell the house.
- Licensing and insurance. Verify both before you sign, and ask for references or documented examples of similar jobs.
- Standards compliance. For lining work, ask whether installation follows recognized CIPP or SAPL practices, such as the NASSCO guidelines.
- A final inspection in the scope. The written scope should include a closing camera run and testing, not leave them as extras.
Get more than one bid, and give each contractor the same camera footage or have each one inspect the line independently. If two bids differ sharply, the gap usually comes from the scope: one may include permits, restoration and testing while the other quietly leaves them out.
Check with your local sewer agency too. Some municipalities have inspection requirements or assistance programs, and a televised line inspection is the dependable way to verify what condition your pipe is actually in rather than guessing from its age.
Why I insist on a camera first
My view is simple: never pay for a fix before you have seen the problem. A camera-first approach, with the line cleaned and the footage recorded, turns a vague worry into numbers you can compare. It also stops well-meaning jetting from pushing debris deeper or stressing a weak pipe. The good news is that many bellies caught early can be handled with trenchless methods rather than a full dig. Insist on a written scope, delivered video, and a warranty you can read.
— Maayan
How we can help with a sewer line belly
We provide sewer repair services:
- Camera inspection and pre-cleaning through our hydro jetting service
- Trenchless and excavation repairs through our sewer repair service
- Everyday drain cleaning to keep a line flowing between visits
When you call, ask for a camera inspection and an itemized proposal with options and final testing. Book your sewer inspection today through our sewer repair page.
FAQ
How serious is a belly in a sewer line?
It depends on how deep and long the sag is and how much of the pipe it blocks. A small, shallow belly may only need monitoring, while a severe one can cause repeated backups and calls for repair. A TV inspection with measurements is the only way to know.
How do you fix a belly in a sewer line?
Fixes range from replacing the sagging section by excavation to trenchless lining methods such as CIPP, SAPL or spiral-wound liners. Cleaning and hydro jetting prepare the pipe but do not remove the low spot. Your inspection footage decides which option fits.
What causes bellies in sewer lines?
Common causes include soil settlement, poor compaction after installation, incorrect original slope, ground movement and broken or offset joints. Roots and debris can then make an existing sag worse. A camera inspection shows which cause applies to your line.
What are the symptoms of a sewer belly?
Typical signs are slow drains in several fixtures, clogs that return soon after cleaning, gurgling sounds and sewer odors. Wet or unusually green patches in the yard can also point to a problem along the sewer run. Repeated cleanings that fail to solve the issue are a strong hint.
Sources
Recommended
- Your Top Sewer Line Repair Options, Explained Clearly
- Understanding the Sewer Repair Process From Start to Finish
- Sewer line repair guide for Pittsburgh homeowners
- Sewer Line Warning Signs Every Homeowner Should Know
