
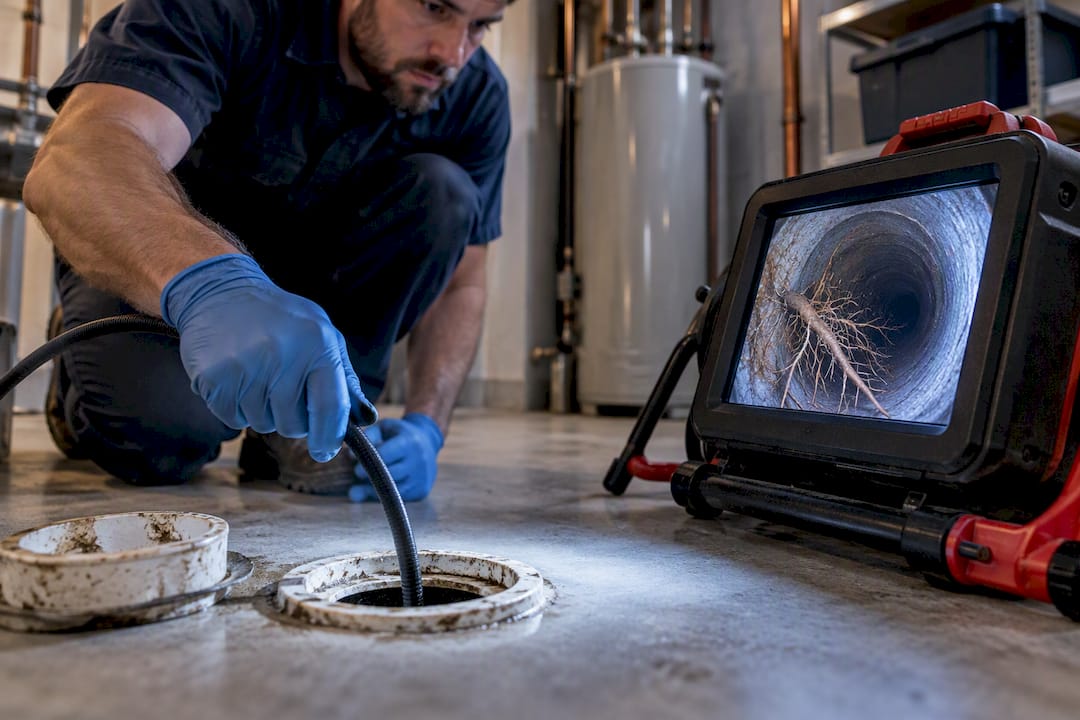
Professional hydro jetting reliably removes root masses from sewer pipes, restoring flow in most residential lines the same day. It’s a cleaning solution, not a structural repair, and results typically hold for one to five years depending on tree species and pipe condition. Before you book anything, insist on a camera inspection first. Jetting a pipe with hidden cracks or joint separations can turn a clog into a much bigger problem.
TL;DR:
- Hydro jetting with camera inspection is essential to avoid damaging pipes with cracks or joint separations, especially in older or compromised lines.
- Roots generally regrow within one to five years, with faster return near cracked or gapped joints and slower regrowth when conditions are more sealed or distant from mature trees.
- Repeating jetting often becomes less economical than permanent solutions like lining or grouting if multiple service calls are needed within a few years.
- Jetting is most effective when targeted with the correct nozzle type chosen after inspection; using the wrong nozzle or without verification risks making problems worse.
- DIY rental jetters lack the pressure, nozzle options, and knowledge needed to reliably clear mature root masses and may cause pipe damage without professional assessment.
Table of Contents
- How Hydro Jetting Removes Roots From Sewer Lines
- Hydro Jetting vs. Snaking: Which Lasts Longer?
- When Hydro Jetting Is the Wrong Call
- How Long Before Roots Grow Back After Jetting?
- Repeated Jetting or a Permanent Fix: Doing the Math
- What Happens During a Hydro Jetting Appointment
- What Local Plumbing Experience Adds to the Decision
- Why the Camera Comes Before the Jetter, Every Time
- Ready to Deal With Your Root Problem the Right Way?
- Sources
- FAQ
How Hydro Jetting Removes Roots From Sewer Lines
A hydro jetting rig pushes water through a hose and nozzle at pressures most homeowners never think about. Residential rigs typically run between 1,500 and 4,000 PSI, while commercial units used for larger diameter lines often exceed that range. That pressure, combined with the right nozzle, is what separates hydro jetting from a garden hose or a rental snake from the hardware store.
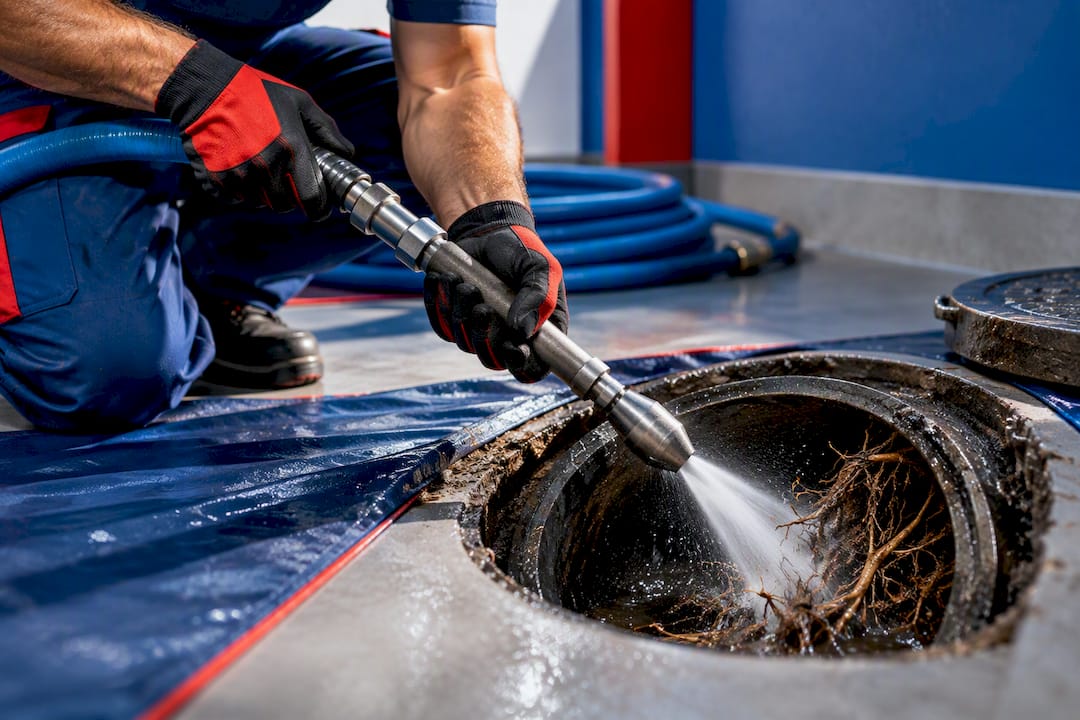
Technicians choose nozzles based on what’s inside the pipe. A root-cutter head shreds intruding root masses on the way in. A penetrating nozzle pulls itself forward through grease and scale. A flushing nozzle sprays water backward in a wide fan to scour the pipe wall clean on the way out. The workflow follows two passes: a forward cut through the obstruction, then a reverse flush that clears debris toward the cleanout for removal.
That capability gap between consumer and professional equipment is real. A rental jetter might handle light buildup in a laundry line, but it lacks the pressure and nozzle selection to cut through a mature root mass wrapped around a pipe joint. Professional trucks also carry root-cutter attachments most homeowners never see, plus vacuum equipment to remove what gets flushed loose.
- Root-cutter nozzles chew through fibrous root intrusion at the point of blockage.
- Penetrating nozzles thread through grease and sludge to reach the clog.
- Flushing nozzles scour the full pipe wall, not just a narrow channel.
This trade-standard approach, described in detail in industry hydro jetting guides, restores pipes close to their original diameter when the pipe itself is structurally sound.
Hydro Jetting vs. Snaking: Which Lasts Longer?
Snaking and cable cutters punch a hole through a clog. Hydro jetting scours the entire circumference of the pipe. That difference explains why jetted lines tend to stay clear longer than snaked ones, even when both jobs look successful on the day of service.
A cable cutter drills a channel wide enough for water to pass, but it leaves root fragments and buildup clinging to the pipe wall. Those leftovers become the seed for the next clog. Jetting, by contrast, blasts material off the full 360 degrees of pipe wall, leaving less for roots to grab onto when they push back through a cracked joint.
That said, jetting isn’t always the first tool into the pipe. In a severely packed line where roots have fully occluded the diameter, a nozzle can’t get past the obstruction to start cutting. Technicians often run a cable cutter first just to open a pilot channel, then follow with the jetter to finish the job properly.
- Camera scope confirms the blockage type and pipe condition.
- Cable cutter opens a channel if the line is fully packed.
- Root-cutter nozzle clears the remaining mass.
- Flushing pass scours the pipe wall clean.
Recurrence timing depends heavily on tree species, how close the roots are to the pipe, and the age and material of the pipe itself. A silver maple 15 feet from a cracked clay joint will find its way back faster than a slow-growing oak planted well away from the line.
Pro Tip: Ask your plumber which nozzle they used and why. A tech who can explain the choice is usually the one who actually inspected the pipe first instead of running a generic cycle.
When Hydro Jetting Is the Wrong Call
Hydro jetting is a high-pressure tool, and that pressure is exactly why it’s not appropriate for every pipe. Certain materials and conditions turn a routine cleaning into a costly mistake.
- Orangeburg pipe, made of compressed wood fiber and tar, can delaminate or collapse under jetting pressure.
- Brittle or heavily corroded cast iron can crack further instead of simply getting clean.
- Pipes with severe existing cracks or visible separations risk blowing out entirely.
- Any section showing signs of collapse should never be jetted before repair.
The risk isn’t limited to the pipe itself. Forcing high-pressure water into a compromised line can wash out the soil supporting it, and that soil loss is a documented path toward sinkholes and further structural failure. Professional plumbers caution that jetting a pipe with major joint separation can make problems worse rather than better, since the water finds every weak point and exploits it.
This is why a pre-jet camera inspection isn’t optional. A responsible contractor scopes the line first and shows you the footage before recommending jetting, snaking, or lining. If a plumber wants to jet blind, that’s a signal to ask more questions. Sewer scope standard procedures call for documenting cracks and defects specifically so that decision gets made with evidence, not guesswork, and industry guidance notes that visible defects can predict failure within 12 to 24 months if left unaddressed.
How Long Before Roots Grow Back After Jetting?
Regrowth timelines vary more than most homeowners expect. Root intrusion generally comes back somewhere between one and five years after jetting, and the range depends heavily on tree species, distance from the pipe, and the condition of the pipe joints where roots originally found their way in. A line with tight, well-sealed joints near a slow-growing tree might stay clear for years. A line with gapped joints near a fast-growing willow could see roots return within a season.
Several strategies extend that window:
- Foaming root inhibitors. Dichlobenil-based foams coat roots inside the pipe and inhibit regrowth when applied according to the EPA-registered product label. They extend time between services but aren’t a one-time cure. Reapplication on a schedule matters more than a single treatment.
- Landscape adjustments. Planting distance matters more than most homeowners realize. University extension guidance recommends keeping trees more than 10 feet from sewer lines and notes that no tree is truly sewer-safe, though slower-growing species planted farther away reduce the odds significantly.
- Root barriers. Physical barriers installed between a tree and the pipe redirect root growth downward instead of sideways, though they work best when installed before intrusion starts, not after.
- Permanent lining or grouting. These address the structural gaps roots exploit in the first place.
| Prevention method | What it does | Best fit |
|---|---|---|
| Foaming root inhibitor | Coats roots to slow regrowth | Between scheduled jetting visits |
| Root barrier | Redirects root growth away from pipe | New or replanted trees near the line |
| Joint grouting | Seals pipe joints against infiltration | Concentrated joint defects |
| CIPP lining | Rebuilds the pipe interior | Widespread structural wear |
On permanent fixes, the data gets specific. A trenchless rehabilitation study found joint grouting reduced infiltration by roughly 92% in one case, while lining showed more variable results depending on hydrologic conditions at the site. Grouting alone can be the stronger fix when defects are concentrated at joints; lining without addressing joint gaps first can leave infiltration paths in the annular space around the new liner.
Repeated Jetting or a Permanent Fix: Doing the Math
At some point, every homeowner with recurring root problems asks the same question: keep paying for jetting, or pay once for a permanent repair? The answer comes down to comparing recurrence frequency against upfront rehabilitation cost.
Residential hydro jetting typically runs $350 to $1,200 per visit depending on pipe length, diameter, and how severe the blockage is, with camera inspections adding another $150 to $350 if not already bundled in. If you’re calling a plumber every year for the same root problem, that adds up fast against a one-time lining or grouting job.
Run through this checklist before deciding:
- How often are backups happening? Annual is a maintenance pattern; multiple times a year signals a structural issue.
- Does camera footage show joint separation or early collapse, not just root intrusion?
- How old is the pipe, and what’s it made of? Clay and Orangeburg joints fail differently than PVC.
- Is there a mature tree canopy nearby that guarantees repeat intrusion regardless of treatment?
If backups are rare and the camera shows sound pipe with isolated root entry, scheduled jetting on a maintenance cadence is often the more economical route. If footage shows multiple joint gaps or a pipe nearing the end of its service life, trenchless lining or joint grouting usually pays for itself within a few years of avoided service calls. For a deeper look at balancing these costs against DIY options, see this homeowner guide to clearing roots from drains.
What Happens During a Hydro Jetting Appointment
A professional visit follows a consistent sequence, and knowing it ahead of time helps you evaluate whether the contractor is doing the job right.
- Scheduling and access check. The technician confirms cleanout location and access before arrival.
- Pre-jet camera scope. A camera run identifies the blockage type, location, and pipe condition.
- Nozzle selection. Based on the footage, the technician chooses a root-cutter, penetrating, or flushing nozzle.
- Cut and flush passes. The forward pass cuts through the obstruction; the reverse pass flushes debris toward the cleanout.
- Vacuum removal. Cut material and debris get vacuumed out through the cleanout access point.
- Post-jet camera verification. A second camera pass confirms the line is clear and checks for any damage the jetting revealed.
Most residential jobs take one to three hours. If the post-jet camera reveals joint separation, significant pipe wear, or a section that didn’t respond to jetting, that’s the point where a contractor should pivot the conversation toward lining instead of scheduling another cleaning.
Pro Tip: Ask for the camera footage, not just a verbal summary. A contractor confident in their work will hand over both the before and after video without hesitation.
What Local Plumbing Experience Adds to the Decision
AG Heating, Cooling & Plumbing has provided plumbing services in Pittsburgh, PA, and the surrounding area for 30 years, long enough to see how local clay pipe and mature tree canopies interact over decades, not just one service call. That kind of tenure matters because root intrusion patterns are regional. A silver maple-lined street in an older Pittsburgh neighborhood behaves differently than a newer development with PVC lines and younger trees.
Staying current with plumbing technique matters just as much as tenure. Nozzle technology and camera equipment have both improved substantially, and a contractor who hasn’t updated their approach is working with yesterday’s tools on today’s pipes. AG Plumbing’s own hydro jetting resources and coverage of commercial jetting applications reflect that ongoing attention to technique, from nozzle selection to diagnosing when a line needs more than a cleaning.
Why the Camera Comes Before the Jetter, Every Time
The biggest gap between good and bad hydro jetting service isn’t the equipment. It’s whether the contractor looks before they act. Plenty of outfits will jet a line on the first visit because it’s faster and the customer wants the clog gone. That approach works fine until it doesn’t, and when it doesn’t, the homeowner is the one paying for the sinkhole or the emergency excavation.
The conventional advice on this topic treats jetting as a universal fix for slow drains and root intrusion. It isn’t. It’s an excellent cleaning tool that restores flow in sound pipe and does real damage in compromised pipe. The distinction that actually matters is what the camera shows, not what the symptom feels like from inside the house.
If you take one thing from this guide, make it this: never let anyone jet your line without showing you footage first, and never accept a verbal “it looked fine” in place of the video. Homeowners who build a camera-first habit end up making better decisions about when to keep scheduling maintenance jetting and when to commit to a permanent fix like lining or grouting.
— Maayan
Ready to Deal With Your Root Problem the Right Way?
If recurring clogs have you calling for a snake every few months, hydro jetting with camera verification breaks that cycle instead of just delaying the next call. An experienced local plumbing company brings years of regional knowledge to every job, starting with a camera scope so you know exactly what’s happening in your line before any equipment goes in.

Book a visit and you’ll get a professional workflow: pre-jet camera inspection, selection of the right nozzle for the specific blockage, a post-jet verification pass, and a written estimate for lining or joint grouting if the footage shows your pipe needs more than a cleaning. That’s a different experience than a contractor who jets first and explains later. Get started on the hydro jetting page or reach out through AG Plumbing’s contact page to schedule your inspection.
Sources
- UTIA extension: tree selection near sewer lines
- Thesis: evaluating trenchless rehabilitation efficacy (USF)
- EPA pesticide label: Roebic Foaming Root Killer (dichlobenil)
- Hydro Jetting: The Complete Guide (trade guide)
FAQ
How Expensive Is Hydro Jetting?
Residential hydro jetting typically costs $350 to $1,200 per visit, depending on pipe length, diameter, and blockage severity. Camera inspections add another $150 to $350 if they aren’t already bundled into the service. AG Plumbing’s current pricing is available directly through their hydro jetting page.
How Quickly Will Roots Return After Hydro Jetting?
Root regrowth typically takes one to five years, depending on tree species, distance from the pipe, and the condition of the pipe joints. Fast-growing species near cracked or gapped joints tend to return sooner, while slower-growing trees farther from sound pipe can stay clear much longer.
Can I Do Hydro Jetting Myself?
Consumer rental jetters lack the pressure range and nozzle selection professional rigs use, so they can’t reliably clear mature root masses. DIY jetting also carries real risk: without a camera inspection first, you can’t know if your pipe is structurally sound enough to handle the pressure.
What Kills Roots in Sewer Lines Fast?
A root-cutter nozzle during hydro jetting physically removes root mass immediately, which is faster than any chemical treatment. Foaming root inhibitors like dichlobenil-based products, registered with the EPA, work more slowly and are best used to extend time between jetting services rather than as a first response to an active blockage.
Recommended
- Clearing Roots From Drains: A Cost-Aware Homeowner Guide
- What is hydro jetting? Ultimate guide for homeowners 2026
- Clear Sewer Line Blockages: 2026 Homeowner’s Guide
- How drain cameras revolutionize home plumbing diagnosis
