
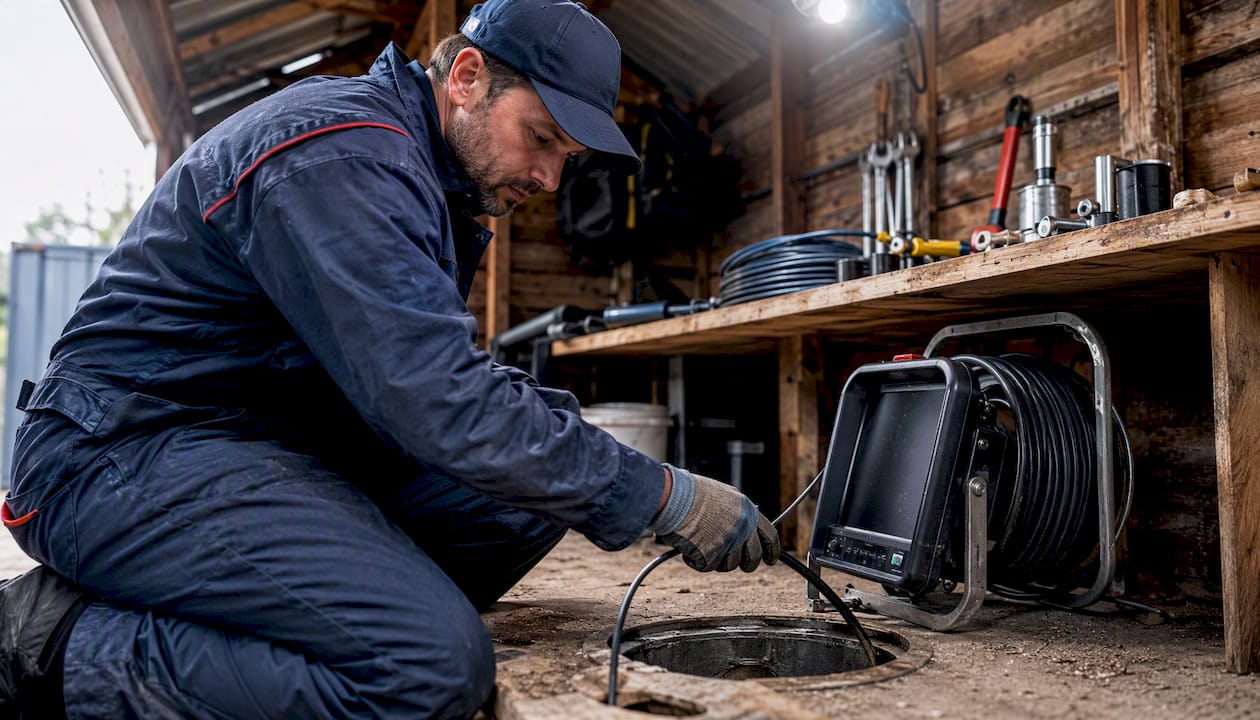
Your main choices for sewer-line repair are trenchless lining (CIPP), pipe bursting, spot/trench repair, and full open-trench replacement. The camera inspection decides which one fits. Before you agree to any method, a licensed plumber should run a sewer camera through the line — that video tells you whether the pipe is cracked, collapsed, offset, or bellied, and that finding is what narrows the field.
Cost ranges vary widely. Angi’s data puts the average professional sewer line replacement around the typical national cost estimates, with projects ranging from small spot repairs to more extensive replacements including restoration. Per-foot costs depend heavily on the method, the pipe’s depth, and what gets torn up to reach it.
Here is a quick reference for the four main repair families:
- CIPP (trenchless lining): A resin-saturated liner is inserted and cured inside the existing pipe, creating a pipe within a pipe. Best for cracked or root-infiltrated lines with intact shape.
- Pipe bursting: A bursting head fractures the old pipe outward while pulling a new pipe in behind it. Works trenchlessly when the pipe is too deteriorated to line but still roughly in place.
- Spot/trench repair: A targeted dig to replace a short damaged section. Right for isolated breaks or offsets when the rest of the line is sound.
- Full open-trench replacement: The whole line is excavated and replaced. Required for collapsed pipes, severe grade problems, or Orangeburg in advanced deterioration.
Key Takeaways
The camera inspection is the single non-negotiable first step — it determines which repair method is actually viable and prevents costly misapplied repairs.
| Point | Details |
|---|---|
| Inspection before method | A sewer camera inspection ($100–$500) must precede any repair commitment; it determines pipe condition and method eligibility. |
| Trenchless when surface costs are high | CIPP and pipe bursting cost more per foot but save thousands when concrete or mature landscaping sits above the pipe. |
| Excavation for collapse or grade problems | Collapsed pipes, severe offsets, and bellies cannot be fixed trenchlessly; full excavation is the correct call in those cases. |
| Get itemized written quotes | Compare total project cost including restoration, permits, and camera work — not just the per-foot pipe rate. |
| Ag-plumbing for Pittsburgh | Ag-plumbing provides camera inspection, CIPP, pipe bursting, and open-trench replacement with written warranties and local permit coordination. |
Table of Contents
- How do you know if your sewer line is damaged?
- What are the top sewer line repair options for your situation?
- What does sewer line repair actually cost?
- How do you choose the right repair method?
- Should you attempt sewer line repair yourself?
- How long does sewer line repair take, and what gets restored?
- How does pipe material affect your repair options?
- What Ag-plumbing’s field experience shows about sewer diagnosis
- What contractors actually see — and what homeowners get wrong
- Ag-plumbing handles the full sewer repair process in Pittsburgh
- Sources
- FAQ
How do you know if your sewer line is damaged?
The signs of sewer line damage rarely announce themselves cleanly. Most homeowners notice one symptom and assume it is a simple clog, which is exactly how a manageable crack becomes a full collapse.
Watch for these warning signs:
- Slow drains in multiple fixtures at the same time (not just one sink)
- Recurring backups that return within days of snaking
- Sewage odors inside the house or near the yard
- Soggy, sunken, or unusually lush patches of grass over the pipe path
- Gurgling sounds from toilets when you run a sink or shower
- Multiple fixture failures happening simultaneously
Pro Tip: The lush-grass patch is the one most homeowners miss. A slow leak from a cracked lateral fertilizes the soil above it for months before any backup appears indoors. If you have a suspiciously green strip of lawn running toward the street, that is worth a camera look before you assume it is just good soil.
When two or more of these signs appear together, stop adding chemicals or renting a snake. Those measures can temporarily mask the symptom while the underlying problem worsens. The right next step is a sewer camera inspection — not a guess. A video inspection typically costs $100–$500 and gives you a definitive diagnosis of what is actually wrong and where.
What are the top sewer line repair options for your situation?
This Old House and practitioners across the industry agree: the camera inspection result is the single most important input for choosing a repair method. Here is what each option actually involves.
CIPP (cured-in-place pipe) relining
CIPP is the most widely used trenchless method. A felt or fiberglass liner saturated with epoxy resin is pulled or inverted into the existing pipe, then inflated and cured with hot water, steam, or UV light. The result is a smooth, jointless pipe inside the old one, rated for a 50-plus-year design life when installed in a suitable candidate.
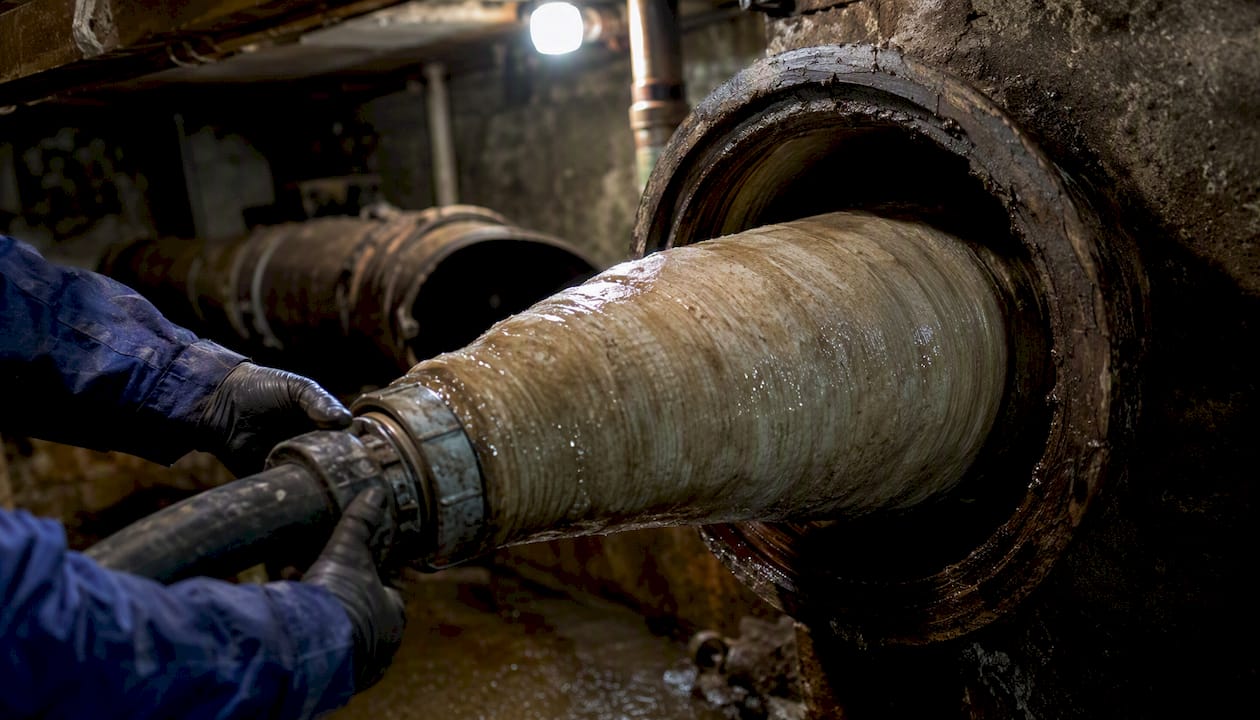
It works well on cracked, root-infiltrated, or lightly deteriorated pipes that still hold their round shape. The tradeoff is a slight reduction in interior diameter — typically a quarter to half an inch — which matters on already-undersized lines. CIPP cannot correct a belly (a sag in the pipe’s grade) because the liner simply follows the existing path. Learn more about pipe relining for Pittsburgh homes.
Pipe bursting
Pipe bursting pulls a conical bursting head through the old pipe, fracturing it outward into the surrounding soil while simultaneously pulling a new HDPE pipe in behind it. Unlike CIPP, pipe bursting can actually upsize the pipe diameter, which is useful when the original line was undersized. It requires small access pits at each end of the run rather than a full trench, so surface disruption stays limited.
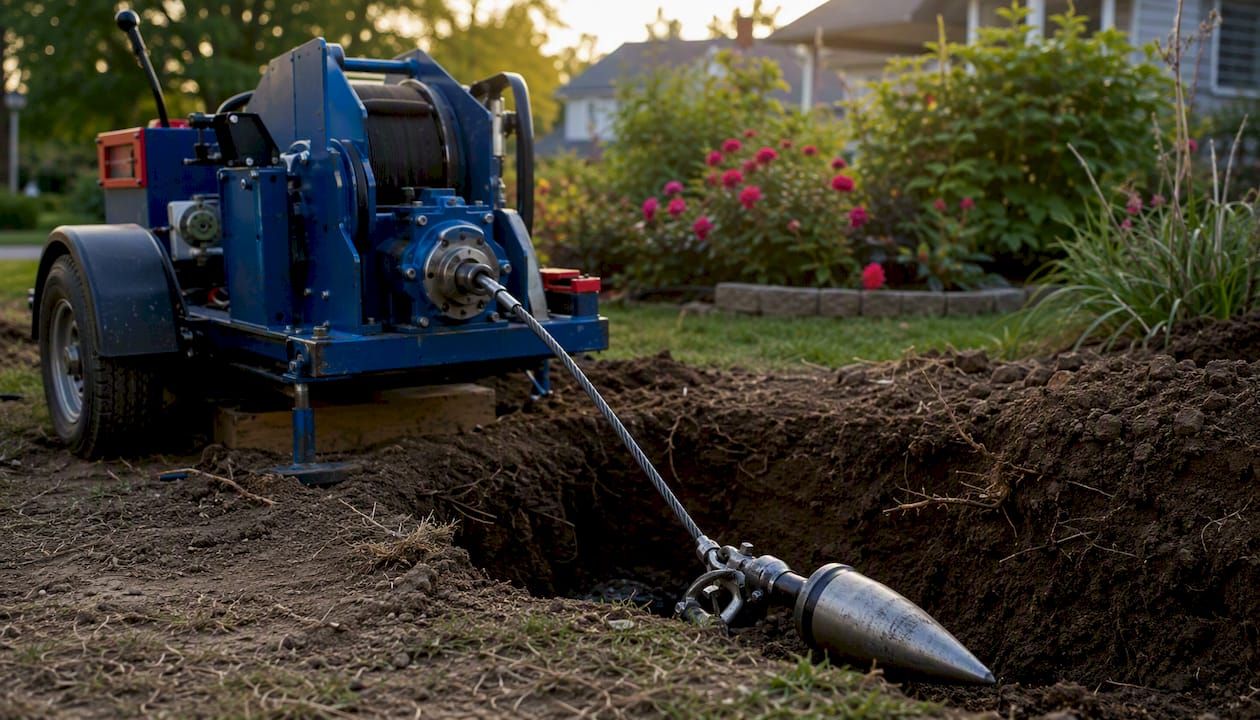
The method works trenchlessly, but it is not a universal fix. It needs the surrounding soil to accept the displaced pipe fragments, and it cannot correct a grade problem any more than CIPP can. Learn about pipe bursting for Pittsburgh properties.
Spot/trench repair
When the camera shows one isolated problem — a single offset joint, a root intrusion at one connection, a short section of collapsed clay — a targeted dig is often the most cost-effective answer. The contractor excavates only the damaged section, replaces it, and backfills. Total disruption is limited to a small area, and the rest of the line stays untouched.
Spot repair makes sense when the surrounding pipe is in good condition. If the camera shows damage at multiple points, spot repairs at each location can add up to more than a full replacement.
Full open-trench replacement
Some pipes cannot be saved by any trenchless method. Trenchless methods are not appropriate for fully collapsed lines, severe offsets that have shifted the pipe out of alignment, or pipes with a belly that needs grade correction. In those cases, the entire line is excavated, removed, and replaced with new PVC or HDPE pipe set to the correct slope.
Full replacement costs more and disrupts more surface area, but it solves problems that no liner or bursting head can address. It also resets the clock on the pipe’s lifespan.
Method comparison
What does sewer line repair actually cost?
Cost is where homeowners most often get surprised, and the surprise usually comes from restoration — not the pipe work itself.
Per-foot installation costs are only part of the number. A trenchless job that costs $150 per foot might look expensive next to a $90-per-foot excavation bid, but if the excavation runs under a concrete driveway, you are adding $3,000–$8,000 in concrete replacement on top of the pipe work. Trenchless methods typically cost more per linear foot but can save thousands in restoration when driveways, patios, or mature landscaping sit above the pipe.
| Method | Typical per-foot range | Typical total project range |
|---|---|---|
| CIPP relining | costs vary according to project specifics/ft | $3,000–$8,000 |
| Pipe bursting | costs vary according to project specifics/ft | $3,500–$8,000 |
| Spot repair | $50–$150/ft (section) | $500–$3,000 |
| Full excavation | costs vary according to project specifics/ft | $3,000–$15,000 |
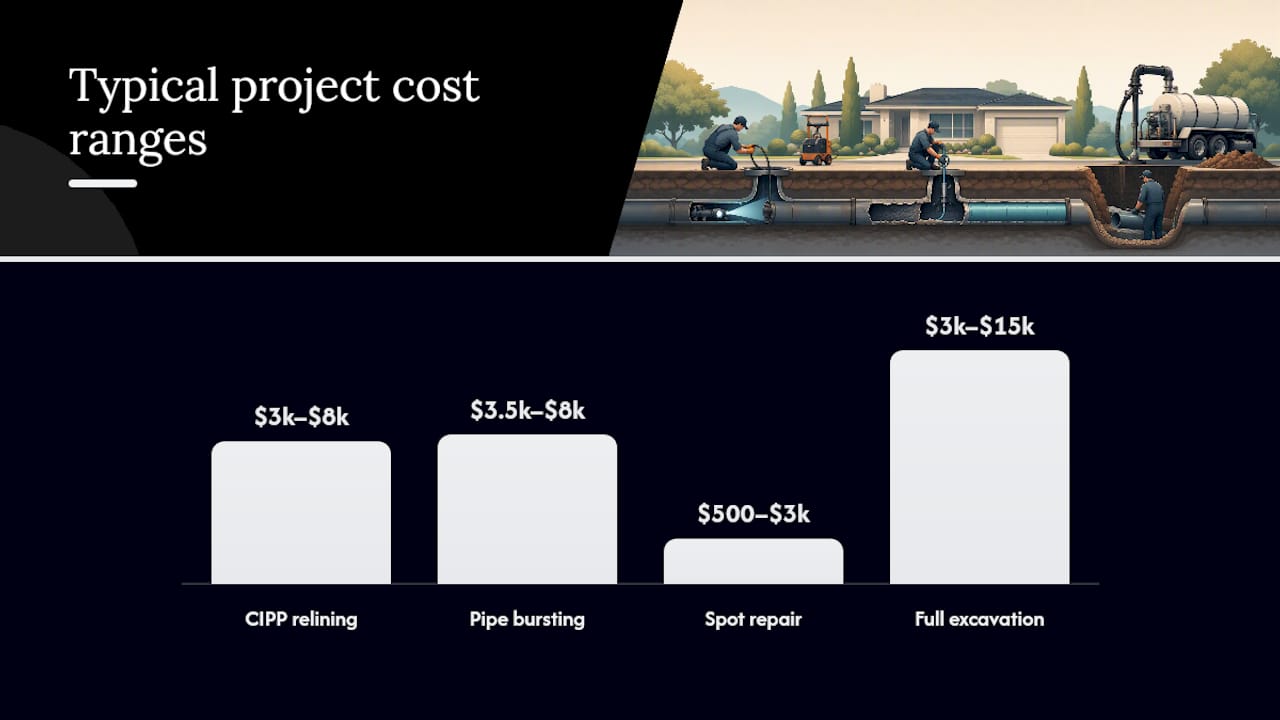
Ranges sourced from CostToRenovate and Angi. Totals vary by pipe length, depth, local labor rates, and restoration scope.
What drives the price up
- Pipe depth: Deeper pipes require more excavation time and shoring equipment.
- Pipe material: Clay and cast iron are harder to work with than PVC.
- Restoration scope: Concrete, asphalt, and pavers cost significantly more to restore than lawn.
- Permits and inspections: Municipal permits add cost and time; work connecting to the public main often requires a city inspection.
- Hydro jetting: Many trenchless jobs require the line to be cleaned first, adding $300–$600.
- Camera inspection: Budget $100–$500 for the diagnostic video, though many contractors credit it toward the repair.
- Access pits: Trenchless methods still need entry and exit pits, which add labor.
What to ask for in a written estimate
Before signing anything, make sure the quote includes:
- Itemized line items for pipe work, camera inspection, permits, and restoration
- The scope of restoration work (exactly what gets repaired after the dig)
- Warranty terms and expected service life for the installed method
- Whether a subcontractor handles any part of the job
- The pipe material being installed and its specifications
How do you choose the right repair method?
The decision process is straightforward when you follow it in order. Skipping steps is where homeowners end up paying twice.
- Get a camera inspection. No reputable contractor should recommend a method without one. The video shows pipe material, defect type, defect location, and whether the pipe holds its shape — all of which determine candidacy for trenchless methods.
- Interpret the findings. Cracks and root infiltration with intact pipe shape: CIPP is likely viable. Severely deteriorated but structurally present pipe: pipe bursting. One isolated break: spot repair. Collapse, belly, or severe offset: excavation is the answer.
- Factor in surface restoration costs. Get a realistic number for what sits above the pipe. A concrete driveway changes the math entirely.
- Get three written quotes. Bids should be itemized. A quote that lists only “sewer repair — $X” tells you nothing about what you are actually getting.
- Check contractor credentials. Licensed, insured, and pulling the required permits. Ask for references and before/after photos from similar jobs.
Questions to ask every contractor
- Can I have a copy of the camera inspection video?
- Which permits are required, and who pulls them?
- What does restoration include, and is it in the written scope?
- What warranty do you offer on the repair, and what does it cover?
- What pipe material are you installing, and what is its rated lifespan?
- How long will the job take, and will service be interrupted?
- Is any part of this job subcontracted?
Red flags to watch for
- No camera inspection before recommending a method
- Vague scope (“sewer repair” with no method or material specified)
- Missing permit line item in the estimate
- No restoration estimate or a verbal-only promise to “fix everything back”
- Pressure to decide same-day without a written quote
A Pittsburgh sewer repair guide can help you understand what local permit requirements and restoration standards typically look like in this area.
Should you attempt sewer line repair yourself?
Short answer: almost never, and not because the work is mysterious. Sewer lateral work connects to the municipal system, which means permits, inspections, and in many jurisdictions, licensed contractor requirements. The EPA’s guidance on sanitary sewer overflows makes clear that improper connections and discharges carry public-health and regulatory consequences that go well beyond a failed DIY project.
There are a few things homeowners can reasonably manage:
- Scheduling and coordinating multiple contractor bids
- Reviewing camera inspection video with the contractor
- Documenting the job with photos before, during, and after
- Confirming permit status with the local municipality
Sewage exposure is a genuine health hazard. Raw sewage contains pathogens including E. coli, hepatitis A, and norovirus. Open trenches also carry collapse and shoring risks that require OSHA-compliant equipment. These are not risks to manage with a shovel and a YouTube tutorial. Even hydro jetting — which looks like a pressure washer — operates at pressures that can cause serious injury without proper training and equipment.
Snaking a drain yourself is reasonable for a minor clog. The moment the problem recurs, involves multiple fixtures, or produces sewage odors, the job belongs with a licensed plumber. Temporary measures like shutting supply valves or avoiding certain fixtures can limit damage while you wait for a professional, but they are not repairs.
How long does sewer line repair take, and what gets restored?
Timeline depends heavily on the method and what sits above the pipe. Here is a realistic breakdown:
Permits and municipal inspections can add days or weeks to any of these timelines, particularly when the work extends into the public right-of-way or connects to the city main. Factor that in before scheduling around a hard deadline.
Post-job restoration is where budgets often get revised upward. Typical restoration costs:
- Lawn and landscaping: $200–$1,500 depending on sod, grading, and plantings disturbed
- Concrete (driveway or sidewalk): $3,000–$8,000 for a standard driveway section
- Asphalt: $1,500–$4,000 depending on patch size and thickness
- Pavers: $2,000–$6,000 or more, since matching existing pavers is often difficult
Always confirm in writing that restoration is included in the contractor’s scope. “We’ll put it back the way we found it” is not a contract term.
How does pipe material affect your repair options?
The pipe already in the ground shapes every decision. Different materials fail differently, and not every repair method works on every material.
| Pipe material | Typical lifespan | Common failure modes | Best repair approach |
|---|---|---|---|
| Clay (vitrified) | 50–100 years | Root infiltration, joint separation, cracking | CIPP if intact shape; excavation if collapsed |
| Cast iron | 50-plus years | Corrosion, tuberculation, cracking | CIPP or spot repair; excavation for severe corrosion |
| Orangeburg | 50 years (often less) | Delamination, collapse, oval deformation | Excavation and full replacement |
| PVC | 100+ years | Root intrusion at joints, physical damage | Spot repair or CIPP |
| HDPE | 50–100 years | Physical damage, improper joints | Spot repair; rarely needs full replacement |
Orangeburg deserves a specific note. It is a fiber-and-pitch pipe installed widely from the 1940s through the 1970s, and it softens and deforms over time. By the time most Orangeburg lines show symptoms, they have already lost their round shape, which disqualifies them from CIPP. Excavation and full replacement is almost always the correct call.
CIPP liners and HDPE replacement pipe both carry a 50-plus-year design life when properly installed. PVC, the most common replacement material today, can last 100 years or more under normal conditions. Root resistance is a genuine advantage of both CIPP-lined pipe and HDPE — neither has the joints that roots exploit in clay or older PVC systems.
Pro Tip: Ask your contractor what material is currently in the ground before the camera goes in. Older Pittsburgh homes built before 1970 frequently have clay or cast iron laterals, and some have Orangeburg. Knowing the material ahead of time helps you ask smarter questions about which methods are actually on the table.
What Ag-plumbing’s field experience shows about sewer diagnosis
The most common mistake Ag-plumbing’s technicians see is a homeowner who has already agreed to a repair method before anyone has looked at the pipe. A neighbor recommended trenchless, the price sounded good, and the contractor was ready to start — but nobody ran a camera. That scenario plays out more often than it should, and it frequently ends with a liner installed in a pipe that had a belly, meaning the standing water problem never went away.
A few patterns from the field:
- A recurring backup that multiple plumbers had snaked turned out to be a root mass at a clay joint 40 feet from the house. CIPP resolved it in a single day. The homeowner had been paying for snake service twice a year for three years.
- A homeowner quoted $4,500 for CIPP called for a second opinion. The camera showed a full collapse at the midpoint of the run. CIPP was not viable; the correct repair was a targeted excavation and spot replacement, which cost less than the original trenchless quote.
- A property manager assumed a slow drain in one unit was a localized clog. The camera showed root infiltration at four separate joints across 60 feet of clay pipe. Spot repairs at each location would have cost more than a full CIPP relining of the run.
Pro Tip: When reviewing the camera video with your contractor, ask them to note the clock position of any cracks (12 o’clock is top of pipe, 6 o’clock is bottom). Cracks at the bottom suggest structural loading or ground movement. Cracks at the top often indicate corrosion from gases inside the pipe. That distinction changes the repair recommendation.
Ag-plumbing provides written documentation of inspection findings and carries that information through to the repair recommendation. The sewer repair process should always start with a camera, and the video should be yours to keep.
What contractors actually see — and what homeowners get wrong
The single most expensive mistake homeowners make is choosing a repair method before getting a camera inspection. Trenchless sounds appealing — less mess, faster, no driveway to replace — and some contractors are happy to sell it without confirming the pipe qualifies. The result is a liner in a collapsed or bellied pipe that fails within a few years, leaving the homeowner with the same problem and a depleted budget.
The second mistake is ignoring restoration costs when comparing bids. A quote that looks $2,000 cheaper than a competitor’s may simply be omitting the concrete work. Always ask what the total project cost is, including everything that gets disturbed and put back.
In Pittsburgh specifically, permit requirements and right-of-way rules vary by municipality. Work that crosses into the city’s right-of-way or connects to the public main requires coordination with the local authority, and that process takes time. Building that into the project schedule from the start prevents surprises.
A short checklist of actions that save money and reduce risk:
- Get the camera inspection before agreeing to any method
- Ask for the camera video in writing as part of your deliverables
- Compare total project costs (pipe work plus restoration plus permits), not just per-foot rates
- Verify the contractor’s license and insurance before signing
- Confirm permit responsibility in the written contract
Ag-plumbing handles the full sewer repair process in Pittsburgh
Thirty years of sewer work in Pittsburgh and the surrounding areas means Ag-plumbing has seen every pipe material, every failure mode, and every restoration scenario the region produces. The process starts with a camera inspection — you get the video — and the repair recommendation follows from what the camera actually shows, not from what is easiest to sell.

Ag-plumbing’s sewer repair services cover the full range: camera inspection and diagnosis, CIPP relining, pipe bursting, spot repair, full open-trench replacement, hydro jetting, and restoration coordination. Every job comes with a written scope, itemized pricing, and warranty documentation. Licensed, insured, and pulling the required permits — every time.
To schedule a camera inspection and get a written assessment of your line’s condition, contact Ag-plumbing through Ag-plumbing. The inspection is the starting point; everything else follows from what it finds.
Sources
The following sources back the cost figures, method descriptions, and regulatory context in this article:
- Sanitary sewer overflow (SSO) frequent questions | US EPA
- How Much Does Sewer Line Replacement Cost? 2026 Data | Angi
- Sewer Line Repair and Replacement — This Old House
- Sewer Line Repair / Replacement Cost in 2026 | CostToRenovate
- Video pipe inspection: how it works and why it’s important — RapidView
- Trenchless Sewer Repair vs Sewer Excavation: Which Method Fits Your Line? | Drain, Sewer & Hydro Jetting
FAQ
What is the average cost to repair a sewer line?
Angi’s data puts the average professional sewer line replacement around the typical national cost estimates, though total project costs range from a few hundred dollars for a small spot repair to over $10,000 when concrete restoration is involved.
What is the best way to repair a broken sewer pipe?
The best method depends on what the camera inspection finds. CIPP relining works for cracked or root-infiltrated pipes with intact shape; pipe bursting suits deteriorated but structurally present pipes; excavation is required for collapsed or bellied lines.
Is trenchless sewer repair worth it?
Trenchless methods typically cost more per linear foot than excavation, but they eliminate or reduce restoration costs for driveways, patios, and landscaping — making them cost-effective when significant surface work would otherwise be required.
Can you repair a sewer line without digging it up?
Yes, when the pipe qualifies. CIPP relining and pipe bursting are both trenchless options that require only small access pits. However, collapsed pipes, severe offsets, and grade problems cannot be corrected without excavation, which is why a camera inspection must come first.
Recommended
- Understanding the Sewer Repair Process From Start to Finish – AG-Plumbing
- Sewer line repair guide for Pittsburgh homeowners – AG-Plumbing
- Clear Sewer Line Blockages: 2026 Homeowner’s Guide – AG-Plumbing
- How Sewer Repair Can Prevent Major Plumbing Problems – AG-Plumbing
