TL;DR:
- Repairing a sump pump involves diagnosing and fixing issues with power, float switch, discharge line, and check valve to prevent basement flooding. Regular troubleshooting, cleaning, and component replacements can extend the pump’s lifespan and ensure effective operation during heavy rains. When repairs become frequent or the pump is over seven years old, professional replacement is recommended to avoid costly water damage.
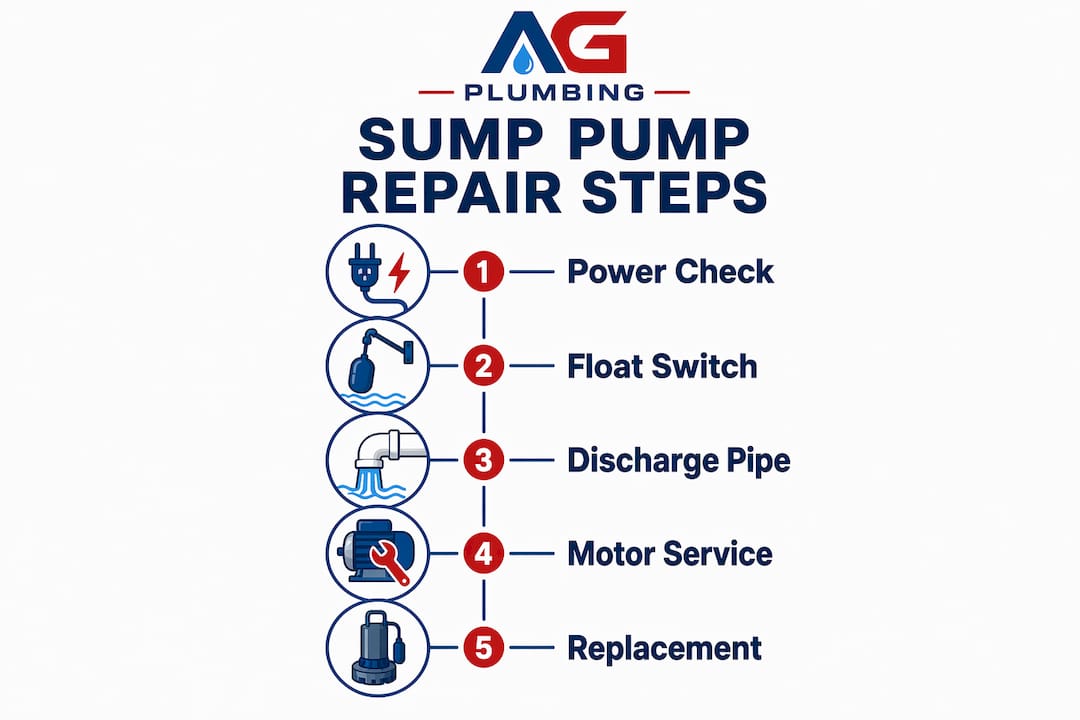
Repairing a sump pump means systematically diagnosing and fixing its power supply, float switch, discharge line, and check valve to restore full operation before basement flooding occurs. Most Pittsburgh homeowners can handle these repairs with basic tools: a wet/dry vacuum, bucket, flathead screwdriver, and a non-contact voltage tester. The troubleshooting sequence that works best moves from power checks to float switch inspection to valve and discharge evaluation, cutting both diagnosis time and flood risk. Knowing how to repair a sump pump yourself can save hundreds of dollars and protect your basement from serious water damage, especially during Pittsburgh’s heavy spring rains.
How to repair sump pump power problems first
Power failure is the most common reason a sump pump stops working, and it is almost always the easiest fix. Start troubleshooting with the power source before touching any mechanical components.
Follow these steps in order:
- Locate the GFCI outlet where your sump pump plugs in. GFCI outlets are the ones with “Test” and “Reset” buttons, usually found in basements and utility rooms. Press the Reset button firmly. A tripped GFCI is responsible for a surprising number of “dead pump” calls that turn out to require zero repairs.
- Check your breaker panel. Look for any breaker that sits between the ON and OFF positions. Flip it fully to OFF, then back to ON. If it trips again immediately, stop and call a professional. A breaker that keeps tripping signals a wiring issue, not a pump issue.
- Inspect the piggyback plug. Most sump pumps use a two-plug system: one plug controls the motor and one controls the float switch. Unplug both, then plug only the motor plug directly into the outlet. If the pump runs, the float switch plug is the problem. If nothing happens, the motor itself may be failing.
- Test the outlet with another device. Plug in a lamp or phone charger to confirm the outlet actually has power. A dead outlet with a reset GFCI is a sign of a deeper electrical issue requiring an electrician.
- Check the power cord for damage. Rodents in Pittsburgh basements occasionally chew through cords. Inspect the full length of the cord for cuts, fraying, or burn marks.
Pro Tip: Never skip the GFCI reset step. In over half of storm-related sump pump calls, the fix is a simple outlet reset that takes ten seconds.
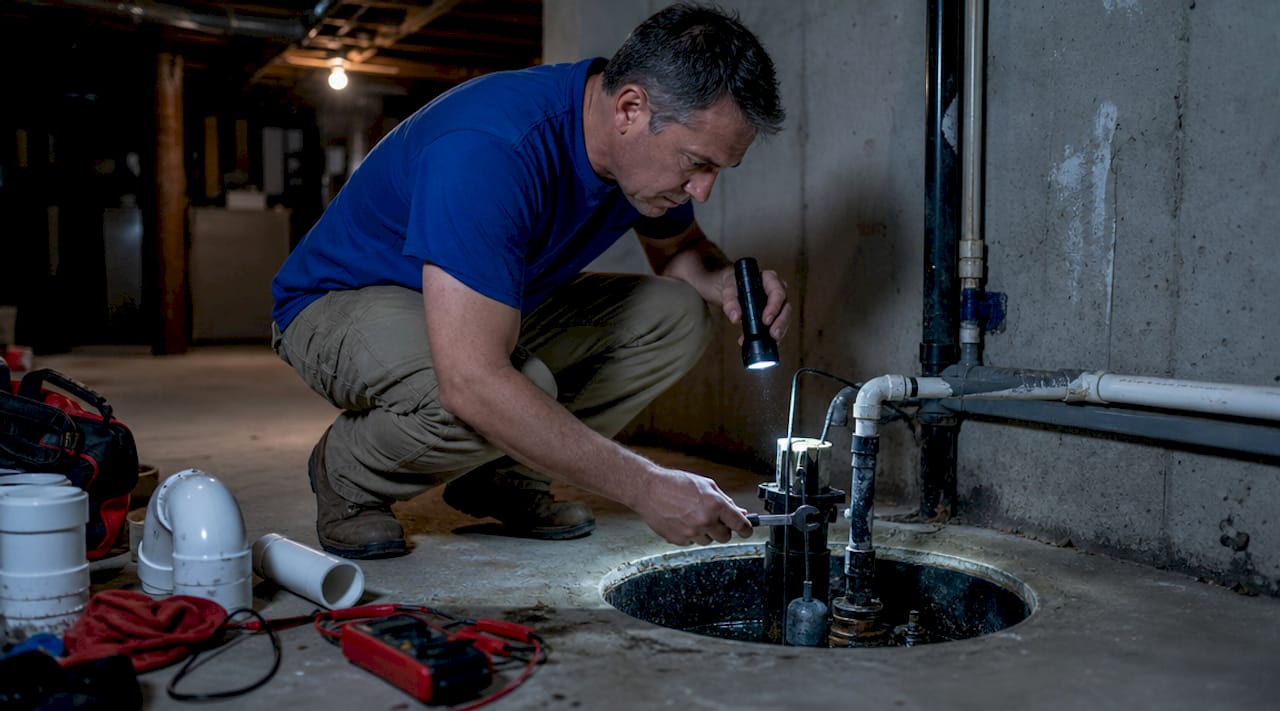
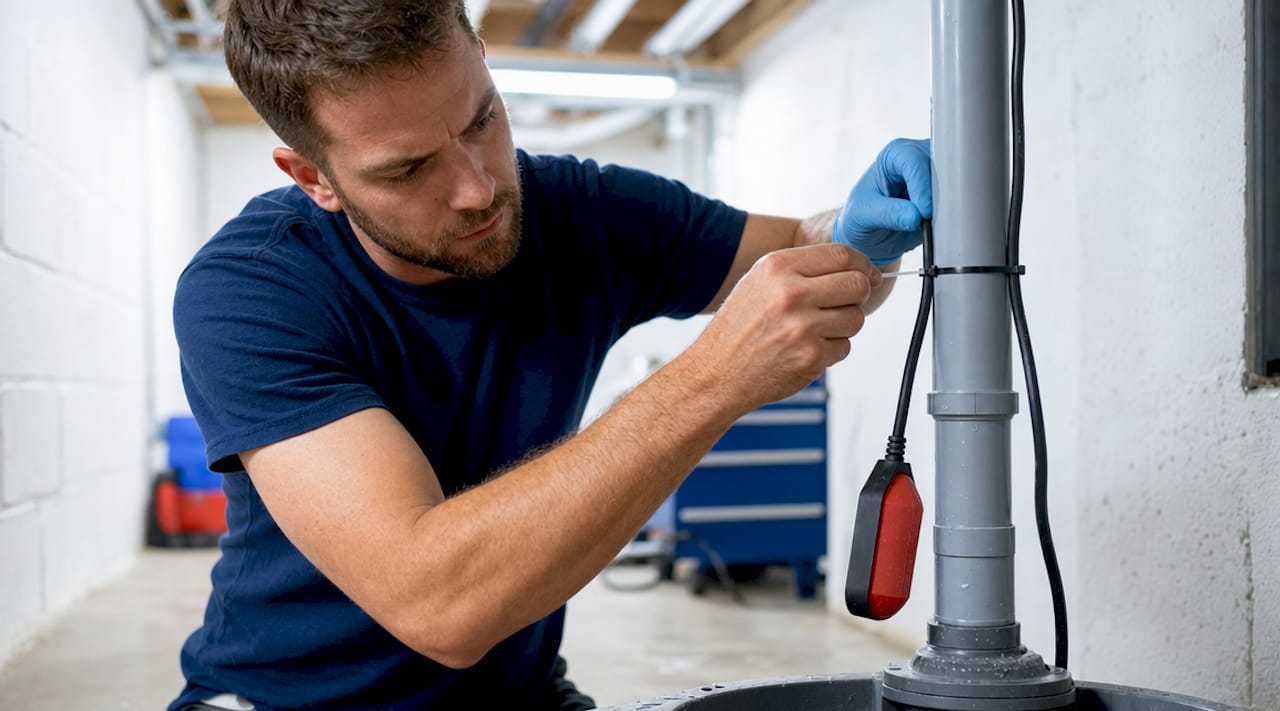
How to identify and fix a faulty float switch
The float switch is the small buoy that rises with water and triggers the pump to turn on. Float switches fail most often because they get stuck against the pit wall, tangled in the power cord, or coated in debris. This is the second most common cause of sump pump failure after power issues.
Here is how to diagnose and fix it:
- Unplug the pump completely before reaching into the pit. This is non-negotiable.
- Lift the float by hand. It should move freely in all directions. If it feels stiff or catches on anything, that is your problem.
- Free a stuck float using a plastic or wooden tool. Never use metal tools inside the pit, as they can damage the float arm or pit liner. Reposition the pump so the float has at least 6 inches of clearance from the pit wall.
- Clean the float switch if it is coated in sediment or mineral buildup. Soak it in a 50/50 solution of white vinegar and water for 20 minutes, then rinse and dry it thoroughly. Pittsburgh’s water supply can leave mineral deposits that freeze float movement over time.
- Test the float manually. After cleaning, lift the float by hand while the pump is plugged in. You should hear a distinct click as it rises and another as it drops. No click means the switch is dead and needs replacement.
- Replace the float switch if it fails the click test. Replacement float switches for common brands like Zoeller and Wayne cost between $15 and $40 at most hardware stores. Match the connector type to your existing pump before buying.
Pro Tip: Tie the float cord loosely to the discharge pipe with a zip tie so it cannot drift and tangle. This single step prevents most recurring float failures.
How to clear discharge pipe clogs and check valve faults
A blocked discharge pipe or a failed check valve forces your pump to work constantly without actually removing water. Constant pump running usually signals a failed check valve causing backflow, while rapid short cycling points to float or pit sizing issues.
Signs your discharge pipe is blocked:
- Water level in the pit stays high even when the pump is running
- No water exits the outdoor discharge point during pump operation
- Ice visible around the outdoor pipe end in winter
To clear a blocked discharge line, disconnect it at the pump and use a garden hose to flush water through from the outside end. Mud, leaves, and ice are the most common culprits in Pittsburgh’s freeze/thaw seasons. If the pipe is frozen solid, apply warm water or a heat gun on low setting to the exterior section.
Check valve comparison:
| Symptom | Likely cause | Fix |
|---|---|---|
| Pump runs constantly | Check valve failure, water backflows | Inspect and replace check valve |
| Pump short-cycles every few seconds | Backflow or pit too small | Replace valve, evaluate pit size |
| Gurgling after pump shuts off | Air trapped in discharge line | Drill vent hole below check valve |
| No water at outdoor discharge | Clog or frozen pipe | Flush or thaw discharge line |
The check valve sits on the discharge pipe above the pump and prevents pumped water from flowing back into the pit. To inspect it, disconnect the pipe section above and below the valve. Shake it. A working check valve allows flow in one direction only. If water passes freely in both directions, replace it.
One detail most homeowners miss: drill a 3/16 inch vent hole in the discharge pipe just below the check valve. This purges trapped air that can create airlocks and cause the float switch to malfunction. Zoeller’s installation manual specifies this step, yet it is skipped during most DIY installations.
Pro Tip: Inspect your outdoor discharge pipe every fall before the first freeze. A $5 mesh cap prevents debris clogs that cause mid-winter pump failures.
When to clean, service, or replace the sump pump unit
Cleaning and servicing your pump extends its life significantly, but there is a clear point where replacement beats repair on both cost and reliability.
Clean the pump and pit when you notice:
- Visible silt, gravel, or debris coating the pump body
- Slow pump activation despite a working float switch
- Unusual odors coming from the pit
To clean the unit, unplug it, remove it from the pit, and rinse it with a garden hose. Use a stiff brush to clear the intake screen at the pump’s base. Vacuum out the pit with a wet/dry vacuum and wipe the walls down. This process takes about 30 minutes and should happen at least once a year, ideally before spring rains hit Pittsburgh.
Signs the motor is failing, not just dirty:
- The pump hums but does not move water. A humming pump almost always means a jammed impeller or a failing motor, both of which require either deep cleaning or full replacement.
- The pump runs hot to the touch after a short cycle
- A burning smell comes from the motor housing
For pumps older than 7 years, replacement is the smarter call over costly repairs. Installed replacement costs typically run between $350 and $1,000 depending on pump type and labor. Minor DIY repairs usually cost under $200. The math favors replacement once a pump passes the 7-year mark and shows motor symptoms. You can review common repair decisions Pittsburgh homeowners face to benchmark your situation.
How to test your sump pump at home
Testing your pump before a storm is the single most effective thing you can do to prevent a flooded basement. This 5-gallon bucket test confirms float switch activation, motor function, and proper water discharge in under five minutes.
Follow these steps:
- Fill a 5-gallon bucket with water and pour it slowly into the sump pit. Watch the water level rise.
- Observe the float switch. It should lift with the water and trigger the pump to start. Listen for the motor click and then the pump running.
- Watch the water level drop. The pump should clear the water within 20 to 30 seconds for a standard residential pit.
- Check the outdoor discharge point while the pump runs. Water should exit steadily. No flow outside means a clog or disconnected pipe.
- Listen for the shutoff. The pump should stop automatically once the water drops below the float’s lower threshold. If it keeps running after the pit is empty, the float switch is stuck in the ON position.
- Time the cycle. A pump that cycles on and off every few seconds without clearing water is short-cycling, which points to a check valve failure or a pit that is too small for the pump.
Pro Tip: Run this test quarterly. Seasonal preventative maintenance including quarterly float and GFCI checks prevents the failures that cause real water damage. Set a calendar reminder for March, June, September, and December.
Key takeaways
Fixing a sump pump requires working through power, float switch, discharge, and motor issues in sequence to restore operation and prevent basement flooding.
| Point | Details |
|---|---|
| Start with power checks | Reset GFCI outlets and breakers before touching any mechanical components. |
| Float switch is the top mechanical failure | Free, clean, or replace the float switch if the pump has power but will not activate. |
| Check valve failure causes constant running | Replace a failed check valve and drill a vent hole below it to prevent airlocks. |
| Replace pumps older than 7 years | Installed replacement costs $350 to $1,000; repairs on aging motors rarely pay off. |
| Test quarterly with a bucket | A 5-gallon pour confirms float activation, motor function, and discharge flow in minutes. |
What 30 years of Pittsburgh basements taught me about sump pump repairs
The mistake I see most often is homeowners waiting until a storm is already hitting to discover their pump is dead. Pittsburgh gets serious rainfall in spring, and a pump that sat untested all winter is a gamble no basement can afford. The fix is almost never complicated. It is almost always something that a 10-minute check in October would have caught.
The second most common mistake is forcing a stuck float. I have seen homeowners yank on float arms with pliers and crack the housing, turning a $25 cleaning job into a $400 replacement. Plastic floats are fragile. Use a wooden dowel or your fingers, not tools with leverage.
What I tell every Pittsburgh homeowner: keep a spare float switch in your utility room. They cost less than $30, they fit most pump brands, and having one on hand means a 20-minute fix during a storm instead of a flooded basement while you wait for a hardware store to open. Pair that with a plumbing maintenance checklist you actually follow, and you will almost never face a true emergency.
The one situation where I always say call a professional: when the breaker trips repeatedly, when you smell burning from the motor, or when the pump is over 10 years old and showing multiple symptoms at once. DIY repairs have real limits, and a flooded basement costs far more than a service call.
— Maayan
Get professional sump pump repair in Pittsburgh
When the repair goes beyond a float swap or a GFCI reset, Ag-plumbing’s team is ready to help. AG Heating, Cooling & Plumbing has served Pittsburgh homeowners for 30 years, handling everything from emergency sump pump failures during storms to full pump replacements and pit upgrades. The technicians know Pittsburgh’s basement conditions, local soil drainage patterns, and the pump models most common in the area. Ag-plumbing offers 24/7 emergency service so a failed pump at 2 a.m. during a spring storm does not mean a flooded basement by morning. Visit AG Heating, Cooling & Plumbing to schedule a sump pump inspection or request emergency service today.
FAQ
Why is my sump pump not working during a storm?
The most common cause is a tripped GFCI outlet or circuit breaker, which cuts power to the pump. Reset the GFCI outlet first, then check the breaker panel before inspecting any mechanical components.
How do I test if my sump pump is working?
Pour a 5-gallon bucket of water into the sump pit and watch for the float switch to activate the motor. The pump should clear the water within 30 seconds and shut off automatically when the pit empties.
How often should I perform sump pump maintenance?
Quarterly maintenance is the standard recommendation, including float movement checks, GFCI testing, and a visual inspection of the discharge line. A full cleaning should happen at least once a year before spring.
What does it mean when my sump pump hums but does not pump water?
A humming pump that moves no water almost always signals a jammed impeller or a failing motor. Try cleaning the intake screen first. If the problem persists, the pump likely needs replacement.
When should I replace instead of repair my sump pump?
Replace any pump that is 7 or more years old and showing motor symptoms such as humming, overheating, or burning smells. Installed replacement costs run $350 to $1,000, which is more cost-effective than repeated repairs on an aging unit.
Recommended
- Step-by-Step Faucet Repair for Pittsburgh Homeowners – AG-Plumbing
- Step-by-step pipe replacement guide for Pittsburgh homeowners – AG-Plumbing
- How to snake a drain: DIY guide for Pittsburgh homeowners – AG-Plumbing
- Smart Plumbing Tips Every Pittsburgh Homeowner Needs – AG-Plumbing