TL;DR:
- Replacing corroded or burst pipes in Pittsburgh can prevent costly water damage and water bill spikes. Homeowners can DIY short sections if they follow permit requirements, safety protocols, and proper procedures, but should call professionals for complex or aged systems. Proper planning, tool use, and adherence to local codes ensure a safe, leak-free repair that maintains home insurance and code compliance.
A burst or corroded pipe can flood a basement, spike your water bill, and leave you without running water at the worst possible time. Ignoring the problem costs more than just the repair itself. Water damage to flooring, walls, and framing can easily run into the tens of thousands. But here’s the good part: with the right preparation, tools, and know-how, a short section of damaged pipe is a realistic DIY fix for many Pittsburgh homeowners. This guide covers every stage of the process, from pulling permits to pressure testing, so you can decide whether to roll up your sleeves or call in a local professional.
Table of Contents
- What to know before replacing pipes
- Tools and materials you’ll need
- Step-by-step guide: Replacing a damaged pipe section
- Troubleshooting, testing, and when to call a pro
- A local pro’s take: What most guides miss about pipe replacement in Pittsburgh
- Need professional help? AG-Plumbing is here for Pittsburgh homeowners
- Frequently asked questions
Key Takeaways
| Point | Details |
|---|---|
| Permits are required | Pittsburgh mandates plumbing permits for most pipe replacement jobs—even for homeowner DIY projects. |
| Choose materials carefully | PEX offers ease and low cost, while copper brings durability and resale value—know which suits your project. |
| Follow each step | Proper shutoff, prep, support, and pressure testing prevent leaks and future problems. |
| DIY suits small jobs | Replacing short pipe sections is within reach for skilled homeowners, but older systems may need a full pro repipe. |
| Know when to hire help | If you hit complications or need code compliance, local pros can ensure safety and reliable results. |
What to know before replacing pipes
Once you understand why pipe replacement matters, it’s critical to get clear on Pittsburgh’s rules, costs, and practical pros/cons before grabbing any tools.
Permits and local requirements
Skipping a permit might seem like a timesaver, but it can void your homeowner’s insurance and create serious problems during a home sale inspection. Pittsburgh requires permits for re-piping, new fixture installations, and water heater replacements. The good news is that homeowners can pull permits as owner-builders, which means you don’t need to be a licensed contractor to do this work yourself. Applications go through Pittsburgh’s Department of Permits, Licenses and Inspections (PLI) or the Allegheny County Health Department, depending on your municipality.
Call the PLI office before starting any re-piping project. Inspectors in Pittsburgh are used to seeing older homes with galvanized or lead pipes, and they know what to look for. Getting that stamp of approval protects you legally and keeps your insurance intact.
What does pipe replacement actually cost?
For budget planning, whole-house repiping costs between $4,000 and $15,000, with an average of $6,000 to $10,000 for homes in the 1,500 to 2,500 square foot range. Several factors push the number up or down:
| Factor | Lower cost | Higher cost |
|---|---|---|
| Pipe material | PEX | Copper |
| Access | Basement (open joists) | Slab foundation |
| Home size | Under 1,500 sq ft | Over 2,500 sq ft |
| Scope | Single section | Full repipe |
| Labor | DIY | Licensed contractor |
Replacing a short section yourself drops the cost dramatically, often to under $100 in materials for a straightforward water supply line repair.
When does DIY make sense?
DIY is realistic if you’re replacing a single, accessible section of pipe (under 10 feet), you’ve done basic plumbing before, and you’re working on a water supply line rather than a drain, vent, or gas line. If you’re dealing with lead pipes, corroded galvanized steel throughout the house, or complex configurations near the main shutoff, that’s where the math strongly favors calling a licensed plumber. For a deep look at your options, our breakdown of best pipe choices in Pittsburgh will help you match the right material to your home.
Safety first: Never work on gas lines without a licensed professional. Always shut off your main water supply before cutting any pipe. If your home was built before 1986, assume there may be lead solder or lead pipe present and wear gloves and a mask when cutting or disturbing old joints.
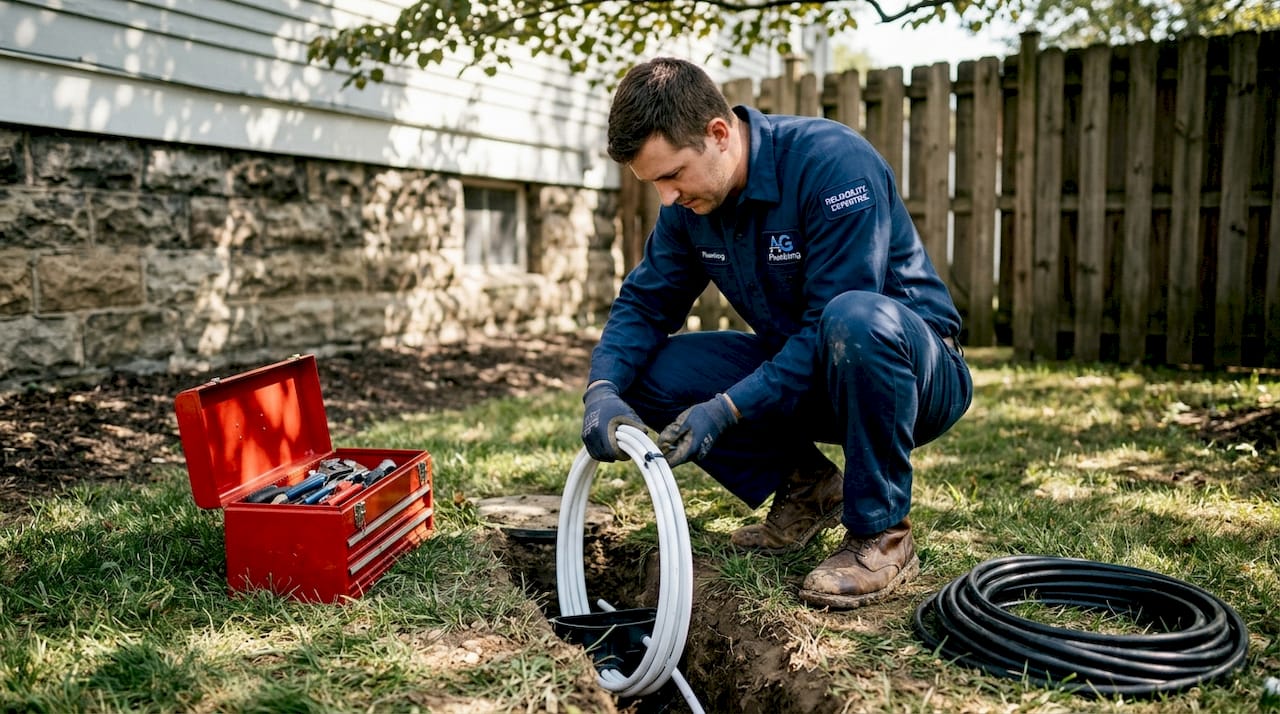
Some homeowners also opt for trenchless pipe repair when the damaged section runs underground or through a slab, which dramatically reduces excavation costs and disruption.
Tools and materials you’ll need
Now that you know what’s required before getting started, let’s detail the tools and materials that make the job possible and easier.
Material comparison: PEX vs. copper vs. galvanized
PEX is flexible, cheaper, and freeze-resistant, while copper lasts longer but is more expensive. Galvanized steel is being phased out across Pittsburgh’s aging housing stock because it corrodes from the inside out over decades. Here’s a quick comparison:
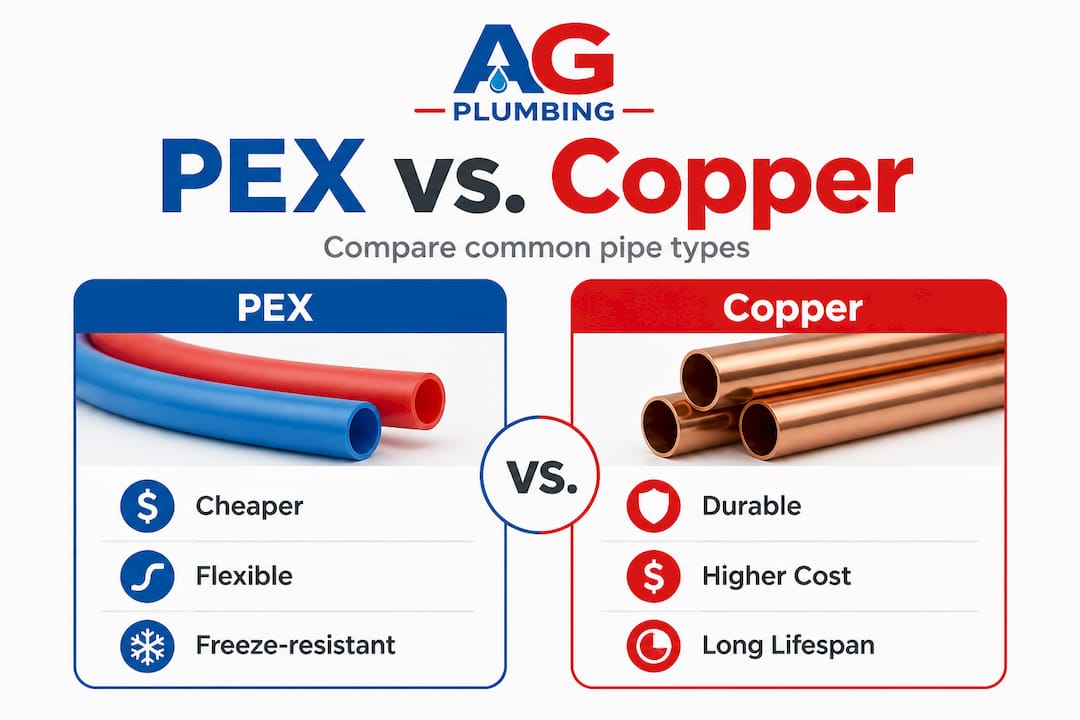
| Material | Lifespan | Cost (per foot) | Best use case |
|---|---|---|---|
| PEX | 25 to 40 years | $0.50 to $2.00 | Flexible runs, retrofits, freeze-prone areas |
| Copper | 50 to 70 years | $2.00 to $4.00 | Long-term installs, hot water lines |
| Galvanized steel | 20 to 50 years | $1.00 to $3.00 | Replacement only, not recommended for new work |
| CPVC | 25 to 40 years | $0.50 to $1.50 | Cold and hot supply lines, tight budgets |
For a detailed look at how to get the most out of PEX and plastic pipe tips for Pittsburgh homes, there’s a full breakdown available. You can also review our guide on choosing plumbing materials for a side-by-side analysis based on Pittsburgh’s water quality and climate.
Tool and material checklist
For copper pipe:
- Pipe cutter (rotary style, sized to match pipe diameter)
- Propane or MAPP torch and solder
- Flux and flux brush
- Emery cloth or pipe cleaning brush
- Pipe deburring tool
- Copper fittings (couplings, elbows, tees as needed)
- Fire-resistant cloth or heat shield
For PEX pipe:
- PEX tubing (Type A, B, or C, sized to match existing pipe)
- PEX crimp tool or clamp tool
- Stainless steel crimp rings or clamp rings
- Go/no-go gauge (checks crimp diameter)
- PEX fittings and push-to-connect adapters
- Plastic pipe cutter or sharp tubing cutter
Universal supplies:
- Adjustable wrench and channel-lock pliers
- Teflon tape and pipe dope
- Bucket and towels for draining water
- Pipe hanger clips or strapping
Pro Tip: Rent a PEX crimp tool from your local hardware store instead of buying one. A quality tool rents for about $20 to $30 per day, and you’ll only need it for a few hours. The same goes for a pipe threading kit if you’re working with galvanized steel.
Don’t forget dielectric unions if you’re connecting copper to galvanized steel. Without them, the contact between two dissimilar metals causes galvanic corrosion that will fail within a few years.
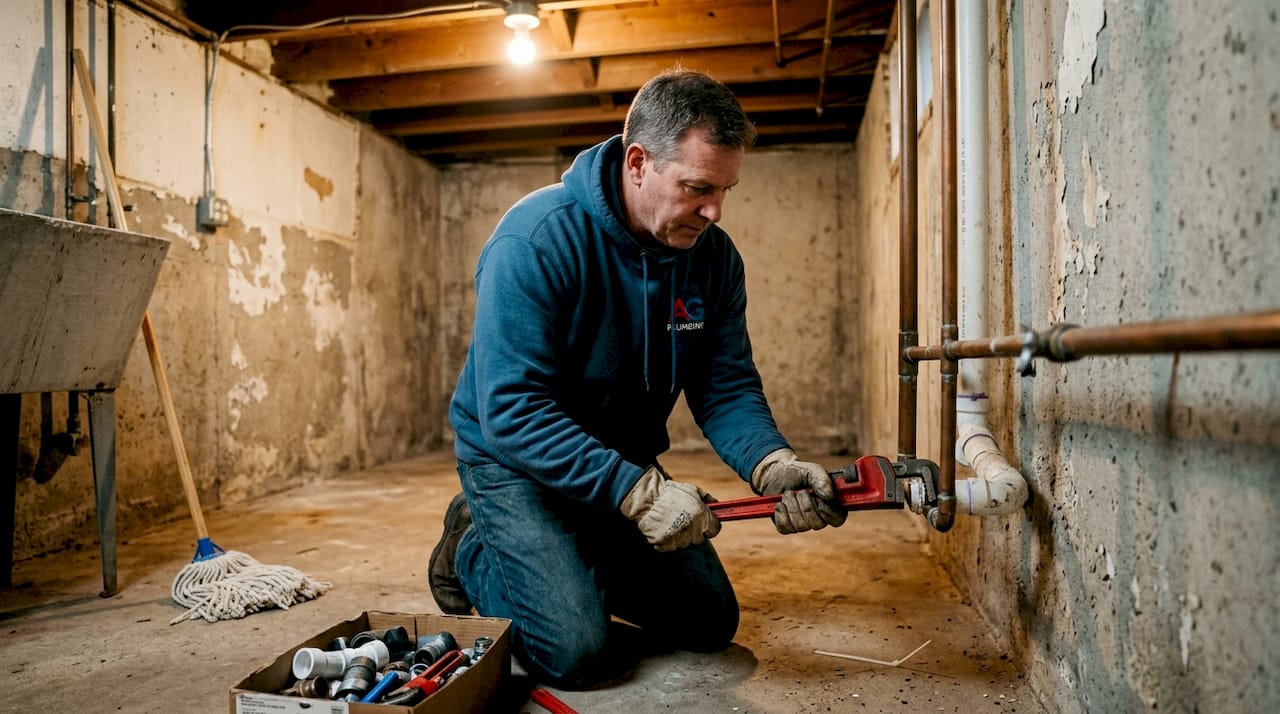
Step-by-step guide: Replacing a damaged pipe section
With your materials prepped, here’s how to actually carry out a safe, successful pipe replacement, from start to finish.
The core process
Core steps include shutting off water, draining, cutting the old section, prepping ends, installing new pipe, supporting it, and pressure testing. Here’s what that looks like in practice for Pittsburgh homeowners:
-
Locate and shut off the water supply. Turn off the main shutoff valve, typically near the water meter in your basement. Open the lowest faucet in the house to relieve pressure and drain water from the line you’re working on.
-
Drain the line completely. Let gravity and air pressure clear as much water as possible before cutting. Keep a bucket under the work area. Even a “drained” line will have residual water.
-
Mark and cut the damaged section. Use a rotary pipe cutter for clean, square cuts. Measure the section you’re removing and add 1 inch on each end for fittings. Straight, square cuts are critical for leak-free connections, especially on copper.
-
Deburr and clean the pipe ends. For copper, use emery cloth to shine the outside of both pipe ends and the inside of your fittings. For PEX, use a deburring tool to remove any plastic shavings. This step is skipped far too often, and it’s a leading cause of weeping joints.
-
Dry-fit everything before committing. Slide fittings onto the pipe without soldering or crimping. Make sure the layout works, there’s no tension pulling joints apart, and pipe hangers will land in the right spots.
-
Solder (copper) or crimp/clamp (PEX). For copper, apply flux to both cleaned surfaces, heat the joint with your torch until solder flows smoothly into the joint without you needing to force it. For PEX, use crimp rings placed 1/8 to 1/4 inch from the end before inserting the fitting and crimping firmly. Use your go/no-go gauge to confirm the crimp diameter is correct.
-
Support the new pipe properly. Copper and PEX both need hangers or clips every 4 to 6 feet. Unsupported pipe vibrates, stresses joints, and eventually fails early. Use the right clip material for your pipe type to avoid wear from metal-on-plastic contact.
-
Restore water and inspect for leaks. Slowly open the main shutoff. Walk the entire repaired section looking and feeling for drips at every joint. Pay close attention for the first 5 minutes as pressure builds.
-
Pressure test if required by permit. Some Pittsburgh PLI inspectors require a pressure test, where the line is pressurized to a set PSI and held for a period of time to confirm no drop.
Pro Tip: Before calling for your inspection, run water through the repaired section for at least 24 hours and re-check every joint. Thermal expansion can reveal a marginal solder joint after the first heat cycle.
For a wider look at issues Pittsburgh homes face, reviewing common plumbing repairs can give you context. If you’re dealing with a sudden failure, our burst pipe repair guide covers emergency steps before a permanent fix.
Troubleshooting, testing, and when to call a pro
Even a careful replacement can hit roadblocks, so here’s how to check your work and avoid common DIY mistakes.
Common DIY errors to avoid
- Skipping deburring: Rough pipe edges score fittings and cause slow leaks over months.
- Under-crimping PEX: A loose crimp ring will fail under pressure. Always check with a go/no-go gauge.
- Mixing metals without dielectric unions: This creates galvanic corrosion at the joint within a few years.
- Inadequate pipe support: Sagging or vibrating pipes stress joints and connections.
- Using flux without cleaning: Flux on un-scoured copper creates a weak solder bond.
- Rushing the torch: Heating copper too fast or unevenly causes solder to bead rather than flow into the joint.
How to pressure test your work
A basic pressure test means closing all downstream valves, pressurizing the line to normal household pressure (typically 60 to 80 PSI), and watching a pressure gauge for 15 to 30 minutes. A drop in pressure means there’s a leak somewhere. You can also use soapy water brushed across joints to see bubbles. If you see a steady drip or a bubble, the joint needs to be redone before covering it with drywall or insulation.
When to stop and call a professional
DIY is suitable for short sections and experienced homeowners, but professionals recommend full repiping if you’re dealing with old galvanized or polybutylene pipes to avoid repeated failures throughout the system. Stop and call a licensed plumber if:
- You find lead pipe or lead solder in a home built before 1986
- The leak is near the main shutoff or water meter
- You’re working in a tight space with multiple pipe intersections
- You’ve resoldered the same joint twice and it still weeps
- You’re unsure about permit requirements or code compliance
“When a homeowner keeps patching an old galvanized system, they’re spending money on a pipe that’s already past its useful life. At some point, the smart call is a full replacement so you stop chasing failures.”
For guidance on hiring a reliable plumber in Pittsburgh, we’ve outlined exactly what to look for in a licensed, reputable contractor.
A local pro’s take: What most guides miss about pipe replacement in Pittsburgh
After 30 years working in Pittsburgh homes, we’ve seen patterns that generic DIY guides simply don’t address.
Pittsburgh’s housing stock skews old. A large share of homes in neighborhoods like Squirrel Hill, Lawrenceville, and Mt. Washington were built between the 1910s and 1950s. That means galvanized steel supply lines, cast iron drain stacks, and potentially lead solder at copper fittings. The age of your home isn’t just a cosmetic issue. It shapes every decision you make about pipe replacement.
Here’s what surprises most homeowners: a single pipe repair can trigger a code compliance review of connected systems in some municipalities. If an inspector visits and notices non-compliant venting, corroded shutoff valves, or improper pipe support elsewhere, you may end up with a list of corrections that goes beyond your original scope. That’s not a reason to avoid the permit process. It’s a reason to do the whole job right from the start.
The mistake we see most often is patchwork thinking. A homeowner replaces one section of galvanized pipe but leaves the rest of the 60-year-old system in place. Six months later, another section fails. Then another. The cumulative cost of three or four partial repairs often exceeds what a full repipe would have cost in the first place. The benefits of repiping go beyond just stopping leaks. Clean pipes improve water quality, protect appliances from sediment damage, and can lower your home insurance premium.
Finally, be honest with yourself about your comfort level. Plumbing mistakes don’t just fail silently. They can cause mold behind walls, structural wood rot, or significant water damage over weeks before you notice. A confident, methodical homeowner with prior experience can absolutely tackle a short pipe repair. But there’s no shame in recognizing that a complex job in a century-old Pittsburgh home deserves a professional’s eyes and hands.
Need professional help? AG-Plumbing is here for Pittsburgh homeowners
Whether you’ve hit a snag mid-repair or you want an expert to handle the entire job from permits to pressure testing, AG Heating, Cooling & Plumbing has served Pittsburgh homeowners for 30 years with exactly this kind of work.
Our licensed plumbers know Pittsburgh’s code requirements, understand the quirks of the city’s older housing stock, and carry the tools and materials to get the job done right the first time. If you want to explore your options, our plumbing repair services page covers everything from single-section repairs to full-home repiping. You can also browse our guide to essential plumbing services to understand what type of help fits your situation. We’re ready to give you a straight answer, a fair quote, and work you can trust.
Frequently asked questions
Do I need a permit to replace a water pipe in Pittsburgh?
Yes. Pittsburgh requires permits for most pipe replacement work, including re-piping, and homeowners can pull permits themselves as owner-builders through Pittsburgh PLI or the Allegheny County Health Department.
How much does a typical pipe replacement cost in Pittsburgh?
A full-home repipe typically runs $4,000 to $15,000, with most homes in the 1,500 to 2,500 square foot range landing between $6,000 and $10,000. Replacing a single damaged section yourself can cost well under $100 in materials.
Is PEX better than copper for pipe replacement?
PEX is cheaper, installs faster, and resists freezing, which matters a lot in Pittsburgh winters. Copper lasts 50 or more years and can boost resale value, but it costs more and requires soldering skills to install correctly.
What is the most common mistake in DIY pipe replacement?
The most common mistakes are using the wrong connectors when mixing pipe materials, failing to support pipes properly, and not testing for leaks before closing up walls or ceilings. Using a dielectric union wherever copper meets galvanized steel is one of the most frequently skipped but critical steps.
Recommended
- Install plumbing fixtures: Pittsburgh homeowner guide – AG-Plumbing
- Sewer line repair guide for Pittsburgh homeowners – AG-Plumbing
- Pipe relining: Smart, cost-saving fix for Pittsburgh pipes – AG-Plumbing
- How to repair a burst pipe: quick fixes for Pittsburgh – AG-Plumbing