
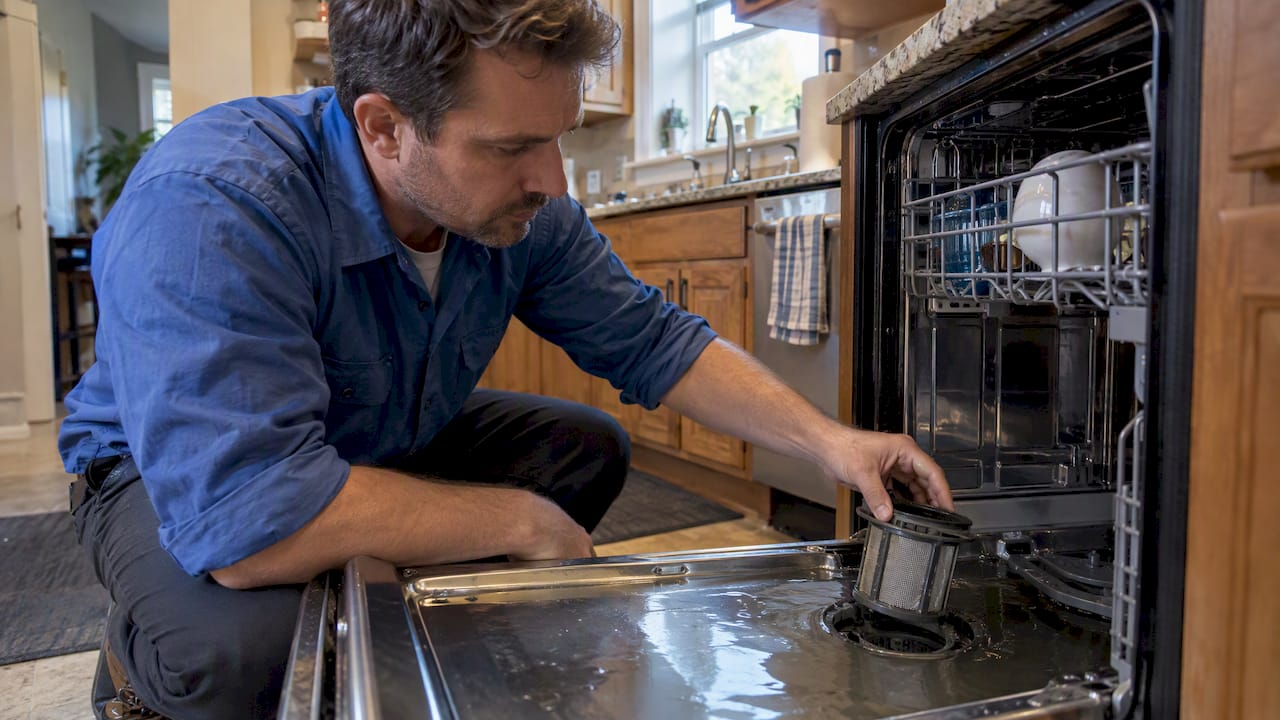
Most dishwashers that won’t drain are blocked by a dirty filter or sump, a kinked drain hose, a garbage disposal knockout plug left in place, or a missing high loop, and clearing these takes most owners under an hour. A smaller share of cases trace back to a jammed drain pump or an electrical fault. Start with the quick checklist below, then move to the step-by-step fixes if standing water remains.
TL;DR:
- Cut power before reaching inside, remove standing water, then clean the filter and sump; glass, labels, and food scraps commonly collect there.
- With a disposal connection, run it briefly and confirm its knockout plug was removed; also verify an air gap or high loop prevents backflow.
- Flush the drain hose and replace it if cracked or collapsing; avoid caustic drain cleaners, which can damage pump seals and plastic housings.
- After clearing every accessible blockage, humming or grinding suggests a jammed pump, while silence or repeated error codes may indicate electrical faults requiring a technician.
- Consumer Reports puts the median dishwasher repair at about $142; compare that cost with your machine’s age and value before choosing repair or replacement.
Table of Contents
- Quick checklist: 8 things to check right now
- Step-by-step fixes for a clogged dishwasher drain
- When the problem is the pump or the electronics, not a clog
- When to call a plumber and how to prepare for the visit
- A homeowner’s drain checklist from the field
- What we see on service calls
- Getting professional help for a dishwasher that won’t drain
- FAQ
- Sources
Quick checklist: 8 things to check right now
Before pulling anything apart, work through this list in order. Most dishwasher drainage issues get solved in the first four steps.
- Unplug the dishwasher or shut off its breaker before reaching inside. Standing water can hide a live wire fault, and this is the one step you should never skip.
- Bail out standing water with a cup and towels so you can see the filter and sump clearly.
- Pull the bottom rack and twist out the filter assembly. Rinse it under the faucet and look for food scraps, glass fragments, or labels caught in the mesh.
- Try a forced drain: most models let you hold the cancel or drain button for a few seconds to run the pump on its own, clearing a cycle that stalled mid-drain.
- Run the garbage disposal for a few seconds if your dishwasher drains through it. A clog in the disposal backs straight up into the dishwasher.
- Check for a knockout plug. New disposal installs sometimes leave a factory plug in place, which blocks the dishwasher drain line completely according to Whirlpool’s installation troubleshooting guide.
- Inspect the air gap on the counter or sink edge, and confirm the drain hose forms a high loop under the sink if there’s no air gap. Either one stops dirty water from siphoning back into the tub.
- Listen for the pump during a cycle. A steady hum with no water movement or a grinding sound points toward a mechanical problem rather than a simple clog.
Keep a short kit nearby while you work:
- A flashlight to see into the sump and under the sink.
- A small cup or wet vacuum for standing water.
- A screwdriver and pliers for the filter and hose clamps.
- Old towels, since this job gets wet no matter how careful you are.
Manufacturer troubleshooting pages consistently list the same five culprits: a clogged filter or sump, a blocked or kinked hose, an obstructed air gap or missing high loop, a disposal knockout plug, and a jammed pump. If you’ve worked through the list above and water still sits in the tub, the detailed steps below go further into each part.
Step-by-step fixes for a clogged dishwasher drain
Work through these in order. Each step rules out one likely cause before you move to the next, which keeps you from taking apart parts that were never the problem.
1. Remove standing water and open up the tub. Scoop or vacuum out any water first. Pull the bottom rack, then locate the cylindrical filter at the back or center of the tub floor and twist or lift it out according to your model’s release mechanism.
2. Inspect and clear the sump. With the filter out, you’ll see the sump, the small recessed area where water collects before the pump pulls it out. Shine a flashlight in and remove debris by hand or with pliers. Broken glass, popcorn kernels, fruit stickers, and toothpicks are common finds here, and Whirlpool’s own troubleshooting steps name these as the usual suspects behind a clogged sump.
3. Detach and flush the drain hose. Under the sink, find where the corrugated drain hose connects to the disposal or drain tee. Loosen the clamp, pull the hose free, and check for kinks or a soft blockage by running water through it in a sink or bucket. A flashlight held at one end while you look through the other end will show you any obstruction clearly. If the hose feels brittle, cracked, or collapses when bent, replace it with a smooth-walled, dishwasher-rated hose rather than another corrugated one. Field technicians commonly find that corrugated replacement hoses trap debris and kink more often than smooth-walled hoses, based on Whirlpool’s own repair guidance.
4. Reinstall the hose with a proper high loop. Secure the hose as high as possible under the counter, at least as high as the dishwasher’s base, before it drops down to the disposal or drain line. This loop keeps dirty sink water from siphoning backward into the dishwasher. If your setup uses a countertop air gap instead, the high loop isn’t needed, but the two should never be skipped together.
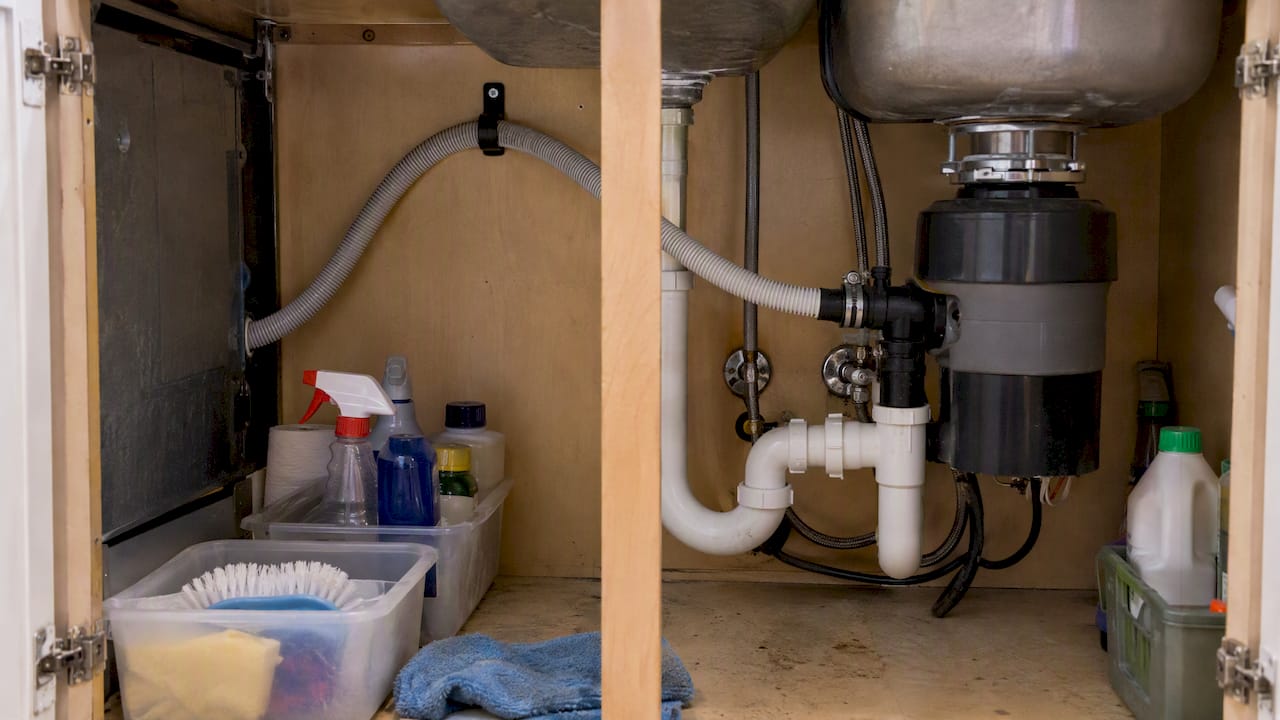
5. Check the garbage disposal knockout plug. If the dishwasher connects to a disposal, shut off power at the breaker first. Look inside the disposal’s inlet nipple where the hose attaches. A small plastic plug is knocked out at installation to open that passage, and if it was left in place, the dishwasher has nowhere to drain. Shine a flashlight in or gently probe with a pencil, never a metal tool, to feel for the plug. This single missed step is one of the most common causes of a brand-new dishwasher that won’t drain at all, according to Whirlpool’s new-install troubleshooting page.
6. Clean the air gap. If your sink has a small chrome or plastic cap near the faucet, that’s the air gap. Lift the cap, pull out the plastic insert underneath, and rinse away any buildup. A clogged air gap often shows up as water bubbling up at the sink instead of draining from the dishwasher, and clearing it resolves the issue immediately in most cases.
7. Run a short drain test. Plug the dishwasher back in or restore the breaker. Start a cycle and either let it reach the drain phase naturally or trigger a forced drain with the cancel or drain button. Listen for the pump motor engaging and watch whether water actually leaves the tub within a minute or two.
Pro Tip: Never use caustic drain cleaners in a dishwasher pump or sump. They can damage seals and plastic housings, and mechanical clearing with a flush and a flashlight check solves the same problem without the risk.
Avoid probing the pump chamber itself with screwdrivers or wire, since the impeller blades sit close to the housing and a sharp tool can crack a seal that was never actually blocked.
When the problem is the pump or the electronics, not a clog
If you’ve cleared the filter, sump, hose, disposal, and air gap and water still won’t move, the cause is likely mechanical or electrical rather than a simple blockage.
- Humming with no water movement: the pump motor is running but the impeller isn’t turning, often because something hard, like glass or a bone fragment, has jammed it.
- Grinding or rattling noises: hard debris is caught in the pump chamber and is being chewed against the impeller blades.
- Water creeping toward the door gasket: this can mean the pump is pushing water somewhere it shouldn’t, a sign of a cracked impeller or failed seal.
- No pump sound at all, or a cycle that stops partway through: suggests a control board, wiring, or drain valve issue rather than a physical clog.
- Error codes on the display: many models flag a drain-related fault directly. Check your owner’s manual for the code’s meaning before assuming the worst.
A safe visual check is reasonable: with power off, look into the sump area for obvious jammed debris without removing the pump housing itself. Sealed pump assemblies are not designed for home disassembly, and forcing one open often turns a simple part swap into a bigger repair.
Pump and control board work is typically a job for a licensed technician because it involves OEM parts, specialized tools, and warranty considerations that a DIY repair can void. Consumer Reports notes that a service call fee of $50 to $100 commonly factors into the repair-versus-replace decision, on top of the repair itself. Pump replacement tends to run in a moderate cost range depending on the part and labor involved, according to Angi’s dishwasher repair cost data.
When to call a plumber and how to prepare for the visit
Some symptoms are worth handing off right away instead of pushing further on your own.
- You hear grinding, humming, or buckling sounds that suggest a jammed or failing pump.
- Water is leaking from under the unit or pooling near the door gasket.
- The dishwasher has stopped mid-cycle repeatedly with an error code you can’t resolve.
- You’ve completed every step in the checklist above and standing water is still there.
- You’re not comfortable working under the sink or around the disposal wiring.
Consumer Reports’ repair cost data puts the median dishwasher repair at about $142 for members, a number worth keeping in mind against the price of a new unit when a pump or control board is involved. The same reporting suggests that trying simple fixes first before paying for a diagnostic visit tends to save homeowners money, since many drainage problems never require a technician at all.
Before the visit, have a few things ready:
- Your dishwasher’s model number, usually printed on a sticker inside the door frame.
- A quick note of what you’ve already tried, including the filter, hose, and disposal checks.
- Clear access under the sink and around the dishwasher’s base.
- Questions about warranty coverage, expected parts lead time, and whether repair or replacement makes more sense for your model’s age.
A technician’s first visit typically includes a diagnostic check of the pump, hose, and electrical connections, followed by a written estimate before any repair begins.
A homeowner’s drain checklist from the field
Across years of service calls in and around Pittsburgh, a few patterns show up again and again, and most of them map directly onto the checklist above.
- Prep the area with towels and a flashlight before touching anything.
- Clean the filter first. It’s the single most common clog point and the easiest to fix.
- Check the sump for hard debris like glass or bone fragments.
- Pull and flush the drain hose rather than assuming it’s clear.
- Confirm the disposal knockout plug was removed, especially on a newly installed unit.
- Clean the air gap or verify the high loop, never skip both.
- Reset the unit and run a short forced drain to confirm the fix worked.
- Call a professional if the pump or electronics are suspected.
Pro Tip: Skip the drain cleaner. Caustic chemicals are built for pipes, not dishwasher pumps, and mechanical flushing clears the same debris without risking a seal or a plastic housing.
The most commonly missed issues on calls are partially removed knockout plugs that still block part of the opening, corrugated hoses kinked tight against a cabinet wall, and high loops that sag low enough to let water siphon back. These three account for a large share of the “it still won’t drain” calls that come in after a homeowner has already cleaned the filter.
For a shorter, appliance-specific walkthrough, our guide on fixing a dishwasher drain backing up covers the same core steps in a faster format, and our checklist for recurring drain clogs is worth bookmarking if this isn’t the first time water has backed up somewhere in the house.
What we see on service calls
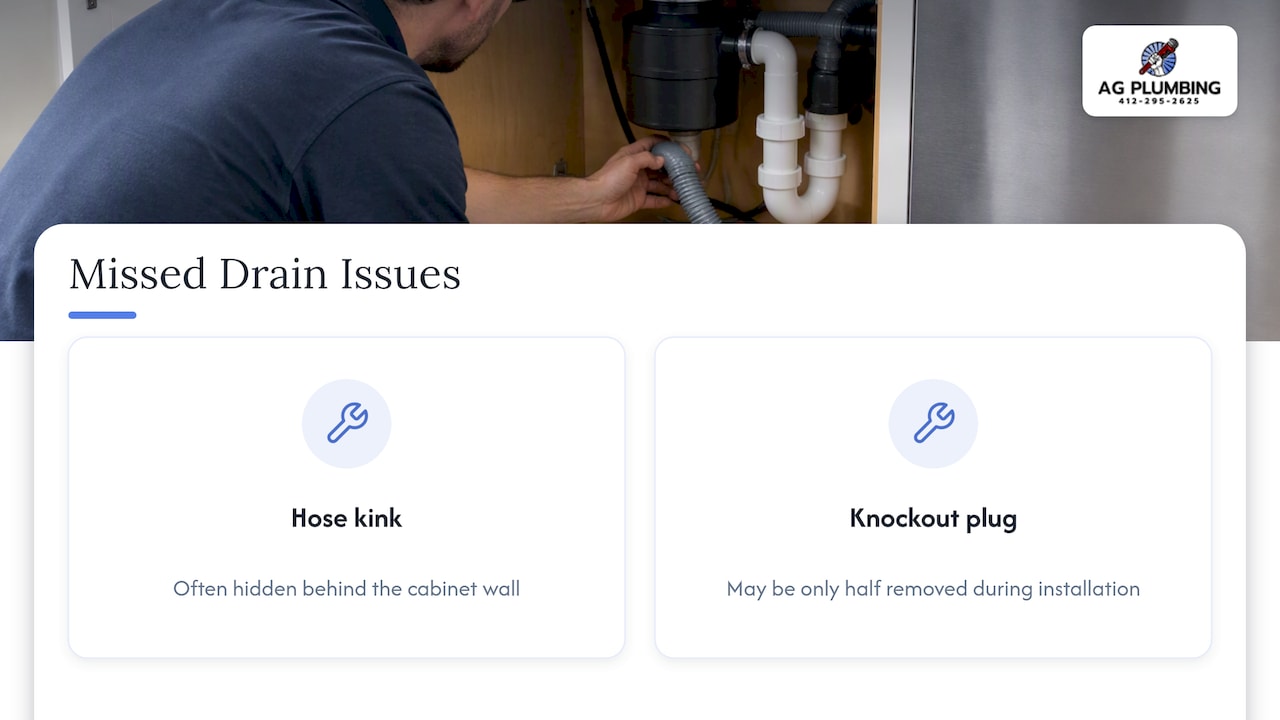
Most dishwasher calls that reach us have already had the filter cleaned. What usually gets missed is the hose kink hidden behind the cabinet wall or a knockout plug that was only half removed during installation. Neither one is obvious until someone looks closely with a flashlight.
Working with water and electrical components together carries real risk, so unplugging the unit before you reach inside is worth repeating; if the job seems too complex, consider whether DIY fixes or professional help are best for your situation. If the checklist and step-by-step fixes above don’t solve it, that’s usually the point where a pump or control issue is likely, and that’s exactly the kind of job our team handles every week.
— Maayan
Getting professional help for a dishwasher that won’t drain
When the filter, hose, disposal, and air gap are all clear and water is still sitting in the tub, the remaining causes are mechanical or electrical, and that’s where our licensed technicians take over. We handle pump diagnostics, hose replacement, and the plumbing side of a dishwasher hookup as part of our everyday plumbing repair work across Pittsburgh and the surrounding area.

On a service visit, you can expect:
- A licensed technician who inspects the pump, hose, and disposal connection before quoting anything.
- A clear, written estimate before repair work begins, so there are no surprises on the bill.
- Access to drain cleaning and hydro jetting if the blockage extends beyond the dishwasher into the connected drain line.
If you’ve worked through the checklist above and the water still won’t move, book a visit with our plumbing team and we’ll get it sorted without the guesswork.
FAQ
Why is there standing water in the bottom of my dishwasher?
Standing water almost always comes from a clog in the filter, sump, or drain hose, or from a routing problem like a missing high loop or a blocked air gap. A jammed pump is a less common cause but should be suspected if you hear humming or grinding during the cycle.
How do you force a dishwasher to drain?
Most models let you hold the cancel or drain button for a few seconds to trigger a forced drain cycle, running the pump independently of the normal wash sequence. If a garbage disposal is connected to the dishwasher, run the disposal briefly first to clear any clog sitting downstream.
How do I know if my dishwasher drain pump is clogged?
A clogged or jammed pump typically hums steadily without moving any water, or makes a grinding sound from hard debris like glass or bone caught against the impeller. If cleaning the filter, hose, and air gap doesn’t resolve the standing water, the pump is the next likely cause.
What does it mean if my dishwasher is backing up into the sink?
This usually points to a missing or improperly formed high loop in the drain hose, or a clogged air gap, both of which let dirty water siphon backward instead of draining forward. Checking the garbage disposal connection and knockout plug is also worth doing, since a blockage there can push water back toward the sink.
Is it worth repairing a dishwasher that won’t drain, or should I replace it?
Simple clogs in the filter, hose, or air gap cost nothing to fix and are worth trying first. For pump or control board failures, the median repair cost reported by Consumer Reports is about $142, a figure worth weighing against the age and value of your current unit before deciding.
Sources
Check your manufacturer’s troubleshooting pages and owner’s manual for error codes, diagrams, and parts specific to your model.
- How to unclog a dishwasher | Whirlpool
- Should you repair or replace your broken dishwasher? | Consumer Reports
Recommended
- Homeowners: Fix a Dishwasher Drain Backing Up Safely in Under an Hour
- Homeowners: Quick Checklist to Stop Recurring Drain Clogs
- Signs Your Drains Need Professional Cleaning Services
- Plumbing troubleshooting: Steps to fix common issues
